BlackBerry Wireless Handheld User Guide
User Guide BlackBerry 7750 Wireless Handheld™: 800/1900 MHz CDMA Network Model Number: RAN21CN Last modified: 16 March 2004 Part number: PDF-07490-001 At the time of publication, this documentation complies with handheld software version 3.7.1. © 2004 Research In Motion Limited. All Rights Reserved. The BlackBerry and RIM families of related marks, images and symbols are the exclusive properties of Research In Motion Limited.
Contents Messages......................................................................................................................... 5 Email and PIN messages ......................................................... 6 SMS messages ......................................................................... 18 Managing messages ............................................................... 23 Address book ....................................................................................................
Tasks ......................................................................................... 90 MemoPad................................................................................. 92 Calculator................................................................................. 94 Alarm........................................................................................ 95 Games....................................................................................... 96 Options .........................
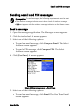
1 Messages This section provides information on the following topics: • Email and PIN messages • SMS messages • Managing messages
1: Messages Email and PIN messages Email messages that are sent from or received by your handheld are routed through your email account. You can also send and receive PIN messages. A personal identification number (PIN) uniquely identifies each BlackBerry handheld on the network. If you know another person’s handheld PIN, you can send a PIN message to that person. PIN messages are not routed through an email account. Tip: To locate your handheld PIN, open the options application.
Email and PIN messages Sending email and PIN messages Prerequisite: To send messages, the following requirements must be met: • The wireless coverage indicator must show a level of wireless coverage. • 1X must appear with the wireless coverage indicator on the Home screen. Send a message 1. Open the messages application. The Messages screen appears. 2. Click the trackwheel. A menu appears. 3. Select one of the following options: • To send an email message, click Compose Email.
1: Messages • To send a PIN message, click PIN. The One Time PIN screen appears. 6. Type an email address or PIN number. 7. Click the trackwheel. A menu appears. 8. Click Continue. Tip: To add additional contacts to your message, click the trackwheel. Click Add To, Add Cc, or Add Bcc. Repeat steps 4 through 6. 9. In the Subject field, type a subject. 10. Press the Enter key. 11. Type a message.
Email and PIN messages • To send an email message, click Email . • To send a PIN message, click PIN . 4. In the Subject field, type a subject. 5. Press the Enter key. 6. Type a message. 7. Click the trackwheel. A menu appears. 8. Click Send. The message is sent. Send an email message using a link In messages and on web pages, links appear as underlined text. 1. Click an email address link. A menu appears. 2. Click Email. 3. In the Subject field, type a subject. 4.
1: Messages • To reply to the sender and all recipients of the original message, click Reply To All. Tip: To delete the original message from the reply, click the trackwheel. A menu appears. Click Delete Original Text. 6. Type a message. 7. Click the trackwheel. A menu appears. 8. Click Send. The message is sent. Forward a message 1. Open the messages application. The Messages screen appears. 2. Click a message. A menu appears. 3. Click Forward. The Select Address screen appears. 4. Click a contact.
Email and PIN messages Edit and resend a message 1. Open the messages application. The Messages screen appears. 2. Click a sent message. A menu appears. 3. Click Open. The message appears. 4. Click the trackwheel. A menu appears. 5. Click Edit. The message appears. 6. Edit the message. Tip: To replace a contact, place the cursor in the To field. Click a contact. A menu appears. Click Change Address. 7. Click the trackwheel. A menu appears. 8. Click Send. The message is sent.
1: Messages • To send a PIN message, click PIN . 6. Type a message. 7. Click the trackwheel. A menu appears. 8. Click Attach Address. The Attach screen appears. 9. Click a contact. A menu appears. 10. Click Continue. The contact information is attached to the message. Composing a message — Address book attachment 11. Click the trackwheel. A menu appears. 12. Click Send. The message and attachment are sent. Open an address book attachment 1.
Email and PIN messages Open email message with address book attachment 2. Click the trackwheel. A menu appears. 3. Click View Attachment. The contact information appears. 4. Click the trackwheel. A menu appears. 5. Select one of the following options: • To add the contact information to your address book, click Add To Address Book. • To update the contact information that is in your address book, click Update Address. • To return to the open message, click Close.
1: Messages Managing file attachments If the attachment service is loaded on your handheld, you can open file attachments on your handheld. You can open attachments with a .zip, .html, .doc, .ppt, .pdf, .wpd, .txt, or .xls file extension. Prerequisite: To open file attachments with a .doc, .ppt, .pdf, .wpd, .txt, or .xls file extension, the following requirements must be met: • Your handheld must be enabled for attachment service on a BlackBerry Enterprise Server version 3.
Email and PIN messages 3. Click Table of Contents. A menu appears. 4. Click Retrieve. The table of contents appears. Tip: To request the content for a table of contents item, click the item. A menu appears. Click Retrieve. The content appears. Open a file attachment 1. In a message with a file attachment, click the trackwheel. A menu appears. 2. Click Open Attachment. The Attachments screen appears. Note: If you retrieve a .pdf file that is password-protected, you must type the password.
1: Messages Set file attachment options 1. In a file attachment, click the trackwheel. A menu appears. 2. Click Options. The Options screen appears. 3. In the following fields, press the Space key until the preferred option appears: Field Description Default Sheet Outline Cells Set whether the grid appears in spreadsheet format. Yes Sheet Horizontal Scroll Set whether the information in cells wraps around when you scroll horizontally.
Email and PIN messages Setting message options Prerequisite: To set the Hide Filed Messages and Delete On options, your handheld must be integrated with an email account using the BlackBerry Enterprise Server or the BlackBerry Desktop Redirector. To set the Wireless Reconcile and Conflicts options, one of the following requirements must be met: • Your handheld must be enabled for wireless email reconciliation on a BlackBerry Enterprise Server version 3.
1: Messages Field Description Default Delete On Set whether email messages are deleted from your handheld only or from both your handheld and computer during an email reconciliation. Handheld Wireless Reconcile Set whether messages are reconciled over the wireless network between your handheld and your computer. On Conflicts Set whether your handheld or your computer takes precedence if a message is moved or deleted from both locations. Mailbox wins 5. Click the trackwheel. A menu appears. 6.
SMS messages Opening SMS messages Open an SMS message 1. Open the messages application. The Messages screen appears. 2. Click an SMS message. A menu appears. 3. Click Open. The message appears. SMS message Sending SMS messages You can send SMS messages to contacts who have an SMScompatible phone number. Prerequisite: To send SMS messages, the following requirements must be met: • The wireless coverage indicator must show a level of wireless coverage.
1: Messages 3. Click Compose SMS. The SMS screen appears. 4. Click [Use Once]. A menu appears. SMS screen menu — SMS item 5. Click SMS. The One Time SMS screen appears. 6. Type your contact’s SMS-compatible phone number. Tip: Contact your service provider for more information on setting an SMScompatible number for your contact. Your service provider might require that all SMS-compatible phone numbers include the area code and other prefixes. 7. Click the trackwheel. A menu appears. 8. Click Continue. 9.
SMS messages Send an SMS message to a contact in your address book 1. Open the address book application. The Find screen appears. 2. Click a contact with an SMS-compatible number. A menu appears. 3. Click SMS . 4. Type a message. 5. Click the trackwheel. A menu appears. 6. Click Send. The message is sent. Reply to an SMS message 1. Open the messages application. The Messages screen appears. 2. Click an SMS message. A menu appears. 3. Click Reply.
1: Messages 6. Type a message. 7. Click the trackwheel. A menu appears. 8. Click Send. The message is sent. Resend an SMS message 1. Open the messages application. The Messages screen appears. 2. Click an SMS message. A menu appears. 3. Click Open. The message appears. 4. Click the trackwheel. A menu appears. 5. Click Resend. The message is sent. Setting SMS message options 1. Open the options application. The Options screen appears. 2. Click SMS. The SMS screen appears. 3.
Managing messages 4. Click the trackwheel. A menu appears. 5. Click Save. The options are saved. Note: Depending on your service provider plan, some SMS message options might not be available on your handheld. Contact your service provider for information on available options. Managing messages Saving messages You can save important messages in the saved messages application. If your handheld must delete messages to free memory, it does not delete saved messages. Save a message 1.
1: Messages • To delete a message from the messages application, open the messages application. The Messages screen appears. • To delete a saved message, open the saved messages application. The Saved Messages screen appears. 2. Click a message. A menu appears. 3. Click Delete. A dialog box appears. 4. Click Delete. The message is deleted. Delete messages prior to a specific date 1. Select one of the following options: • To delete messages from the messages application, open the messages application.
Managing messages 3. Click Options. The Message List Options screen appears. 4. Click the trackwheel. A menu appears. 5. Click Purge Deleted Items. A dialog box appears. 6. Click Yes. The Deleted Items folder on your computer is emptied. Reconciling email messages When email messages are reconciled, any message that you open, file, or delete on your handheld is also opened, filed, or deleted on your computer depending on how you set your message options.
1: Messages Filing email messages Prerequisite: To file email messages, the following requirements must be met: • Your handheld must be integrated with an email account using the BlackBerry Enterprise Server or the BlackBerry Desktop Redirector. • You have created folders in your desktop email program. • You have reconciled your email messages so that the folders from your desktop email program appear on your handheld. File an email message 1. Open the messages application. The Messages screen appears. 2.
Managing messages 5. Click File. The message is filed. Tip: To display filed messages on the Messages screen, set the Hide Filed Messages option on the Message List Options screen to No. To remove a filed message from a folder, file the message in the Inbox folder. Searching for messages Search for a message 1. Open the search messages application. The Search screen appears. Search screen — Specifying search criteria 2.
1: Messages 3. In one or more of the following fields, press the Space key until the preferred option appears: Description Default In Field Set the address field in which you want to search. Any Address Field Folder Set the folder in which you want to search. ! To select a folder, press the Space key. The Select Folder screen appears. Click a folder. A menu appears. Click Select Folder. All Folders Show Set whether you want to search for sent, received, or saved messages.
Managing messages • To edit the search criteria, click Edit Search. Edit the search criteria. Click the trackwheel. A menu appears. Click Save. • To delete the search, click Delete Search. A dialog box appears. Click Delete. Tip: To view the criteria of your last search quickly, on the Search screen, click the trackwheel. Click Last. The Search screen displays the criteria of the last search that you performed. Search for a message by sender, recipient, or subject 1. Open the messages application.
1: Messages Marking messages Mark a message as unopened or opened 1. Open the messages application. The Messages screen appears. 2. Click a message. A menu appears. 3. Select one of the following options: • To mark the message as opened, click Mark Opened. • To mark the message as unopened, click Mark Unopened. Mark messages prior to a specific date as opened 1. Open the messages application. The Messages screen appears. 2. Click a date. A menu appears. 3. Click Mark Prior Opened.
2 Address book This section provides information on the following topics: • Adding contacts • Managing the address book • Setting address book options
2: Address book Adding contacts Note: You can import contacts from your desktop email program if your handheld is integrated with an email account using the BlackBerry Enterprise Server. Refer to the Desktop Software: Backup and Restore Help for more information. Create a contact 1. Open the address book application. The Find screen appears. 2. Click the trackwheel. A menu appears. 3. Click New Address. The New Address screen appears. New Address screen 4.
Adding contacts Field Title Work, Home, Mobile, Pager Description Type a job title. Type the appropriate phone number. To insert an extension, type x or ext. Type the extension number. You can use a wait or pause to separate additional numbers (for example, a password or extension) from the main number. When the phone number is dialed, your handheld either pauses before dialing the additional numbers (pause) or prompts you to type them (wait). ! To insert a pause or wait, click the trackwheel.
2: Address book Create a group After you create contacts, you can create a group. If you send an email message to a group, the message is sent to all group members at the same time. 1. Open the address book application. The Find screen appears. 2. Click the trackwheel. A menu appears. 3. Click New Group. The New Group screen appears. 4. Type a group name. 5. Click the trackwheel. A menu appears. 6. Click Add Member. The Select Address screen appears. 7. Click a contact. A menu appears. 8. Click Continue.
Managing the address book 7. Click the trackwheel. A menu appears. 8. Click Save. The contact is saved. Add contact information from the Phone screen 1. Open the phone. The Phone screen appears. 2. Click a phone number. A menu appears. 3. Click Add To Address Book. The New Address screen appears. 4. Type contact information. 5. Click the trackwheel. A menu appears. 6. Click Save. The contact is saved. Add contact information from a link In messages and on web pages, links appear as underlined text. 1.
2: Address book • Click a group. A menu appears. Click View Group. The group member list appears. Tip: To view information for a contact in the group, click the contact. A menu appears. Click View Member. Edit a contact 1. Open the address book application. The Find screen appears. 2. Click a contact. A menu appears. 3. Click Edit. The Edit Address screen appears. 4. Edit the contact information. 5. Click the trackwheel. A menu appears. 6. Click Save. The edited contact is saved. Edit a group 1.
Managing the address book 8. Click the trackwheel. A menu appears. 9. Click Save Group. The edited group is saved. Delete a contact or group If you delete a group, the individual contacts still appear in your address book. If you delete a contact that is a member of a group, the contact is deleted from both your address book and the group. 1. Open the address book application. The Find screen appears. 2. Select one of the following options: • Click a contact. A menu appears. Click Delete. • Click a group.
2: Address book 7. Click a contact. A menu appears. 8. Click one of the following menu items: Menu item Lookup Description Specify or edit search criteria. Resolve Add the selected contact to your address book temporarily. Add Add the selected contact to your address book. Add All Add all the contacts to your address book. Delete Delete the selected contact from the search results. Delete Lookup Delete the search results. View Display the selected contact information.
Setting address book options 5. Click the trackwheel. A menu appears. 6. Click Save. The options are saved.
2: Address book 40 BlackBerry Wireless Handheld
3 Phone Depending on your service provider plan, the phone or some of its features might not be available on your handheld. Contact your service provider for more information on available services.
3: Phone Making phone calls Prerequisite: To make a phone call, the following requirements must be met: • The wireless coverage indicator must show a level of wireless coverage. • 1X, 1x, or D must appear with the wireless coverage indicator on the Home screen. Make a phone call Note: If you are using a headset, insert the headset connector into the headset jack at the top of the handheld. 1. Open the phone. The Phone screen appears. Phone screen 2.
Making phone calls Active Call screen 4. To end the call, press and hold the Escape button. Tip: On the Phone screen, press the Space key and press the Enter key to dial the last number that you typed. Call a contact using speed dial You can use the speed dial feature to place phone calls by pressing a single key. Refer to "Using speed dial" on page 49 for more information on configuring this feature. 1. Open the phone. The Phone screen appears. 2.
3: Phone 3. Click Call . The phone number is dialed. 4. To end the call, press and hold the Escape button. Tip: To delete a contact or a phone number that appears on the Phone screen, click the contact or the phone number. A menu appears. Click Delete. Call a contact in your address book 1. Open the address book. The Find screen appears. 2. Type the first letters of a contact. Contacts that start with these letters appear. 3. Click a contact. A menu appears. 4.
Making phone calls support, when you place an emergency call from your handheld, or during Emergency Callback Mode, an emergency operator can estimate your location. Warning: If your handheld is locked, you can only make calls to recognized emergency numbers (for example, 911). When your handheld is locked, click the trackwheel. A dialog box appears. Click Emergency Call. A dialog box appears. Click Yes. The emergency number is dialed. 1. Open the phone. The Phone screen appears. 2.
3: Phone • If a voice mail access phone number is not available, a dialog box appears. Type your voice mail access phone number. Click the trackwheel. Your voice mail access number is dialed. 4. To end the call, press and hold the Escape button. Answering phone calls Answer a phone call 1. In the dialog box that appears when you receive a phone call, select one of the following options: Option Description Answer Answer the incoming call.
Using phone features Mute a phone call If you mute a phone call, you can hear your contact, but your contact cannot hear you. 1. During a call, click the trackwheel. A menu appears. 2. Click Mute. The call is muted. 3. To turn off the mute feature, click the trackwheel. A menu appears. 4. Click Turn Mute Off. The mute feature is turned off.
3: Phone 4. Click Call . The phone number is dialed and you are connected to the second call. 5. During the second call, click the trackwheel. A menu appears. 6. Click Flash. You are connected to both calls. Note: The Active Call screen shows that you are only connected to the second contact even though you are connected to both calls. • To disconnect from the second contact, click the trackwheel. A menu appears. Click Flash. To add another contact, click the trackwheel. A menu appears.
Using phone features Using speed dial You can configure speed dialing by assigning any letter key to a specific phone number. You can also add, change, and remove numbers from the speed dial list. Assign a speed dial letter 1. Open the phone. The Phone screen appears. 2. Select one of the following options: • If the contact or phone number to which you want to assign a speed dial letter is listed on the Phone screen, select the phone number.
3: Phone 10. Click the trackwheel. The contact is added to the speed dial list. Tip: To change the speed dial letter for a contact, on the Speed Dial Numbers screen, click the trackwheel. A menu appears. Click Move. Roll the trackwheel to select a different speed dial letter. Click the trackwheel. The speed dial letter is changed. Change the contact assigned to a speed dial letter 1. Open the phone. The Phone screen appears. 2. Click the trackwheel. A menu appears. 3. Click Edit Speed Dial List.
Managing phone call logs 7. Click Delete. The phone number is removed from the speed dial list. Tip: To remove a phone number from the speed dial list quickly, on the Phone screen, select the contact or phone number. Click the trackwheel. A menu appears. Click Remove Speed Dial. Managing phone call logs Phone call logs appear on the Messages screen and contain information about the call, including the date and time, duration, caller or recipient information, and any call notes. Open a phone call log 1.
3: Phone Create or edit phone call notes After a phone call ends, you can create call notes to record the details of your call. Tip: If you use a headset with the handheld, you can add call notes during a call. Click the trackwheel. A menu appears. Click Notes. Type your notes. The notes are saved when the call ends. 1. Open the messages application. The Messages screen appears. 2. Click a phone call log. A menu appears. 3. Click Open. The View Call Log screen appears. 4. Click the trackwheel.
Setting phone options Delete a phone call log 1. Open the messages application. The Messages screen appears. 2. Click a phone call log. A menu appears. 3. Click Delete. A dialog box appears. 4. Click Delete. The phone call log is deleted. Setting phone options Setting call logging You can set whether phone call logs appear on the Messages screen. Set call logging 1. Open the phone. The Phone screen appears. 2. Click the trackwheel. A menu appears. 3. Click Options. The Phone Options screen appears. 4.
3: Phone Setting call forwarding You can set whether incoming calls are forwarded to another phone number. Prerequisite: To use call forwarding and set and enable a call forwarding profile, your handheld must be provisioned for call forwarding. Contact your service provider for more information. Set a call forwarding profile 1. Open the phone. The Phone screen appears. 2. Click the trackwheel. A menu appears. 3. Click Options. The Phone Options screen appears. 4. Click Call Forwarding.
Setting phone options • To enable the call forwarding profile, click Enable. Incoming calls are forwarded to the specified phone number. • To disable the call forwarding profile, click Disable. Your handheld receives incoming calls. Tip: To enable or disable a call forwarding profile quickly, select it and press the Space key. Setting enhanced audio You can set automatic volume control for phone calls. Set enhanced audio 1. Open the phone. The Phone screen appears. 2. Click the trackwheel.
3: Phone 3. Click Options. The Phone Options screen appears. 4. Click General Options. The General Options screen appears. 5. In the following fields, press the Space key until the preferred option appears: Description Default Auto Answer Field Set whether calls are answered automatically when you remove your handheld from the holster. Never Auto Hangup Set whether phone calls end when you insert your handheld in the holster.
Setting phone options You can also set options for dialing corporate extensions. If you call a corporation frequently, you can set your smart dialing options so that you do not have to type the main number for the corporation. To call a contact in the corporation, you only need to type x and the extension number. Tip: To type a phone number extension, press the Alt key + the 8 key. The letter X appears. Type the phone number extension. Set general smart dialing options 1. Open the phone.
3: Phone 5. In the following field, type corporate smart dialing information: Field Call Description Type the main phone number of a corporation that you call frequently. If you have set general smart dialing options, you do not need to specify an area or country code. 6. In the following fields, press the Space key until the preferred option appears: Field Description Default Wait For Set how long your handheld waits before dialing extensions.
Setting phone options call. If you move to a wireless coverage area where the service provider does not support voice privacy, the voice privacy icon does not appear and voice privacy is unavailable. Set voice privacy sounds You can set whether you receive notification when voice privacy is lost. 1. Open the phone. The phone screen appears. 2. Click the trackwheel. A menu appears. 3. Click Options. The Phone Options screen appears. 4. Click Sounds. The Sounds screen appears. 5.
3: Phone 4. Click Voicemail. The Voicemail screen appears. 5. In the following fields, type voice mail information: Field Description Access Number Type a voice mail access number. Additional Numbers Type any additional numbers for your voice mail (for example, a password or an extension number). 6. Click the trackwheel. A menu appears. 7. Click Save. The options are saved. Setting TTY options You can use text telephone (TTY) to make calls to and receive calls from other TTY devices.
Viewing phone information 5. In the following field, press the Space key until the preferred option appears: Field TTY Mode Description Set whether the TTY feature is enabled or disabled. Default No 6. Click the trackwheel. A menu appears. 7. Click Save. The option is saved. Viewing phone information The Phone Info screen displays the duration of your calls and your handheld phone number. View phone information 1. Open the phone. The Phone screen appears. 2. Click the trackwheel. A menu appears. 3.
3: Phone 7. Click Save. The timer is reset.
4 Browser Depending on your service provider plan, a browser or some browser features might not be available on your handheld. Contact your service provider for more information on available services.
4: Browser About the handheld browsers Your handheld supports two browser types—one enables you to open web pages using your service provider gateway and one enables you to open web pages using your corporate Mobile Data Service. The options and available services vary depending on your service provider. Prerequisite: To use the BlackBerry Browser, the following requirement must be met: • Your handheld must be enabled for Mobile Data Service on a BlackBerry Enterprise Server version 3.
Browsing web pages Field Content Mode Description Set the type of content that your browser accepts. Default WML & HTML Warning: Do not change the information in any other fields on this screen. 7. Click the trackwheel. A menu appears. 8. Click Save Options. The configuration is saved. Browsing web pages The browser is optimized to view WML and HTML web pages.
4: Browser Go To field — Typing a web page address Tip: Press the Space key to insert a period. Press a Shift key + the Space key to insert a slash mark (/). 5. Click OK. The browser requests the web page. Open a web page from a link Links appear as underlined text. 1. Click a link. A menu appears. 2. Click Get Link. The browser requests the web page. Tip: To open a web page from a link quickly, select the link and hold the trackwheel. Cancel a web page request 1.
Browsing web pages 1. On a web page, select one of the following options: • To select a menu item, click the trackwheel. A menu appears. Click a menu item. • To select a link on a web page, click the link. Tip: To view a list of browser shortcut keys, click the trackwheel. A menu appears. Click Help. Navigate between web pages 1. On a web page, click the trackwheel. A menu appears. 2. Select one of the following options: • To move back a page, click Back or press the Escape button.
4: Browser Save a web page to the Messages screen You can save a web page to the Messages screen instead of creating a bookmark that appears on the Bookmarks screen. 1. On a web page, click the trackwheel. A menu appears. 2. Select one of the following options: • If the web page is not loaded yet, click Save Request. • If the web page is loaded, click Save Page. The requested web page is saved as a message on the Messages screen. Tip: To open a web page from the Messages screen, click a saved web page.
Using bookmarks Download applications You can download applications to your handheld. Note: You are solely responsible for the selection, implementation, and performance of any third-party applications that you use with the handheld or desktop software.
4: Browser Create a bookmark 1. On a web page, click the trackwheel. A menu appears. 2. Click Add Bookmark. The Add Bookmark dialog box appears. Add Bookmark dialog box 3. In the following fields, review or edit the information: Field Description Default Title This field displays the name of the bookmark. Create in Set the folder in which the bookmark is saved. ! To set a different folder, click Change Folder. The Bookmarks screen appears. Click a folder. A menu appears. Click Select Folder.
Using bookmarks Open a bookmark 1. In a browser, click the trackwheel. A menu appears. 2. Click Bookmarks. The Bookmarks screen appears. 3. Click a bookmark. A menu appears. 4. Click Get Link. The browser requests the web page. Edit a bookmark 1. In a browser, click the trackwheel. A menu appears. 2. Click Bookmarks. The Bookmarks screen appears. 3. Click a bookmark. A menu appears. 4. Click Edit Bookmark. A dialog box appears. 5. Edit the bookmark.
4: Browser Move a bookmark 1. In a browser, click the trackwheel. A menu appears. 2. Click Bookmarks. The Bookmarks screen appears. 3. Click a bookmark. A menu appears. 4. Select one of the following options: • To move the bookmark one item higher in the list, click Move Bookmark Up. • To move the bookmark one item lower in the list, click Move Bookmark Down. • To move the bookmark to another folder, click Move Bookmark. The Select Destination Folder screen appears. Click a folder. A menu appears.
Using bookmarks 4. Click View Bookmark Subfolders. The Bookmarks screen appears. 5. Click the trackwheel. A menu appears. 6. Click Add Subfolder. A dialog box appears. Bookmarks screen — Creating a folder 7. In the Enter subfolder name field, type a name for the folder. 8. Click OK. The folder is saved. Rename a folder for bookmarks 1. In a browser, click the trackwheel. A menu appears. 2. Click Bookmarks. The Bookmarks screen appears. 3. Click the trackwheel. A menu appears. 4.
4: Browser Move between folders for bookmarks Folders that contain other folders are marked with a plus sign (+). 1. On the Bookmarks screen, select one of the following options: • To select a folder, click the trackwheel. A menu appears. Click Select Folder. • To open a folder, click the trackwheel. A menu appears. Click Open Folder. • To move up a folder level, click the trackwheel. A menu appears. Click Move Up. • To move to the Bookmarks folder, click the trackwheel. A menu appears.
Managing the browser 1. In a browser, click the trackwheel. A menu appears. 2. Click Close. Tip: To close the browser quickly, press and hold the Escape button. View the browser history The browser saves a list of the last 20 web pages that you visited during your browser session. 1. On a web page, click the trackwheel. A menu appears. 2. Click History. The History screen appears. Clear a browser cache You can clear the browser caches to free memory on your handheld. Each cache can store up to ten items.
4: Browser View the browser connection information You can view the host name of a web page, the duration of your browser session, and the amount of data sent and received by your browser. 1. On a web page, click one of the following icons: Icon Description The browser is connected to the wireless network. The browser is not connected to the wireless network. A dialog box displays the browser connection information. Setting browser options Set browser options 1. In a browser, click the trackwheel.
5 Calendar This section provides information on the following topics: • Navigating in the calendar • Managing appointments and meetings • Setting calendar options
5: Calendar Navigating in the calendar Change the calendar format 1. Open the calendar. The calendar appears. 2. Click the trackwheel. A menu appears. 3. Select one of the following options: • To view your schedule for one day, click View Day. • To view a list of your appointments and meetings, grouped by day, click View Agenda. • To view your schedule for one week, click View Week. • To view your schedule for one month, click View Month.
Navigating in the calendar Week format Month format Tip: To change days quickly in Day format, scroll to the navigation bar. Click a day. View the current date 1. Open the calendar. The calendar appears. 2. Click the trackwheel. A menu appears. 3. Click Today. The current date appears. View a specific date 1. Open the calendar. The calendar appears. 2. Click the trackwheel. A menu appears. 3. Click Go to Date. A dialog box appears. 4.
5: Calendar View the next or previous date 1. Open the calendar. The calendar appears. 2. Click the trackwheel. A menu appears. 3. Select one of the following options: Format Option Day To view that day in the next week, click Next Week. To view that day in the previous week, click Prev Week. Agenda To view the next day on which you have an appointment or meeting, click Next Day. To view the previous day on which you have an appointment or meeting, click Prev Day.
Managing appointments and meetings Create an appointment or meeting 1. Open the calendar. The calendar appears. 2. Click the trackwheel. A menu appears. 3. Click New. The New Appointment screen appears. New Appointment screen 4. In the following fields, type the appointment information: Field Description Subject Type the subject of the appointment. Location Type the location of the appointment. 5.
5: Calendar Field Description Default End Set the date and time when the appointment ends. If you change this field, the Duration field reflects the change. Note: Lotus Notes users cannot create appointments that span days. The appointment must start and end on the same date. 1 hour after start time Duration Set the length of the appointment. If you change this field, the End field reflects the change. 1 Hour 0 Mins Time Zone Set the time zone in which the appointment occurs.
Managing appointments and meetings • To create a meeting, proceed to step 9. 9. Click Invite Attendee. The Select Address screen appears. 10. Click a contact. A menu appears. 11. Click Invite. 12. To invite more contacts, repeat steps 9 through 11. Tip: Do not invite yourself to the meeting. You are already registered as the meeting creator. 13. Click the trackwheel. A menu appears. 14. Click Save. A meeting invitation is sent.
5: Calendar 7. Click the trackwheel. The appointment is saved. Open an appointment or meeting 1. Open the calendar. The calendar appears. 2. Verify that the calendar is in Day, Week, or Agenda format. Tip: If the calendar is in Month format, click a day. A menu appears. Click View Appts. Day format appears. 3. Click an appointment or meeting. A menu appears. 4. Click Open. If the appointment or meeting recurs, a dialog box appears.
Managing appointments and meetings 3. Click Open. The details of the meeting appear. Tip: To check your calendar while you view the meeting invitation, click the trackwheel. A menu appears. Click View Calendar. 4. Click the trackwheel. A menu appears. 5. Select one of the following options: • To accept the meeting without sending comments, click Accept. • To decline the meeting without sending comments, click Decline. • To accept the meeting and send comments, click Accept with comments.
5: Calendar • To edit all occurrences of the appointment or meeting, click Open the series. • To edit only the selected appointment or meeting, click Open this occurrence. The Appointment Details screen appears. 5. Edit the appointment or meeting. Note: Lotus Notes users cannot edit the Start, End, Duration, or Time Zone of a recurring appointment or meeting. 6. Click the trackwheel. A menu appears. 7. Select one of the following options: • To save the edited appointment or meeting, click Save.
Setting calendar options Delete an appointment or meeting Warning: If you delete a meeting invitation from the Messages screen before you accept or decline it, the appointment is deleted from your desktop calendar. 1. Open the calendar. The calendar appears. 2. Verify that the calendar is in Day, Week, or Agenda format. Tip: If the calendar is in Month format, click a day. A menu appears. Click View Appts. Day format appears. 3. Click an appointment or meeting. A menu appears. 4. Click Delete.
5: Calendar 4. In the following fields, press the Space key until the preferred option appears: Field Description Default Enable Quick Entry Set whether you can add appointments quickly when the calendar is in Day format. Yes Initial View Set the format that appears when the calendar opens. Day Default Reminder Set the amount of time before an appointment or meeting that the handheld notifies you. 15 Min. Confirm Delete Set whether you are prompted before appointments are deleted.
6 Other applications This section provides information on the following topics: • Tasks • MemoPad • Calculator • Alarm • Games
6: Other applications Tasks Create a task You can create a task to track the progress of an assigned duty. 1. Open the tasks application. The Find screen appears. 2. Click the trackwheel. A menu appears. 3. Click New. The New screen appears. New screen 4. In the Task field, type the subject of the task. 5. In the following fields, press the Space key until the preferred option appears: Field Description Default Status Set the progress status of the task.
Tasks Open a task 1. Open the tasks application. The Find screen appears. 2. Click a task. A menu appears. 3. Click Open. The task appears. Edit a task 1. Open the tasks application. The Find screen appears. 2. Click a task. A menu appears. 3. Click Open. The Edit Task screen appears. 4. Edit the task. 5. Click the trackwheel. A menu appears. 6. Click Save. The edited task is saved. Change the status of a task 1. Open the tasks application. The Find screen appears. 2. Click a task. A menu appears. 3.
6: Other applications 4. Click Delete. The task is deleted. Tip: To delete all completed tasks, on the Find screen, click the trackwheel. A menu appears. Click Delete Completed. Set task options 1. Open the tasks application. The Find screen appears. 2. Click the trackwheel. A menu appears. 3. Click Options. The Tasks Options screen appears. 4. In the following fields, press the Space key until the preferred option appears: Field Description Default Sort By Set how tasks are sorted on the Find screen.
MemoPad 7. Click the trackwheel. A menu appears. 8. Click Save. The memo is saved. Open a memo 1. Open the memo application. The Find screen appears. 2. Click a memo. A menu appears. 3. Click View. The memo appears. Edit a memo 1. Open the memo application. The Find screen appears. 2. Click a memo. A menu appears. 3. Click Edit. The memo appears. 4. Edit the memo. 5. Click the trackwheel. A menu appears. 6. Click Save. The edited memo is saved. Delete a memo 1. Open the memo application.
6: Other applications 4. In the following field, press the Space key until the preferred option appears: Field Confirm Delete Description Set whether you are prompted before memos are deleted. Default Yes 5. Click the trackwheel. A menu appears. 6. Click Save. The option is saved. Calculator Perform a calculation 1. Open the calculator application. The calculator appears. 2. Type a number. 3. Click an operator. 4. Type another number. 5. Click the equal sign. The result appears.
Alarm 4. Select one of the following options: • To convert from imperial to metric, click To Metric. • To convert from metric to imperial, click From Metric. A menu appears. 5. Click a conversion. The number is converted. Alarm Set the alarm 1. Open the alarm. The Alarm screen appears. 2. In the following fields, press the Space key until the preferred option appears: Field Option Default Daily Alarm Set whether the alarm is on or off. Off Time Set the time when you want the alarm to notify you.
6: Other applications Turn off the alarm • To silence the alarm when it is sounding, press any key. • To disable the alarm, set the Daily Alarm field to Off. Games Start a game 1. Select one of the following options: • Open BrickBreaker. The BrickBreaker screen appears. 2. Click the trackwheel. A menu appears. 3. Click New Game. The game starts. Tip: To pause a game, click the trackwheel. To resume a game, click Resume. BrickBreaker The object of this game is to destroy bricks using a paddle and a ball.
Games Navigate in BrickBreaker Goal Action Move the paddle. Roll the trackwheel. Fire the gun or laser. Press the Space key. Release the ball when in catch mode. Press the Space key. Set BrickBreaker options 1. Open BrickBreaker. The BrickBreaker screen appears. 2. Click the trackwheel. A menu appears. 3. Click Options. The Options screen appears. 4.
6: Other applications 98 BlackBerry Wireless Handheld
7 Options This section provides information on the following topics: • Handheld options • • • • • • • • • • • • • • • • • • • • • About Applications Auto On/Off AutoText Browser Date/Time Firewall Localization Location Based Services Message services Network Owner Profiles Screen/Keyboard Security Service book SMS Status TLS WAP Push WTLS
7: Options Handheld options View handheld options 1. Open the options application. The Options screen appears. Option Description About View your handheld copyright information. Applications View the applications that are installed on your handheld. Auto On/Off Set your handheld to turn on and off at specified times. AutoText View, add, edit, and delete AutoText entries. Browser Set browser options. Date/Time Set the date and time. Firewall View the status of your firewall.
Handheld options Option Description TLS Set Transport Layer Security (TLS) options. WAP Push Set how your handheld processes WAP Push messages and applications. WTLS Set Wireless Transport Layer Security (WTLS) options. About View handheld information 1. Open the options application. The Options screen appears. 2. Click About. Handheld and copyright information appears. 3. To return to the Options screen, press the Escape button twice. Applications Default applications come with your handheld.
7: Options 4. Select one of the following options: • To view all application details, click Modules. A list of modules appears. Click a module. A menu appears. Click Module Information. • To view third-party application details, click Properties. • To delete a third-party application, click Delete. Auto On/Off You can set whether you want your handheld to turn on and off at specific times.
Handheld options Enable or disable Auto On/Off 1. Open the options application. The Options screen appears. 2. Click Auto On/Off. The Auto On/Off screen appears. 3. In the weekday and weekend sections, select one of the following options: • To enable Auto On/Off, in the Disabled field, press the Space key until Enabled appears. • To disable Auto On/Off, in the Enabled field, press the Space key until Disabled appears.
7: Options 2. Click AutoText. The AutoText entries appear. Tip: To search for an AutoText entry, on the AutoText screen, type the first letters of the entry. Entries that begin with those letters appear. Create an AutoText entry 1. Open the options application. The Options screen appears. 2. Click AutoText. The AutoText screen appears. 3. Click the trackwheel. A menu appears. 4. Click New. The AutoText: New screen appears. 5.
Handheld options Edit an AutoText entry 1. Open the options application. The Options screen appears. 2. Click AutoText. The AutoText screen appears. 3. Click an entry. A menu appears. 4. Click Edit. The AutoText: Edit screen appears. 5. Edit the AutoText entry. 6. Click the trackwheel. A menu appears. 7. Click Save. The edited AutoText entry is saved. Delete an AutoText entry 1. Open the options application. The Options screen appears. 2. Click AutoText. The AutoText screen appears. 3. Click an entry.
7: Options 3. In the following field, press the Space key until the preferred option appears: Field Description Default browser configuration Set which browser opens when you click links in messages and attachments. 4. Click the trackwheel. A menu appears. 5. Click Save. The browser options are saved. Date/Time Set the date and time 1. Open the options application. The Options screen appears. 2. Click Date/Time. The Date/Time screen appears. 3.
Handheld options Firewall If you have third-party applications on your handheld, the firewall option prevents these applications from transmitting data without your knowledge. Note: You are solely responsible for the selection, implementation, and performance of any third-party applications that you use with the handheld or desktop software.
7: Options Localization If more than one language is available on your handheld, you can change the language that is displayed. Select a display language 1. Open the options application. The Options screen appears. 2. Click Localization. The Localization screen appears. 3. In the following field, press the Space key until the preferred option appears: Field Locale Description Default Set the language that you want to use on your handheld. current display language 4. Click the trackwheel.
Handheld options 3. In the GPS Services field, press the Space key until the preferred option appears: Option Description 911 Only/ Your location can be estimated by an emergency operator only Location Off during emergency calls and Emergency Callback Mode. Location On Your location can be estimated by an emergency operator during emergency calls and Emergency Callback Mode but is not restricted to these modes. 4. Click the trackwheel. A menu appears. 5. Click Save. The option is saved.
7: Options Network Set network options 1. Open the options application. The Options screen appears. 2. Click Network. The Network screen appears. 3. In the following fields, press the Space key until the preferred option appears: Item Description Default Radio Turn on and turn off your handheld radio. On Scan Mode Set whether your handheld scans for and selects a wireless network automatically. Automatic Active Network This field displays the name of the network that your handheld uses. — 4.
Handheld options 2. Click Owner. The Owner screen appears. 3. In the following fields, type contact information: Field Description Name Type your name. Information Type information that appears when the handheld is locked. 4. Click the trackwheel. A menu appears. 5. Click Save. The owner information is saved. Profiles You can enable profiles that notify you of alarms, saved web pages, and incoming WAP content, messages, and phone calls. The handheld has the following profiles.
7: Options Enable a notification profile 1. Open the profiles application. The Profiles screen appears. 2. Click a profile. A menu appears. 3. Click Enable. The word (On) appears beside the enabled profile. Tip: To enable a profile quickly, on the Profiles screen, select a profile. Press the Space key. Create a notification profile 1. Open the profiles application. The Profiles screen appears. 2. Click the trackwheel. A menu appears. 3. Click New.
Handheld options Field Description Number of Beeps Set how many times the tune plays before notification stops. For phone calls, notification does not stop until you answer the call. Repeat Notification Set whether the LED flashes to remind you of unopened messages. Do Not Disturb Set whether your handheld notifies you of incoming calls. 8. Click the trackwheel. A menu appears. 9. Click Save. The options are saved. 10.
7: Options 11. Click Close. The edited items are saved. Delete a notification profile You can only delete notification profiles that you created. 1. Open the profiles application. The Profiles screen appears. 2. Click a profile. A menu appears. 3. Click Delete. A dialog box appears. 4. Click Delete. The profile is deleted. Download notification tunes You can download tunes, or ring tones, in standard MIDI format. 1. On a web page, click a .mid file link. A menu appears. 2. Click Get Link.
Handheld options 4. Click a tune. A menu appears. 5. Select one of the following options: • To listen to the tune, click Play. • To delete a tune, click Delete. A dialog box appears. Click Delete. Screen/Keyboard Set screen and keyboard settings 1. Open the options application. The Options screen appears. 2. Click Screen/Keyboard. The Screen/Keyboard screen appears. 3.
7: Options 4. Click the trackwheel. A menu appears. 5. Click Save. The options are saved. Security Set security options 1. Open the options application. The Options screen appears. 2. Click Security. The Security screen appears. 3. In the following fields, press the Space key until the preferred option appears: Field Description Default Password Set whether you want to enable a password on Disabled your handheld. Refer to "Set a password" on page 116 for more information.
Handheld options 2. Click Security. The Security screen appears. 3. In the Password field, press the Space key until Enabled appears. 4. Click the trackwheel. A menu appears. 5. Click Save. A dialog box appears. 6. In the New Password field, type a password. 7. Click the trackwheel. A dialog box appears. 8. In the Verify New Password field, type the password again. 9. Click the trackwheel. The password is enabled. Change the password 1. Open the options application. The Options screen appears. 2.
7: Options 3. In the Password field, press the Space key until Disabled appears. 4. Click the trackwheel. A menu appears. 5. Click Save. A dialog box appears. 6. In the Enter Password field, type the password. 7. Click the trackwheel. The password is disabled. Lock your handheld 1. On the Home screen, click the Lock icon. Your handheld is locked. Unlock your handheld Warning: If you type your password five times incorrectly, you are prompted to type blackberry before you can continue.
Handheld options 1. Open the options application. The Options screen appears. 2. Click Security. The Security screen appears. 3. Click the trackwheel. A menu appears. 4. Click Verify Security Software. A dialog box indicates whether the tests passed or failed. Service book You can view the service books that are on your handheld. Some handheld features (for example, wireless calendar synchronization) require a service book to function.
7: Options SMS Refer to "Setting SMS message options" on page 22 for more information on SMS options. Status View status items 1. Open the options application. The Options screen appears. 2. Click Status. The following items appear: Field Description Signal The strength of the network signal, in decibel milliwatts (dBm). Battery The approximate level of battery power. File Free The amount of available memory, in bytes, for storing data such as messages, phone call logs, and contacts.
Handheld options Set TLS options 1. Open the options application. The Options screen appears. 2. Click TLS. 3. In the TLS Default field, press the Space key until the preferred option appears: • To add TLS to the connection from your BlackBerry Enterprise Server to a web server, select Proxy. • To add TLS to the entire connection from your handheld to a web server, select Handheld. Note: Your browser might take more time to connect to web pages if, in the TLS Default field, you select Handheld.
7: Options 4. In the following fields, press the Space key until the preferred option appears: Field Description Default Process Service Load Set how your handheld notifies you of incoming service load content. Auto Process Service Indication Set how your handheld notifies you of incoming service indication content. Auto Process Other Messages Auto Set how your handheld notifies you of incoming content that is neither service load or service indication content. 5. Click the trackwheel.
Handheld options 4. Click the trackwheel. A menu appears. 5. Click Save. The options are saved.
7: Options 124 BlackBerry Wireless Handheld
8 Reference This section provides information on the following topics: • Icons • Troubleshooting • Maintenance
8: Reference Icons Address book Icon Description phone number contains a pause phone number contains a wait Messages Icon Description message is being sent message will be sent when possible attachment request is being sent message was sent to the network attachment request was successful PIN or SMS message was delivered to the recipient draft of email or PIN message message transmission error attachment request was not successful unopened email message opened email message unopened SMS message opened S
Icons Icon Description address book attachment Phone Icon Description phone call is in progress volume level phone call is muted call forwarding is enabled for all phone calls pending voice mail message text telephone (TTY) is enabled placed or received phone call unopened missed phone call log unopened voice mail message opened missed phone call log opened voice mail message speed dial letter assigned voice privacy is in effect during a phone call Assisted Global Positioning System (A-GPS) support is
8: Reference Browser Icon Description unopened saved web page opened saved web page browser is connected to the wireless network browser is not connected to the wireless network browser connection to the web page is secure browser connection to the web page is not secure play MIDI tune stop playing MIDI tune Calendar Icon Description appointment was initiated by a meeting invitation appointment or meeting has a reminder set appointment or meeting has text in the Notes field appointment or meeting recurs
Troubleshooting Other applications Application Tasks Icon Description task is not started or is in progress task is deferred task is complete high priority low priority Alarm alarm is set Miscellaneous Alt mode Shift mode or CAP-lock mode NUM-lock mode new service book Troubleshooting Issue The handheld does not turn on. Possible cause The battery is not inserted correctly. Possible solution Reinsert the battery. Refer to the Getting Started and Quick Reference Card. The battery is too low.
8: Reference Issue Possible cause Possible solution The handheld does not respond or is ”frozen”. Various. Reset the handheld: Press the Alt key + the Right Shift key + the Backspace key. The display is difficult to read. The handheld is in a poorly lit area. Turn on the backlighting: Press the Power button. The display font is too small. Increase the size of the display font. Refer to page 115. The wireless radio is off. Click the Turn Wireless On icon.
Troubleshooting Issue Possible cause Possible solution Some handheld applications do not work. For example, the handheld does not send or receive messages, the phone does not work, or the browser icon does not appear on the Home screen. The wireless radio is off. Click the Turn Wireless On icon. The handheld is not in an area of wireless coverage. Return to an area of wireless coverage. The battery is too low. Charge the handheld. Refer to the Getting Started and Quick Reference Card.
8: Reference Maintenance To Extend battery life Do this Set the Auto On/Off feature. Refer to page 102. Turn off the radio when you are not in an area of wireless coverage: Click the Turn Wireless Off icon. Limit your use of the backlighting feature. Delete the original message when you send a reply. Refer to page 9. If you want to send a message to multiple contacts, use Add To, Add Cc, or Add Bcc instead of sending the message multiple times. Refer to page 7. Charge your handheld regularly.
Index Numerics 3-way calls, 47 911 Only option, 109 A accepting meeting invitations, 84 service books, 119 Access Number field, 60 Active Network field, 110, 131 adding additional contacts to messages, 8 applications, 69 attachments to messages, 11 contacts to groups, 36 multiple email addresses, 32 speed dial to contacts, 49 tunes, 114 See also creating Additional Numbers field, 60 address book adding groups, 34 creating contacts, 13, 32–35 deleting contacts, 37 deleting groups, 37 editing contacts, 36 ed
Index creating entries, 104 deleting entries, 105 editing entries, 105 inserting macros, 104 specified case and smartcase, 104 viewing entries, 103 B Backlight Brightness field, 115 backlighting, 130, 132 battery maintenance, 132 troubleshooting, 129, 131 bookmark folders creating, 72 renaming, 73 setting default, 72 bookmarks availability, 70 creating, 70 deleting, 72 editing, 71 moving, 72, 74 opening, 71 BrickBreaker capsules, 96 definition, 96 navigating, 97 setting options, 97 browser about, 64 bookm
Index formats in calendar, 78 handheld password, 117 order of bookmarks, 72 task status, 91 user-defined field names, 33 volume for phone calls, 46, 55 clearing browser caches, 75 phone timers, 61 closing browser, 74 web pages, 74 configuring browser, 64 browser home page, 64 Confirm close on Escape field, 76 Confirm Delete field, 17, 38, 56, 88, 92, 94 Confirm execute scripts field, 76 Conflicts field, 18 connection requests, 107 Consider PIN Level 1 field, 17 contacts assigning speed dial, 49 changing sp
Index Display Time field, 17 distribution lists, See groups Do Not Disturb field, 113 draft messages icon, 126 saving, 8 E editing appointments, 85–86 AutoText entries, 105 bookmarks, 71 contacts, 36 email and PIN messages, 11 groups, 36 meetings, 85–86 memos, 93 notification profiles, 113 phone call notes, 52 saved searches, 29 task status, 91 tasks, 91 user-defined field names, 33 email addresses, adding multiple, 32 email messages adding contacts to, 8 deleting, 23 editing, 11 filing, 26 forwarding, 10
Index phone call logs, 52 phone calls, 54 SMS messages, 21 full content, opening, 15 G games BrickBreaker, 96 navigating, 97 pausing, 96 resuming, 96 setting options, 97 starting, 96 GPS Services field, 109 groups adding contacts to, 36 changing contacts in, 36 creating, 34 deleting, 37 deleting contacts from, 36 editing, 36 opening, 35 H handheld options about, 101 applications, 101 Auto On/Off, 102 AutoText, 103 browser, 105 date/time, 106 firewall, 107 localization, 108 Location Based Services, 108 me
Index inserting extensions, 33 pauses, 33 waits, 33 IT Policy field, 116 K Key Rate field, 115 Key Tone field, 115 keyboard, setting options, 115 L letters, dialing, 48 links definition, 9 email address, 9 phone number, 44 web page, 66 localization, 108 locating phone number, 61 PIN, 6 Location Based Services, 108 Location Off option, 109 Location On option, 109 Lock Handheld Upon Holstering field, 116 locking the handheld, 118 Log These Call Types field, 53 logs, See phone call logs low battery, 129, 13
Index Number of Beeps field, 113 Number of Previous Items field, 22 O opening address book attachments, 12 appointments, 84 bookmarks, 71 contacts, 35 email and PIN messages, 6 file attachments, 15 groups, 35 meetings, 84 memos, 93 phone call logs, 51 SMS messages, 19 tasks, 91 web pages, 65–66 options address book, 38 browser, 76 calendar, 87 email and PIN messages, 17 file attachment, 16 MemoPad, 93 phone, 53, 55 SMS messages, 22 tasks, 92 Out of Holster field, 112 owner information, setting, 110 P Pas
Index replying to, 9 requesting more of, 6 resending, 10, 11 saving, 23 saving draft, 8 searching for, 27 sending, 7–9 setting importance, 18 setting options, 17 PIN, locating, 6 priority of messages, setting, 18 Privacy Alert field, 59 Prompt for Server Trust field, 122 R radio troubleshooting, 130, 131 turning on, 130 Radio field, 110 recipients replying to all, 10 searching by, 29 reconciling email messages, 25 reference information, 125 refreshing web pages, 67 registering with the network, 110, 131 r
Index WTLS, 122 security self tests, 118 Security Timeout field, 116 selecting display language, 108 folders, 28 network, 110 sender, searching by, 29 sending address book attachments, 11 email and PIN messages, 7 SMS messages, 19 service books accepting, 119 icon, 129 viewing, 119 service, sending messages from specific, 8 setting address book options, 38 alarm, 95 Auto On/Off options, 102 browser options, 76, 105 calendar options, 87 date and time, 106 default folder for bookmarks, 72 email and PIN messa
Index creating, 90 deleting, 91 editing, 91 icons, 129 opening, 91 setting options, 92 text telephone definition, 60 disabling, 60 enabling, 60 icon, 127 time, setting, 106 timers, 61 Title field, 70 TLS, definition, 120 troubleshooting alarm, 130 applications, 131 backlighting, 130 battery, 129, 131 browser, 131 display, 130 font size, 130 lighting, 130 notification, 130 phone, 131 radio, 130, 131 reminders, 130 resetting the handheld, 130 volume, 130 TTY Mode field, 61 Tune field, 112 tunes adding, 114 d
Index See also sounds, 58 volume adjusting for notification profiles, 112 adjusting for phone calls, 46, 55 Automatic Volume Control field, 55 icon, 127 troubleshooting, 130 Volume field, 112 W Wait For field, 58 waits adding, 33 definition, 33 icon, 126 WAP Push, setting, 121 web page address web page, 65, 68 web pages browsing, 65 cancelling requests, 66 closing, 74 connection status, 76 links, 66 BlackBerry Wireless Handheld navigating between, 67 navigating on, 66 opening, 65–66 refreshing, 67 savin
Index 144 User Guide