
User Manual
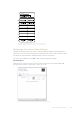


Switches 2, 1 - Select Format Bit 1,0
When connecting an HDMI source that can output Ultra HD and HD, you can set your converter
to force the source output to one or the other. This can be helpful when you want to record or
display your computer’s desktop on SDI equipment in HD so it is larger and easy to view.
While it may appear like it’s an up or down conversion setting, what your converter is actually
doing is telling your source equipment to output Ultra HD or HD video so that your converter can
then output the source video’s native HD or Ultra HD resolution without up or downconversion.
To force your source video to HD, Ultra HD, or to let your converter automatically negotiate the
optimum resolution with your source equipment, simply use combinations of switches 1 and 2.
The combination settings are shown below.
AUTO - switch 1 to OFF, switch 2 to OFF.
Your converter will negotiate an optimum HD or Ultra HD resolution with your source equipment
based on its output capabilities.
FORCE TO HD - switch 1 to OFF, switch 2 to ON.
If your HDMI source equipment is capable of outputting HD and Ultra HD, your converter will
instruct the source equipment to output HD video.
FORCE TO ULTRA HD - Switch 1 to ON, Switch 2 to OFF.
If your HDMI source equipment is capable of outputting HD and Ultra HD, your converter will
instruct the source to output Ultra HD video.
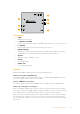
HDMI to SDI 4K
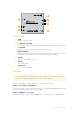
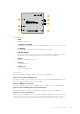
The switch legend on the base of your converter gives you
all the information you need to change conversion settings.
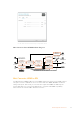
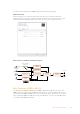
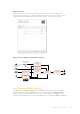
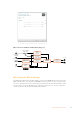
Blackmagic Converters Setup Settings
The Converters Setup utility can be used to change settings and update your Mini Converter’s
software. You can access these settings by moving between the ‘audio,’ and ‘about’ tabs.
The ‘about’ tab is detailed in the ‘changing settings’ section in this manual.
The ‘audio’ tab for Mini Converter HDMI to SDI 4K contains the following settings.
36Blackmagic Mini Converters