® Instruction Manual Bedienungsanleitung Manuel d’utilisation Manuale di Istruzioni ®
NOTICE All instructions, warranties and other collateral documents are subject to change at the sole discretion of Horizon Hobby, Inc. For up-to-date product literature, visit horizonhobby.com and click on the support tab for this product. Meaning of Special Language The following terms are used throughout the product literature to indicate various levels of potential harm when operating this product: The purpose of safety symbols is to atttract your attention to possible dangers.
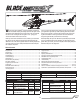
® elcome to the world of Blade ® Pro Series helicopter performance. Over two decades of flying and design experience has gone into the development of the Blade 700 X. Every part, down to the nuts and bolts, has been chosen or designed with one goal in mind – giving you a 700-size 3D machine that is second to none. W If this is your first helicopter building experience, there are a few things you might want to get before you start unpacking parts.
Tools Needed To Complete • 1.5mm, 2mm, 2.5mm, 3mm and 4mm hex drivers • Ball link pliers • Needle nose pliers • Phillips screwdriver • Wire cutter • Pitch gauge • Metric calipers • Petroleum-based, light viscosity lube • Medium cyanoacrylate (CA) Required Items • Receiver/Flybarless control unit AR7200BX (SPMAR7200BX) included with combo BLH5725C • (2X) 5000mAh 6S 22.
Head Assembly (H) Step H1 Step H1 parts (bags H1 and H2) M4 X 25 Cap Head Shoulder Bolt (x2) M4 Locknut (x2) Step H2 parts (bags H1 and H2) M3 X 10 Cap Head Bolt Spindle Sleeve Step H2 Damper (x2) • Clean the threads in the spindle thoroughly with alcohol before installation. Step H3 parts (bag H3) M4 X 12 Cap Head Bolt (x2) M4 X 10 X 2 Washer (x2) Step H3 Smaller inner diameter (I.D.) Thrust Bearing, 8 X 16 X 5 (x2) Washer, 8 X 12.5 X .5 (x2) Larger inner diameter (I.D.
Head Assembly cont’d Step H4 parts (bag H4) Step H4 A M3 X 14 Button Head Bolt (x2) M3 X 12 Button Head Bolt (x2) Control Ball (x2) 2X • Loosely install bolts A and B before tightening. B Step H5 parts (bag H5) Step H5 M3x12 Cap Head Bolt (x2) Washer 3 X 4 X .5 (x4) Radial Bearing 3 X 6 X 2.5 (x4) Brass Spacer (x2) • The stepped sides of the washers should face the radial bearings. • Do not over-tighten. The follower arms should move freely.
Head Assembly cont’d Step H6 Step H6 parts (H6) M3 X 50 Control Rod (x2) M3 Ball Link Pushrod lengths 67mm Swash to blade grip link (x2) Anti-Rotation Pin Control Ball (x7) 7 EN
Frame Assembly (F) NOTICE: Before assembly, plan your wire routing for the servos. At any point where the servo wire is going to pass through or cross the frame plates, use sandpaper to round the edge of the frame plate to prevent the wire from chafing. Step F1 parts (bags F1 and F2) Step F1 M3 X 8 Cap Head Bolt (x20) Washer M3 (x4) • At this stage of the assembly, do not tighten the bearing block screws.
Frame Assembly cont’d Step F3 Step F3 parts (bag F4) One-Way Sleeve M3 X 6 Button Head Bolts (x6) • Slide the mainshaft into position, then tighten all the frame screws. • A .5mm or 1mm shim may be added above the collar if needed. Step F4 Step F4 parts (bag F4) Frame side removed for clarity M4 X 27 Cap Head Shoulder Bolt Push down on the main gear and up on the collar while tightening the collar bolts.
Frame Assembly cont’d Step F5 parts (bag F5) M4 X 40 Cap Head Shoulder Bolt (x3) Step F5 Head assembly removed for clarity M3 X 8 Cap Head Bolt (x4) M3 Washer (x4) M4 X 4 Set Screw (x2) Pinion Helical Mod 1, 13T, 6mm Step F6 parts (bag F6) A M3 X 8 Cap Head Bolt (x3) Step F6 B M3 X 10 Cap Head Bolt (x12) Aileron servos M3 Washer (x12) M2 X 12 Button Head Bolt (x3) B M2 Nut (x3) Servo Control Ball (x3) Servo Horn (x3) A M3 X 55 Control Rod (x3) M3 Ball Link (x6) Servo Spacer (x6) Pushrod leng
Frame Assembly cont’d Step F6 contd.
Frame Assembly cont’d Step F9 parts (bag F7) Step F9 M3 X 8 Cap Head Bolt (x4) Step F10 parts (bag F8) Step F10 Hexagonal Posts (x6) Jack Shaft Radial Bearing 12 X 18 X 4 (x2) Radial Bearing 5 X 10 X 4 (x2) Gear Pin (x2) M3 X 4 Set Screw (x2) EN 12
Frame Assembly cont’d Step F11 Step F11 parts (bag F8) M3 X 8 Cap Head Bolt (x12) Step F12 parts (bag F9) Step F12 M3 X 8 Cap Head Bolt (x4) Double-sided foam tape AR7200BX Alignment 90° Front viewed from top 13 EN
Tail Assembly (T) Step T1 parts (bag T1) Step T1 M3 X 6 Button Head Bolt (x2) Step T2 parts (bag T2) Step T2 M3 X 4 Set Screw Gear Pin Step T3 parts (bag T3) Step T3 Small inner diameter race M3 X 8 Cap Head Bolt (x2) Bearing cage Control Ball (x2) M4 X 3 Set Screw A Washer M3.1 X 7 X .5 (x2) B Washer M5 X 8 X .5 (x2) Large inner diameter race A B C C Washer M8 X 10 X .
Tail assembly cont’d Step T4 Step T4 parts (bag T4) M3 X 6 Button Head Bolt (x2) Bell Crank Bolt (x2) Control Ball Flanged Bearing M3 X 6 X 2.5 (x2) Washer M3 X 4 X .
Tail assembly cont’d • Glue the torque tube bearings in place by placing a thin bead of CA on the torque tube at the given locations (278mm, 300mm), then slide the bearings onto the CA. Do not allow CA to get into the bearings.
Tail assembly cont’d Step T8 Step T8 parts (T7, T8, and T9) Tail Servo Neutral Position A M3 X 8 Cap Head Bolt B M4 X 8 Low Cap Head Bolt C M3 X 6 Button Head Bolt (x2) D M3 X 25 Cap Head Shoulder Bolt (x4) E M3 X 28 Cap B Head Shoulder Bolt C E M3 Lock Nut (x4) Tail Servo Horn Install M3 X 8 Cap Head Bolt M2 X 12 Button Head Bolt A D M2 Nut Servo Control Ball • The tail servo horn and pushrod linkage must be assembled before mounting the servo horn.
ESC and Battery Tray Assembly Step ESC parts (bag F10) Hook and loop strap Hexagonal Post (x2) Battery Tray Post (x2) M3 X 8 Cap Head Bolt (x6) M2.5 X 6 Counter Sunk Bolt (x2) M3 X 14 Button Head Bolt (x2) OR M3 X 14 Cap Head Bolt (x2) Canopy Spacer (x2) Rubber Canopy Standoff (x2) • The battery tray has forward and rear mounting locations to accommodate your equipment selection. Most of the equipment we’ve used has worked best with the rear mounting location to achieve the correct center of gravity.
ESC and Battery Tray Assembly cont’d Loop material Hook material Hook and loop straps 19 EN
Main Rotor Installation Main Rotor parts (bag H3) M5 X 28 Cap Head Shoulder Bolt (x2) M5 Lock Nut (x2) • The rotor blades should be tight enough to hold their position if you hold the helicopter sideways, but loose enough to swing freely if you move the helicopter and stop abruptly. Programming Your Transmitter Refer to your FBL controller and transmitter manuals for proper setup.
Motor Direction Test Place the helicopter outdoors on a clean, flat and level surface (concrete or asphalt) free of obstructions. Always stay clear of moving rotor blades. 3. Connect the Li-Po battery to the ESC. 4. Turn TH HOLD OFF. Slowly increase the throttle until the drive train begins to turn. The main blades spin clockwise when viewing the helicopter from the top. The tail rotor blades spin counterclockwise when viewing the helicopter from the right-hand side. 1. Power on the transmitter.
Blade Tracking WARNING: Always maintain a safe distance of at least 13 meters (45 feet) when checking the main rotor blade tracking. To check the blade tracking: 1. Put the helicopter in a hover at an altitude near eye height. 2. Watch the movement at the blade tips. Both blades should travel in the same plane. 3. If one blade tip appears to be higher than the other, land the helicopter, disconnect the flight battery and adjust the blade linkages. 4.
Blade 700 X Troubleshooting Guide Problem AR7200BX will not initialize Possible Cause Solution The helicopter was moved during initialization Lay the helicopter on its side during initialization if windy The transmitter is powered off Power on the transmitter Center elevator, aileron and rudder controls.
Limited Warranty What this Warranty Covers Horizon Hobby, Inc., (Horizon) warrants to the original purchaser that the product purchased (the “Product”) will be free from defects in materials and workmanship at the date of purchase.
Warranty and Service Contact Information Country of Purchase Horizon Hobby Contact Information Address Horizon Service Center servicecenter.horizonhobby.com/RequestForm/ (Repairs and Repair Requests) www.quickbase.com/db/ Horizon Product Support United States of America (Product Technical Assistance) bghj7ey8c?a=GenNewRecord 888-959-2304 Sales sales@horizonhobby.com 888-959-2304 Service/Parts/Sales: Horizon Hobby Limited sales@horizonhobby.co.uk Horizon Technischer Service service@horizonhobby.
Exploded View (Battery Tray) / Explosionszeichnung Akkuhalter / Vue éclatée (Platine de fixation de batterie) / Vista esplosa (Supporto batteria) 73 71 20 58 98
Exploded View (Head/Tailcase) / Explosionszeichnung (Rotorkopf / Heckrotorgehäuse) / Vue éclatée (Tête et Anticouple) / Vista esplosa (Testa/Scatola di coda) 2x 1 5 8 30 3 5 6 3 9 2 6 65 4 3 5 2x 67 8 65 4 14 3 7 12 13 13 70 35 7 37 15 35 38 39 42 69 37 75 70 35 35 99
Exploded View (Frame Assembly) / Explosionszeichnung (Chassis) / Vue éclatée (Assemblage du châssis) / Vista esplosa (Gruppo telaio) 78 27 31 34 59 22 25 59 28 59 22 28 26 26 36 59 76 26 29 19 26 18 26 77 11 23 16 32 61 62 63 64 10 11 33 24 17 18 14 10 14 100
Exploded View (Tailboom Assembly) / Explosionszeichnung (Heckausleger) / Vue éclatée (Assemblage de la poutre) / Vista esplosa (Gruppo tubo coda) 50 45 47 46 49 44 47 43 43 70 48 47 54 41 68 40 70 40 39 52 53 55 54 51 56 70 101 57
Parts List / Ersatzteile / Pièces de rechange / Pezzi di ricambio # Part # English Deutsch Français 1 BLH5701 Main Rotor Grip Set: 700 X Blade 700 X: Rotorblatthalterset 2 BLH5702 Main Grip Arms: 700 X Blade 700 X: Rotorblatthalterarmset 3 BLH5703 Spindle Set (2): 700 X Blade 700 X: Blatthalterwelle (2) 4 BLH5704 Main Rotor Blade Bolt Set (2): 700 X Blade 700 X: Rotorblattbolzen (2) 5 6 BLH5705 BLH5706 Dampers (4): 700 X Head Block: 700 X Blade 700 X: Dämpfer (4) Blade 700 X: Rotorbl
# Part # 50 BLH5751 51 BLH5752 52 BLH5753 53 54 55 56 57 58 BLH5754 BLH5755 BLH5756 BLH5757 BLH5758 BLH5759 English Deutsch Français Italiano Fin Set: 700 X Tail Rotor Pitch Lever Set: 700 X Tail Rotor Pitch Control Slider Set: 700 X Tail Pitch Slider Yolk: 700 X Tail Rotor Hub: 700 X Tail Rotor Blade Grip: 700 X Tail Bellcrank Mount: 700 X Tail Case Set: 700 X Battery Tray: 700 X Blade 700 X: Finnenset Blade 700 X: Heckrotorpitchhebelset 700 X - Set d’empennages 700 X - Levier de pas d’anticouple
©2013 Horizon Hobby, Inc. Blade, E-flite, Dynamite, Revolution, EC5, Celectra, DSM, DSM2, DSMX, AirWare, ModelMatch and the Horizon Hobby logo are trademarks or registered trademarks of Horizon Hobby, Inc. The Spektrum trademark is used with permission of Bachmann Industries, Inc. BeastX is a registered trademark of Markus Schaack and is used with permission. The Spektrum AR7200BX employs technology exclusively licensed to Horizon Hobby, Inc. from freakware GmbH.