CAR MULTIMEDIA SERIES 530 Enjoy it.
Controls – Device 13 1 12 2 3 11 4 5 6 7 10 8 9 1 DIS button Short press: Adjust the display brightness Long press: Switch off the display With inserted microSD card with navigation data: Short press: Start the navigation In navigation mode: Call up menu of active source Long press: Switch off the display 7 Reset button Access only with open cover Restoring the original factory settings of the device.
Controls – Remote control 15 44 16 43 17 42 18 41 40 F AUDIO button Select playback language (if available on DVD) G EQ button Call up equaliser menu H 19 20 39 21 38 22 37 23 24 36 25 35 26 34 33 32 27 31 30 28 / / / button Navigate in menus/lists Tuning into stations manually ( / ) Calling stored stations ( / ) I OK button Confirm selection J MENU button Call up DVD menu Display the folder/file list K Number buttons 0 - 9 L / RPT button Repeat function M button Delete last ch
Contents Safety notes ................................................................ 5 Symbols used ...........................................................................5 Road safety ................................................................................5 General safety notes ..............................................................5 Declaration of conformity....................................................5 Cleaning notes ...........................................................
Safety notes | Cleaning notes | Disposal notes Safety notes The car sound system was manufactured according to the state of the art and established safety guidelines. Even so, dangers may occur if you do not observe the safety notes in these instructions. These instructions are intended to familiarise you with the most important functions. Detailed information can be found on the Internet under www.blaupunkt.com. • Read these instructions carefully and completely before using the car sound system.
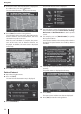
Scope of delivery | Startup Scope of delivery Main menu The scope of delivery includes: • Car sound system • Remote control (incl.
Radio mode Radio mode Start radio mode 쏅 In the main menu, press the [ Radio ] button. The radio playback menu is displayed. Storing stations manually 쏅 Select the desired memory bank with the [ ] button. 쏅 Set the desired station. 쏅 Press one of the memory buttons [ P1 ] - [ P6 ] for approx. 2 seconds to store the current station at the button. The station is stored. Storing stations automatically (Travelstore) Select memory bank Different memory banks and wavebands are available.
Radio mode | Navigation Switching the REG function (regional programmes) on/off Switching priority for traffic announcements on/off Some RDS stations divide their programmes into regional programmes with different contents at certain times. If the REG function is activated, the car sound system changes only to those alternate frequencies of the set station on which the same regional programme is being broadcast. 쏅 Press the [ REG ] button to switch the REG function on or off.
Navigation Starting the navigation Entering a destination 쏅 In the main menu, press [ Navigation ] to start the navigation mode. The navigation menu is displayed. If you start the navigation for the first time, the setup wizard is displayed. Destinations can be entered in different ways: Via the address or as point of interest from the database of points of interest. Points of interest can be sights, museums, stadiums, petrol stations. Initial startup 쏅 Open the navigation menu. 쏅 Press on [ Find ].
Navigation 쏅 If the name of the desired destination is displayed in the address line, press the [ ] button. The selected destination is displayed on the map. 쏅 Press [ Next ] to start the route guidance. The calculation of the route starts. Depending on the distance between start and destination, the route calculation may take some time. After the route calculation is complete, the parameters of the route, such as distance and time, are displayed. In addition, the entire route is displayed on the map.
Navigation Setting route options In the route options, the vehicle type, type of route (quick, short, dynamic) and additional parameters are defined which are required by the device to calculate the route according to your requirements. You define the route options during the initial configuration of the navigation, but you can change them for any route guidance. 쏅 Change the settings, if necessary. 쏅 Press [ Back ] repeatedly until the navigation menu is displayed again.
Navigation | DVD/CD/USB/microSDHC media playback The map settings are displayed. 쏅 Change the settings, if necessary. 쏅 Press [ Back ] repeatedly until the navigation menu is displayed again. 쏅 쏅 쏅 쏅 Note: You can also change the map settings during the route guidance: During a route guidance, press the [ More ] button. Press [ Map Settings ]. The map settings are displayed. Change the settings, if necessary. Press [ Back ]. The route guidance is displayed again.
DVD/CD/USB/microSDHC media playback USB data carrier This device features a USB port under the cover at the front of the device. 쏅 Briefly touch the touchscreen once to display the playback menu again. The playback menu is shown. Connecting a USB data carrier 쏅 Open the cover 6 underneath the rotary/pushbutton. 쏅 Insert the USB data carrier in the USB socket :. The device automatically switches to USB mode. The data are read, the playback starts with the first media file recognized by the device.
DVD/CD/USB/microSDHC media playback Audio playback from DVD/CD, USB or microSDHC The principles of audio playback (MP3/WMA) from data carriers are identical for all sources. 쏅 Select the desired source via the main menu. The device changes to the desired source and the playback starts. If the playback does not start with the audio playback, 쏅 press the [ ] button to change to the folder/file list. ] button to display all the folders and 쏅 Press the [ files of the data carrier.
DVD/CD/USB/microSDHC media playback Video playback from DVD/CD, USB or microSDHC 쏅 Select the desired source via the main menu. The device changes to the desired source and the playback starts. If the playback does not start with the video playback, 쏅 press the [ ] button to change to the folder/file list. ] button to display all the folders and 쏅 Press the [ files of the data carrier. - Or 쏅 Press the [ ] button to display all the video files of the data carrier.
Bluetooth mode Bluetooth mode Registering Bluetooth devices The Bluetooth® function allows registering cell phones and media playback devices with the car sound system. When you register a cell phone with the car sound system, you can make phone calls with the built-in handsfree function. You can access the lists of dialled numbers and the phone book of the registered cell phone.
Bluetooth mode If a call is coming in, the call menu is displayed. Bluetooth settings In the options menu for Bluetooth®, you can make the basic settings for the Bluetooth® mode. 쏅 Press the [ ] button. The options menu is displayed. [ [ ] Reject a call. ] Answer a call. Audio playback - Bluetooth If an audio streaming device is connected with the car sound system via Bluetooth®, you can play back the music via the car sound system and control the playback.
External audio/video sources | External monitor | Sound settings External audio/video sources AV-IN socket This device features an external AV input for audio and video playback. The AV-IN socket is located under the cover at the front of the device. Danger! Increased risk of injury from connector. In case of an accident, the protruding connector in the AV-IN socket may cause injuries. The use of straight plugs or adapters leads to an increased risk of injury.
Sound settings | Basic settings Equalizer Basic settings You can adjust the equalizer for all sources. 쏅 In the main menu or on the control bar of the current audio source, press the [ ] button. The equalizer menu is displayed. In the settings menu, you can adjust the basic settings for the different functions of the device to your requirements. 쏅 In the main menu, press the [ Settings ] button. The settings menu is displayed, the General submenu is activated.
Basic settings | Useful information Sound The following settings are possible: Subwoofer – Switch subwoofer on/off Subwoofer filter – Make the setting according to the subwoofer used (settings: 80/120/160 Hz). Dynamic sound – Switch dynamic bass on/off Time The following settings are possible: Date – Set the date Clock mode – Selection between 12 and 24-h mode Time – Set the time Auto clock – Switch automatic clock setting on or off with the time data transmitted via RDS.
Connection diagram 21
Appendix This item incorporates copy protection technology that is protected by U.S. patents and other intellectual property rights of Rovi Corporation. Reverse engineering and disassembly are prohibited. Windows® und Windows Media® are registered trademarks of the Microsoft Corporation in the U.S.A. and/or other countries. This product is protected by certain intellectual property rights of Microsoft.
Blaupunkt Europe GmbH Robert-Bosch-Straße 200 D-31139 Hildesheim http://www.blaupunkt.