www.blaupunkt.com Radio CD Madeira CD27 Porto CD27 7 647 492 310 7 647 482 310 Bedienungsanleitung Operating instructions Mode d’emploi Istruzioni d’uso Gebruiksaanwijzing Bruksanvisning Instrucciones de manejo Instruções de serviço Betjeningsvejledning Instrukcja obsługi Návod k obsluze Návod na obsluhu 01MadeiraPortoCD27_de.indd 1 14.12.
1 15 3 14 4 13 5 12 6 11 10 7 8 9 2 01MadeiraPortoCD27_de.indd 2 14.12.
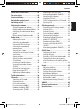
Controls 1 button to remove the control panel (release panel) 2 Button to switch the device on/off and operate the volume mute feature. 3 Volume control 4 CD tray 5 LCD display 6 Arrow buttons 7 button to eject the CD from the device. 8 ESC button Confirm menu item and return to the display of the MENU or AUDIO main level. 9 DIS button Short press: Briefly displays alternative display contents (e.g. time). Long press: Changes display contents. ; AUDIO button Sets bass, treble, balance and fader.
About these instructions .................. 28 For your safety ................................ 29 Scope of delivery ............................. 30 Detachable control panel ................. 30 Switching on/off .............................. 31 Adjusting the volume ....................... 32 Setting the power-on volume ........... 32 Quickly reducing the volume (Mute) ... 33 Switching the confirmation beep on/off .......................................... 33 Muting during telephone mode ........
About these instructions About these instructions Use as directed These instructions contain important information to easily and safely install and operate the device. • Read these instructions carefully and completely before using the device. • Keep the instructions at a location so that they are always accessible to all users. • Always pass on the device to third parties together with these instructions. In addition, observe the instructions of the devices used in conjunction with this device.
For your safety The device was manufactured according to the state of the art and established safety guidelines. Even so, dangers may occur if you do not observe the safety notes in these instructions: If you are installing device yourself You may only install the device yourself if you are experienced in installing car sound systems and are very familiar with the electrical system of the vehicle. For this purpose, observe the installation instructions at the end of these instructions.
Scope of delivery Detachable control panel Scope of delivery Detachable control panel The scope of delivery includes: 1 Car sound system 1 Support frame 2 Disassembly bar 1 Operating instructions Theft protection Optional equipment (not part of the scope of delivery) Use only accessories approved Blaupunkt. by Remote control The steering wheel and/or handheld remote control allows you to access the most important functions of your car sound system safely and conveniently.
Detachable control panel Attaching the control panel 쏅 Push the control panel into the guides of the device from the left to the right. 쏅 Carefully push on the left side of the control panel until it clicks into place. Note: When attaching the control panel, make sure you do not push on the display. If the device was still switched on when you detached the control panel, it will automatically switch on with the last setting activated (radio, CD, CD changer or AUX) when the panel is replaced.
Switching on/off Note: If the vehicle ignition was switched off prior to inserting the CD, you must switch in on first with the button 2 to start the playback. Switching the device on/off using the detachable control panel 쏅 Detach the control panel. The device switches off. 쏅 Attach the control panel again. The device switches on. The last setting (radio, CD, CD changer or AUX) is reactivated. Adjusting the volume Adjusting the volume You can adjust the volume in increments from 0 (off) to 66 (maximum).
Adjusting the volume Quickly reducing the volume (Mute) You can quickly reduce the volume to a preset level (Mute). 쏅 Briefly press the button 2. "MUTE" appears on the display. Cancelling mute To return to your previously set volume level, 쏅 briefly press the button 2 again. Adjusting the mute level You can adjust the mute level. 쏅 Press the MENU button :. 쏅 Press the or button 6 repeatedly until "MUTE LVL" appears on the display. 쏅 Adjust the mute level using the buttons 6.
Radio mode Radio mode Adjusting the tuner To ensure proper functioning of the tuner, the device must be set for the region in which it is being operated. You can select among Europe (EUROPE), America (USA), South America (S-AMERICA), and Thailand (THAI). The tuner is factory-set to the region in which it was sold. If you experience problems with your radio reception, please check this setting. The radio functions described in these operating instructions refer to the tuner setting EUROPE.
Switching REGIONAL on/off 쏅 Press the MENU button :. 쏅 Press the or button 6 repeatedly until "REG" appears on the display. "OFF" or "ON" is displayed alongside "REG". To switch REGIONAL on/off, 쏅 press the or button 6. 쏅 Press the MENU button :. Selecting the waveband/memory bank This device can receive programmes broadcast over the FM frequency range as well as the MW and LW (AM) wavebands.
Radio mode "SENS HI6" means that the tuner is set to the highest sensitivity setting. "SENS LO1" means it is set to the lowest sensitivity setting. 쏅 Set the desired sensitivity level using buttons 6. the When you have finished making your changes, 쏅 press the MENU button :. Note: You can set different sensitivity levels for FM and MW or LW (AM). Storing stations Storing stations manually 쏅 Select the desired memory bank (FM1, FM2, FMT) or one of the wavebands (MW or LW). 쏅 Tune into the desired station.
When you have finished making your changes, 쏅 press the MENU button : twice. Note: The defined scanning time is also applied by the system to scanning carried out in CD and CD changer mode. Programme type (PTY) Besides transmitting the station name, some FM stations also provide information on the type of programme that they are broadcasting. Your car radio can receive and display this information.
Radio mode Selecting a programme type and starting seek tuning 쏅 Press the or button 6. The current programme type appears on the display. 쏅 If you want to select another programme type, you can do so by pressing the or button 6 whilst this display is visible. The selected programme type appears briefly on the display. 쏅 Press the or button 6 to start seek tuning. The radio will then tune into the next station that it finds that corresponds to your selected programme type.
Traffic information CD mode You can use this device to play standard audio CDs, CD-Rs and CD-RWs with a diameter of 12 or 8 cm. Setting the volume for traffic announcements 쏅 Press the MENU button :. 쏅 Press the or button 6 repeatedly until "TA VOLUME" appears on the display. but쏅 Adjust the volume using the tons 6. When you have finished making your changes, 쏅 press the MENU button : twice.
CD mode Notes: • The CD symbol indicates that a CD is located in the drive. A border surrounding the CD symbol indicates that CD is selected as audio source. • If the vehicle ignition was switched off prior to inserting the CD, you must switch in on first with the button 2 to start the playback. If a CD is already inserted in the drive, 쏅 press the SRC/ button > repeatedly until "CD" appears on the display. Playback begins from the point at which it was last interrupted.
Cancelling REPEAT If you want to cancel the repeat function, 쏅 press the 4 RPT button : again. "RPT OFF" appears briefly on the display and the RPT symbol disappears. Normal playback is then resumed. Interrupting playback (PAUSE) 쏅 Press the button 3 <. "PAUSE" appears on the display. Cancelling pause 쏅 During the pause, press the button 3 <. Playback is continued.
CD-changer mode CD-changer mode Note: Information on handling CDs, inserting CDs and operating the CD changer can be found in the operating instructions supplied with your CD changer. Switching to CD-changer mode 쏅 Press the SRC/ button > repeatedly until "CHANGER" appears on the display. A border appears around the CD changer symbol. The device starts playing the first CD that the CD changer detects. Selecting CDs To move up or down to another CD, 쏅 press the or button 6 once or several times.
CD-changer mode To play the tracks on the current CD in random order, 쏅 briefly press the 5 MIX button <. "MIX CD" appears briefly and MIX lights up on the display. To play the tracks on all inserted CDs in random order, 쏅 press and hold down the 5 MIX button < for longer than two seconds. "MIX ALL" appears briefly and MIX lights up on the display. section entitled "Setting the scanning time" in the "Radio mode" chapter. Interrupting playback (PAUSE) 쏅 Press the button 3 <. "PAUSE" appears on the display.
CLOCK time CLOCK time Displaying the time To briefly display the time, 쏅 press and hold the SRC/ button > until the time appears on the display. Setting the time To set the time, 쏅 press the MENU button :. 쏅 Press the or button 6 repeatedly until "CLOCK SET" appears on the display. 쏅 Press the button 6. The time appears on the display. The hours flash and can be adjusted. buttons 쏅 Adjust the hours with the 6. Once the hours are set, 쏅 press the button 6. The minutes flash.
Sound You can adjust the sound settings (bass and treble) separately for each source (radio, CD, CD changer or AUX). The volume distribution settings (balance and fader) apply to all the audio sources (except for traffic announcements). Fader and balance can be adjusted for traffic announcements (TA) only during a traffic announcement. Note: If bass and treble allow only a limited adjustment, set the equaliser presetting to EQ OFF. For further details, please read the section "Equaliser presets".
Sound X-Bass Equalizer presettings (Presets) X-BASS This device features an equalizer in which the settings for the music genres "ROCK", "POP" and "CLASSIC" are already programmed. To select an equalizer preset, 쏅 Press the AUDIO button ;. "BASS" appears on the display. 쏅 Press the button 6 repeatedly until "POP", "ROCK", "CLASSIC" or "EQ OFF" appears on the display. 쏅 Press the or button 6 to select one of the presets or select "EQ OFF" to switch off the equalizer.
External audio sources Instead of the CD changer, you can also connect another external audio source equipped with a line output. Audio sources can, for example, be portable CD players, MiniDisc players or MP3 players. If you want to connect an external audio source, you will need an adapter cable. You can obtain this cable (Blaupunkt no.: 7 607 897 093) from your authorised Blaupunkt dealer. Note: If no CD changer is connected, the AUX input must be switched on in the menu.
Bitte den ausgefüllten Gerätepass sicher aufbewahren! Please keep the filled-in radio pass in a safe place! Prière de conserver soigneusement la carte d’autoradio remplie ! Tenete per favore il libretto di apparecchio, debitamente riempito, in un posto sicuro! Bewaar de ingevulde apparaatpas op een veilige plaats! Vänligen förvara ifyllt apparatpass på säker plats! ¡Favor guardar el documento del aparato debidamente llenado en un lugar seguro! Por favor, guardar o cartão preenchido do aparelho num lugar segu
Germany Austria Belgium Denmark Finland France Great Britain Greece Ireland Italy Luxembourg Netherlands Norway Portugal Spain Sweden Switzerland Czech. Rep.