Radio / Cassette Boston C31 Dresden C31 Dublin C31 Cleveland DJ31 Madison DJ31 Operating instructions
17 16 SVENSKA NEDERLANDS 3 4 15 5 6 14 7 8 13 9 ESPAÑOL 1 PORTUGUÊS 10 11 ITALIANO FRANÇAIS 2 12 3 ENGLISH DEUTSCH
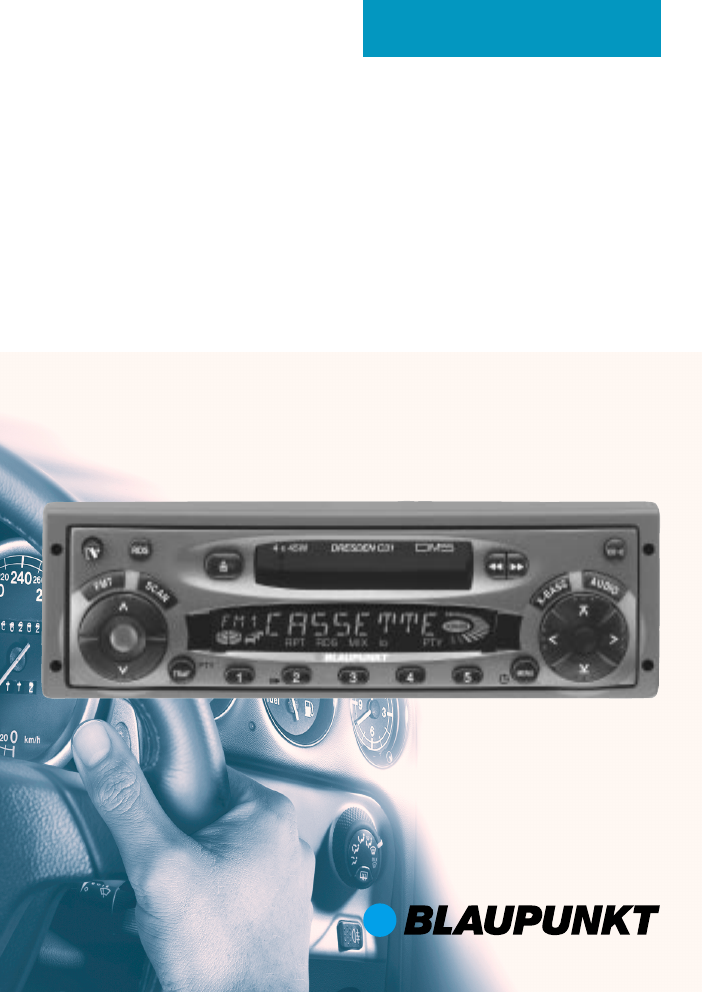
5 6 7 8 > ? @ A ENGLISH FRANÇAIS < = ITALIANO ; NEDERLANDS 4 : X-BASS button, to activate the X-Bass function. CD•C button, to select radio, cassette, CD changer (if connected) and AUX sources AUDIO button, to adjust the bass, treble, balance and fader settings.
TABLE OF CONTENTS Notes and accessories .......... 27 Cassette mode ....................... 38 Road safety ................................... 27 Installation ..................................... 27 Accessories .................................. 27 International telephone information . 27 Cassette Play ................................ 38 Changing Direction of Play ............ 38 Fast Winding ................................. 38 Switching Radio Monitor On / Off ........................................
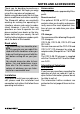
Installation If you want to install your car radio yourself, please read the installation and connection instructions that follow these operating instructions. International telephone information If you have any questions regarding the operation of your car radio or if you require further information, please do not hesitate to call us! The information hotline numbers are printed on the last page of these instructions.
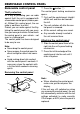
REMOVABLE CONTROL PANEL button 1. Removable control panel ➮ Press the Theft protection The control panel locking mechanism opens. As a way of protecting your car radio against theft, the unit is equipped with a removable control panel (release panel). Without this control panel, the car radio is worthless to a thief. Protect you car radio against theft by taking the control panel with you every time you leave your vehicle. Do not leave the control panel in your vehicle - not even in a hiding place.
➮ To do so, press button A. ➮ Gently insert the cassette with the open side facing towards the right into the drive until you feel some resistance. The cassette will be drawn automatically into the drive. You must not hinder or assist the drive as it draws in the cassette. The unit switches on. Cassette playback begins.
ADJUSTING THE VOLUME Adjusting the volume The system volume can be adjusted in steps from 0 (off) to 66 (maximum). To increase the system volume, ➮ press the button @. To decrease the system volume, ➮ press the button @. Setting the power-on volume You can set the unit's default power-on volume. ➮ Press the MENU button =. ➮ Keep pressing the or button < until “ON VOL” appears in the display. ➮ Set the power-on volume using the and buttons <.
ADJUSTING THE VOLUME DEUTSCH Configuring the confirmation beep ENGLISH For some functions you will hear a confirmation beep if you keep a button pressed for longer than two seconds. For instance, after storing a radio station to a station button you will hear a confirmation beep.You can configure the beep. FRANÇAIS ➮ Press the MENU button =. ➮ Keep pressing the or button ITALIANO < until “BEEP OFF” or “BEEP ON” appears in the display.
RADIO MODE Radio mode Switching REG on/off This unit is equipped with an RDS radio receiver. Many of the receivable FM stations transmit a signal that not only carries the programme but also additional information such as the station name and programme type (PTY). The station name appears in the display as soon as it is received. ➮ Press the MENU button =. ➮ Keep pressing the or button Switching to radio mode < until “REG” appears in the display. “OFF” or “ON” is displayed alongside “REG”.
or button <. The unit tunes into the next receivable station. Tuning into stations manually You can also tune into stations manually. ➮ Press the or button <. Note: You can only tune into stations manually if the RDS function is deactivated. ● Browsing through broadcasting networks (only FM) If a radio station provides several programmes, you have the option of browsing through its so-called “broadcasting network”. or button < to move to the next station on the broadcasting network.
RADIO MODE ➮ Press one of the station buttons 1 5 > for longer than two seconds to store the station to that button. Storing stations automatically (Travelstore) You can automatically store the five stations with the strongest reception in the region (only for FM). The stations are stored in the FMT memory. Note: ● Stations that were previously stored in this memory are deleted in the process. ➮ Keep the BAND (TS) button 2 or FMT button 2 pressed for longer than two seconds.
RADIO MODE Switching PTY on/off ➮ Keep the TRAF (PTY) button ? pressed until “PTY” appears in or disappears from the display. The programme type appears briefly in the display when you switch PTY on. Or ➮ Press one of the buttons 1 - 5 > to select a programme type that is stored on one of these buttons. The selected programme type is displayed briefly. or button < to start seek tuning. The next station corresponding to your selected programme type will then be tuned into.
RADIO MODE Displaying scrolling text Selecting the PTY language You can set the language in which the programme type is displayed. ➮ Press the MENU button =. ➮ Keep pressing the or button < until “PTY LANG” appears in the display. ➮ Press the or button < to switch between German, English and French. When the required language appears in the display, until “NAME FIX” appears in the display. To allow scrolling text to be displayed again, ➮ press the MENU button = twice.
Traffic announcement priority is active when a traffic jam symbol lights up in the display. ENGLISH ➮ Set the volume using the and buttons <. When you have finished making your changes, ➮ press the MENU button = twice. Note: ● You can also adjust the volume during a traffic announcement for the duration of the announcement by using the volume control @. FRANÇAIS < until “TAVOLUME” appears in the display. ITALIANO Switching traffic information priority on/off ➮ Press the TRAF button ?.
CASSETTE MODE Cassette mode Cassette Play If there is no cassette in the device ➮ Insert the cassette into the cassette slot with the open side to the right. The cassette starts playing with the side that is facing upwards. The cassette symbol shows in the display. ● If there is already a cassette in the device ➮ Press the CD•C button : until “TAPE” appears in the display. The cassette is played in whichever direction was last selected.
Selecting a CD To move up/down from one CD to another, ➮ press the or several times. button < once or Selecting tracks To move up/down from one track to another on the current CD, ➮ press the or several times. button < once or Quick track selection To quickly select tracks backwards or forwards, / buttons < pressed until fast reverse / forward track selection begins. ➮ keep one of the 39 DEUTSCH ENGLISH FRANÇAIS until “CHANGER” appears in the display.
CD CHANGER MODE Fast searching (audible) To fast search backwards or forwards, buttons < pressed until fast reversing / forwarding begins. ➮ keep one of the Repeating individual tracks or whole CDs (REPEAT) If you wish to repeat the current track, ➮ briefly press button 3 (RPT) >. “RPT TRCK” appears briefly and RPT lights up in the display. If you wish to repeat the current CD, ➮ press button 3 (RPT) > again. “RPT DISC” appears briefly and RPT lights up in the display.
To display the time, Cancelling pause ➮ keep the MENU ( ) button = Changing the display Setting the time manually To set the time, To switch between the track number / CD number display and the track number / playing time display, ➮ press the MENU button =. ➮ Keep pressing the or button ➮ press the MENU button =. ➮ Keep pressing the or button < until “CDC DISP” appears in the display. ➮ Press the button <. The current setting is displayed.
CLOCK - TIME Selecting 12/24-hour clock mode ➮ Press the MENU button =. ➮ Keep pressing the or button < until “24 H MODE” or “12 H MODE” appears in the display. or button < to switch between the modes. When you have finished making your changes, ➮ Press the ➮ press the MENU button = twice. Displaying the time continuously when the unit is off and the ignition is on To display the time when the unit is off and the vehicle ignition is on, ➮ press the MENU button =.
You can adjust the sound and volume distribution settings separately for each source (radio, cassette, CD changer and AUX). To adjust the left/right volume distribution (balance), Adjusting the bass settings ➮ Keep pressing the ➮ press the AUDIO button ;. ➮ press the AUDIO button ;. ITALIANO or button < to adjust the bass. When you have finished making your changes, ➮ Press the or button < to adjust the balance (right/left).
X-BASS EXTERNAL AUDIO SOURCES X-BASS External audio sources The X-BASS feature can be used to boost the bass at low volume levels. Instead of connecting a CD changer, you can connect another audio source equipped with a line output. The audio source, for example, can be a portable CD player, MiniDisc player or MP3 player. The AUX input must be activated in the menu. If you want to connect an external audio source, you will need an adapter cable (Blaupunkt no.: 7 607 897 093).
Output power: 4 x 25 watts sine in accordance with DIN 45 324 at 14.4 V 4 x 45 watts max. power Tuner Frequency ranges: FM: 87.