Radio / CD / MP3 Acapulco MP54 US Casablanca MP54 US 7 644 275 310 7 644 295 310 Operating instructions http://www.blaupunkt.
Open here 2
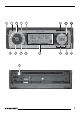
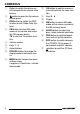
ITALIANO FRANÇAIS 5 15 14 13 12 8 11 10 9 ENGLISH 7 NEDERLANDS 6 17 SVENSKA 4 ESPAÑOL 16 3 PORTUGUÊS 2 DANSK 1 3 DEUTSCH
CONTROLS 1 2 3 4 5 6 7 8 9 4 Button to switch the device on/ off and operate the volume mute feature button to open the flip-release control panel RDS button to switch the RDS function on/off (Radio Data System). FM button to select FM radio mode as the source and select the FM memory banks. TS to start the Travelstore function Volume control Keys 1 - 3 Arrow buttons DIS•ESC button to change the display content and close menus. MENU button to open the basic settings menu.
Setting the power-on volume ......... 10 Instantaneously decreasing the volume (mute) ................................ 10 Telephone audio / navigation audio .. 10 Setting the volume of the confirmation beep .......................... 11 Automatic sound ........................... 11 Radio mode ............................ 12 Switching to radio mode ................ 12 RDS function (only FM) ................. 12 Selecting the waveband / memory bank .................................
CONTENTS CD-changer mode ................. 27 Equalizer ................................ 34 Switching to CD-changer mode ..... 27 Selecting CDs ............................... 27 Selecting tracks ............................ 27 Fast searching (audible) ................ 27 Changing the display ..................... 28 Repeating individual tracks or whole CDs (REPEAT) .................... 28 Random track play (MIX) ............... 28 Scanning all tracks on all CDs (SCAN) ....................................
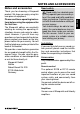
NOTES AND ACCESSORIES DEUTSCH Only use accessories approved by Blaupunkt. Remote control The optional RC08 or RC10 remote control allows you to access the most important functions of your car sound system safely and conveniently from your steering wheel. You cannot switch the device on/off using the remote control. Amplifiers You can use all Blaupunkt and Velocity amplifiers.
NOTES AND ACCESSORIES CD changers You can connect the following Blaupunkt CD changers: CDC A 08, IDC A 09 and CDC A 03. Compact Drive MP3 You can connect the Compact Drive MP3 instead of a CD-changer in order to play MP3 music tracks. If you decide to connect a Compact Drive MP3, you will first need to use a computer to store the MP3 music tracks on the Microdrive™ hard disk that is inside the Compact Drive MP3.
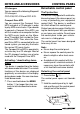
CONTROL PANEL vice’s guides that are positioned on the left and right at the lower edge of the housing. Push the control panel carefully into the bracket until it clicks into place. ➮ Flip up the control panel and carefully press it into the device until it clicks into place. Switching the device on/off using the detachable control panel ➮ Detach the control panel. The device switches off automatically after approx. one minute. ➮ Attach the control panel again. The device switches on.
ADJUSTING THE VOLUME Adjusting the volume You can adjust the volume in steps from 0 (off) to 50 (maximum). To increase the volume, ➮ turn the volume control 5 clockwise. To decrease the volume, ➮ turn the volume control 5 anticlockwise. Setting the power-on volume You can set the default volume level at which the device plays when it is switched on. ➮ Press the MENU button 9. ➮ Press the or button 7 repeatedly until “VOLUME MENU” appears in the display.
Note: ● You can use the volume control 5 to adjust the volume of telephone calls and navigation announcements whilst you are listening to them. the volume menu. or button 7 repeatedly until “BEEP VOL” appears in the display. ➮ Press the ➮ Adjust the volume using the buttons 7. “0” means that the beep is deactivated, “6” means that the maximum beep volume is set.
RADIO MODE ADJUSTING THE VOLUME ➮ Press the MENU button 9. ➮ Press the button 7 repeatedly until “VOLUME MENU” appears in the display. ➮ Press the OK button : to display the volume menu. or button 7 repeatedly until “AUTO SOUND” appears in the display. ➮ Set the volume adjustment level buttons 7. (0 - 5) using the When you have finished making your changes, ➮ press the MENU button 9.
Setting the sensitivity of station seek tuning Selecting the waveband / memory bank You can use this device to receive programmes broadcast over the FM and AM wavebands. There are three memory banks (FM1, FM2 and FMT) for the FM waveband and two memory banks (AM and AMT) for the AM waveband. Six stations can be stored in each memory bank.
RADIO MODE Storing stations Storing stations manually ➮ Select the memory bank that you want: FM1, FM2, FMT or AM, AMT. ➮ Tune into the station that you want. ➮ Press and hold down one of the station buttons 1 - 3 6 or 4 - 6 ; for longer than two seconds to assign the station to that button. Storing stations automatically (Travelstore) You can automatically store the six stations offering the best reception in the region. The stations are stored in the FMT or AMT memory bank.
RADIO MODE Selecting a programme type and starting seek tuning ➮ press the MENU button 9. ➮ Press the Note: ● The scanning time that you set is also applied by the system to scanning carried out in CD/MP3 mode and CD-changer mode. The programme type that you selected last appears in the display. ➮ Press the OK button : to display the tuner menu. “PTY” and the current setting appear in the display. or button 7 to start seek tuning.
RADIO MODE Assigning a programme type to a station button Switching bandwidth during interference (SHARX) ➮ Select a programme type using the The SHARX function allows you to largely avoid interference caused by neighbouring radio stations (FM only). Switch on the SHARX function if the density of radio stations in your area is very high. or button 7. ➮ Press and hold down the station button 1 - 3 6 or 4 - 6 ; that you want for longer than two seconds.
➮ Press the OK button : to display the tuner menu. or button 7 repeatedly until “STATION NAME” appears in the display. ➮ Press the ➮ Press the button 7. You will now enter editing mode. The currently set name is displayed and the first text input position flashes. ENGLISH ➮ Press the MENU button 9. “TUNER MENU” appears in the display. ➮ Press the OK button : to display the tuner menu. or button 7 repeatedly until “R-TEXT” appears in the display. ➮ Press the or button 7 to switch radio text on/off.
CD MODE CD mode You can use this device to play standard audio CDs, CD-Rs and CD-RWs with a diameter of 12 cm. To avoid problems when playing CDs, you should not burn CDs at speeds greater than 16speed. Besides being able to play audio CDs on this device, you can also play CDs containing MP3 music files. For further information, please read the chapter entitled “MP3 mode”. Risk of severe damage to the CD drive! CD singles with a diameter of 8 cm and non-circular contoured CDs (shape CDs) must not be used.
Note: ● You can set the scanning time. For further information, please read the section entitled “Setting the scanning time” in the “Radio mode” chapter. Cancelling SCAN and continuing listening to a track ➮ To stop scanning, press the OK button :. The currently scanned track will then continue to be played normally. Repeating tracks (REPEAT) If you want to repeat a track, ➮ press the 5 RPT button ;. “RPT TRK ON” appears briefly in the display and the RPT symbol lights up.
CD MODE Note: ● In the menu you can configure whether you want to display the CD text or the CD name. For further information, please read the following section entitled “Displaying CD text”. ● CD text can only be displayed if the appropriate information is contained on the CD. The CD name can only be displayed if you have already named the CD. For further information, please read the section entitled “Naming CDs”.
Deleting a CD name ➮ Listen to the CD whose name you want to delete. ➮ Press the MENU button 9. ➮ Press the or button 7 repeatedly until “VARIOUS MENU” appears in the display. ➮ Press the OK button :. ➮ Press the or button 7 repeatedly until “CD NAME EDIT” appears in the display. ➮ Press the OK button :. ➮ Press and hold down the MENU ➮ Press the OK button :. ➮ Press the or button 7 repeatedly until “CD NAME EDIT” appears in the display. ➮ Press the OK button :.
CD MODE Ejecting a CD ➮ Press the button 2. The flip-release panel opens out towards you. ➮ Press the eject button A next to the CD compartment. The CD is ejected. ➮ Remove the CD and close the control panel. Note: ● If a CD is ejected, the drive will automatically draw it back in again after 10 seconds. ● You can also eject CDs whilst the device is switched off or whilst another audio source is activated.
T r a c k s ¥ F i l e s You can name each directory using a PC. The device is capable of displaying the directory name. Name the directories and tracks/files using your CD burner software. The software’s instruction manual will provide details on how to do this. Notes: To ensure uninterrupted playback, ● do not try changing the file extension to “.MP3” of any files other than MP3 files and then attempt to play them! The device will ignore these invalid files during playback.
MP3 MODE ● Do not use mix-mode CDs containing both CD-audio tracks and MP3 tracks. If you try playing a mixmode CD, the device will only play the CD-audio tracks. Switching to MP3 mode MP3 mode is activated in the same way as normal CD mode. For further information, please read the section entitled “Switching to CD mode” in the “CD mode” chapter. Configuring the display Configuring the default display You can display various types of information on the current track: 1.
press one of the / buttons 7 repeatedly until the directory is shown in the top line of the display and then press the OK button ;. The selected directory opens and the first track starts playing. The tracks contained in the directory are displayed in browse mode. Selecting tracks Selecting tracks/files using the arrow buttons (Normal, info, track and dir and clock mode) To move up or down to another track/ file in the current directory, or button 7 once or several times.
MP3 MODE Cancelling MIX To cancel MIX, ➮ briefly and repeatedly press the 4 MIX button ; until “MIX OFF” appears in the display. The MIX symbol disappears. Scanning tracks – SCAN (not in MP3 browse mode) You can scan (briefly play) all the tracks on the CD. ➮ Press and hold down the OK button : for longer than two seconds. The next track will then be scanned. “SCAN” and the selected display mode appear alternately in the display (see “Configuring the display”). Note: You can set the scanning time.
edly until “CDC” appears in the display. The device starts playing the first CD that the CD changer detects. ➮ press the MENU button 9. Selecting CDs ➮ briefly press the 1 SCL button 6. To move up or down to another CD, ➮ press the or several times. button 7 once or Note: ● The device will ignore empty CD slots in the changer and slots containing invalid CDs. Selecting tracks To move up or down to another track on the current CD, ➮ press the or several times.
CD CHANGER MODE Changing the display You can choose from various display options in CD-changer mode: ● “NORMAL MODE”: First line: Track number Second line: CD number / CD name and playing time ● “CLOCK MODE”: First line: Track number. Second line: CD number / CD name and clock time ● “MINIMAL MODE”: First and second line: Track number. To switch between the display options, ➮ press the DIS•ESC button 8. In the menu you can choose to display the CD name (if available) instead of the CD number.
Note: ● You can set the scanning time. For further information, please read the section entitled “Setting the scanning time” in the “Radio mode” chapter. Pausing playback (PAUSE) ➮ Press the 6 button ;. “PAUSE” appears in the display. Cancelling pause button ; while in pause mode. Playback is resumed. ➮ Press the 6 ➮ Listen to the CD that you want. ➮ Press the MENU button 9. ➮ Press the or button 7 repeatedly until “VARIOUS MENU” appears in the display. ➮ Press the OK button :.
CD CHANGER MODE Deleting a CD name ➮ Listen to the CD whose name you want to delete. ➮ Press the MENU button 9. ➮ Press the or button 7 repeatedly until “VARIOUS MENU” appears in the display. ➮ Press the OK button :. ➮ Press the or button 7 repeatedly until “CD NAME EDIT” appears in the display. ➮ Press and hold down the MENU button 9. After four seconds you will hear a beep and “DELETE NAME” appears in the display. ➮ Let go of the MENU button 9. The CD name will be deleted.
➮ Press the OK button :. ➮ Press the or button 7 repeatedly until “CLOCK AUTO” or “CLOCK MANUAL” appears in the display. ➮ Select the “CLOCK AUTO” setting or button 7. ➮ Press the MENU button 9. The menu appears again. Setting the clock manually To set the clock time manually, ➮ press the MENU button 9. ➮ Press the or button 7 repeatedly until “CLOCK MENU” appears in the display. button 7. The minutes flash. ➮ Set the minutes using the ENGLISH FRANÇAIS ➮ press the / buttons 7.
CLOCK TIME Displaying the time continuously when the device is off and the ignition is on To display the time when the device is off and the vehicle ignition is on, ➮ press the MENU button 9. ➮ Press the or button 7 repeatedly until “CLOCK MENU” appears in the display. ➮ Press the OK button :. ➮ Press the or button 7 repeatedly until “OFF CLOCK OFF” or “OFF CLOCK ON” appears in the display. or button 7 to switch between the ON/OFF settings.
➮ Press the AUDIO button > to close the menu or press the / button 7 to make further changes to the settings. Adjusting the front/rear volume distribution (fader) To adjust the front/rear volume distribution (fader), ➮ press the AUDIO button >. “BASS” appears in the display. or button 7 repeatedly until “FADER” appears in the display. ➮ Press the or button 7 to adjust the fader (front/rear).
EQUALIZER Equalizer The Casablanca MP54 is fitted with a digital DEQ Max equalizer. The Acapulco has a DEQ Max EX equalizer. This means you have three 5-band equalizers, six sound presets and seven vehicle presets at your disposal. You can also configure the EQ1 - EQ3 equalizers manually. The Acapulco MP54 additionally allows you to calibrate an equalizer automatically. You can obtain the calibration microphone necessary for this from accessory retailers.
edly until “MANUAL EQ” appears in the display. ➮ Press the OK button :. ➮ Press the or button 7 repeatedly until the equalizer that you want to calibrate (“USER EQ1”, “USER EQ2” or “USER EQ3”) appears in the display. ➮ Press the OK button : twice. ➮ Press the ESC button 8. ➮ Press the or button 7 repeatedly until “AUTO EQ” appears in the display. 35 ENGLISH FRANÇAIS ITALIANO NEDERLANDS SVENSKA ➮ press the DEQ button ?.
EQUALIZER ➮ Press the OK button :. A countdown is shown in the display. Afterwards you will hear a test sound and calibration begins. Note: Follow the instructions shown in the display during calibration! Manually adjusting the equalizer Notes on adjusting the settings We recommend you use a CD that you are familiar with for making changes to the settings. Before adjusting the equalizer, set the sound and volume distribution settings to zero and deactivate X-BASS.
EQUALIZER ENGLISH DEUTSCH Note: ● Please note that you can boost or reduce one frequency in each equalizer band. Proceed in the way described above with all the equalizer bands that you want to adjust. ➮ Press the OK button : or the ITALIANO FRANÇAIS DEQ button ? to close the menu. The settings are saved. Dirty bass Booming sound Unpleasant pressure Reduce the lower mid level with Frequency: 400 Hz Gain: approx. -4 dB Sound very much in the foreground, aggressive, no stereo effect.
ADJUSTING THE DISPLAY SETTINGS Adjusting the display settings Switching the bar graph on/off You also have the option of switching off the bar graph in the bottom line of the display. ➮ Press the MENU button 9. ➮ Press the or button 7 repeatedly until “VARIOUS MENU” appears in the display. ➮ Press the OK button :. ➮ Press the or button 7 repeatedly until “BARGRAPH” appears in the display alongside the current setting (“ON” or “OFF”). or button 7 to switch between the ON and OFF settings.
edly until “DISPLAY MENU” appears in the display. edly until the colour that you want is displayed. When you have finished making your changes, or button 7 to adjust the viewing angle. When you have finished making your changes, ➮ Press the ➮ press the MENU button 9.
ADJUSTING THE DISPLAY SETTINGS or button 7 repeatedly until the setting that you want is displayed. ➮ Press the or button 7 to move the selection marker to the position after the other colours. ➮ Press the ➮ Adjust the other colour components to suit your preferences. When you have finished making your changes, ➮ press the OK : button and then the MENU button 9. The settings are saved.
FRANÇAIS Note: ● If the AUX input is switched on, you can select it by pressing the SRC button @. ENGLISH ➮ press the MENU button 9. ITALIANO In addition to the CD changer, you can also connect another external audio source equipped with a line output. If no CD changer is connected to the device, you can connect two external audio sources. Audio sources can, for example, be portable CD players, MiniDisc players or MP3 players. The AUX input must be activated in the menu.
SPECIFICATIONS Specifications Amplifier Output power: 4 x 18 watts sine at 14.4 V and 1% distortion factor at 4 ohms. 4 x 26 watts sine in accordance with DIN 45324 at 14.4 V at 4 ohms. 4 x 50 watts max. power Tuner Wavebands: FM : MW : LW : 87.5 - 108 MHz 531 - 1 602 kHz 153 - 279 kHz FM frequency response: 35 - 16,000 Hz CD Frequency response: 20 - 20,000 Hz Pre-amp out 4 channels: 4V Input sensitivity AUX input: 2 V / 6 kΩ Tel.
Service numbers / Numéros du service après-vente / Números de servicio / Número de serviço Country: Phone: Fax: WWW: http://www.blaupunkt.