
Operation Manual


Working with the map | Manage
27
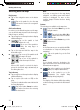
Quick Menu
In the Quick Menu make the settings which are
often used during navigation.
Tap on the symbol to go to the Quick
Menu.
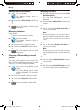
Note:
If you have activated the button Quick Menu,
the respective button is marked.
Adjust the volume control in order to change
the volume for navigation announcements.
Tap on the symbol in order to
switch between the day and night
views.
Tap on the symbol to activate the
route record (ticked) or to
deactivate it (not ticked).
Tap on the symbol to fade the 3D
objects in or out.
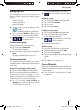
Note:
3D objects such as important
buildings and POIs can only be
displayed if they are included in
the digital map.
Tap on the symbol in order to
select the speed profi le.
The route will be recalculated if
necessary.
Tap on the button GPS to display the GPS
reception.
쏅
쏅
쏅
쏅
쏅
쏅
쏅
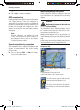
Manage
In the Manage menu you can manage different
route options, your user data as well as the
favourites and last destinations.
How you work on POIs and symbol as well as
changing groups are described in the chapter
"Managing POIs".
The chapter "Recording a route*" describes how
you record, reproduce and export routes on to
memory cards.
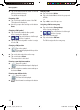
Changing stored routes*
Routes which you have created and stored can be
renamed and deleted.
Tap on the symbol in the navigation
menu.
The Manage menu is displayed.
Select in the menu Manage on the
symbol.
The Saved Routes menu is displayed.
The saved routes are listed.
Tap on the button to leaf
through the menu.
Tap in the list on a button in order to rename
the desired route.
The keyboard is displayed.
Give it a new name and tap on the button
Done.
Tap on the button to delete a route.
-or-
Tap on the button Clear All to delete all the
saved routes.
In both cases a query is displayed.
Tap on the button Yes to delete the route, or
all routes.
-or-
Tap on No to cancel the process.
쏅
쏅
쏅
쏅
쏅
쏅
쏅
쏅
쏅
TP100EE_lo_GB_193.indd 27TP100EE_lo_GB_193.indd 27 29.08.2008 13:31:30 Uhr29.08.2008 13:31:30 Uhr