Aluminum PrivacyBlind owner's handbook
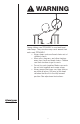
WARNING Young children can STRANGLE in cord and bead chain loops. They can also wrap cords around their necks and STRANGLE. • Always keep cords and bead chains out of children’s reach. • Move cribs, playpens, and other furniture away from cords and bead chains. Children can climb furniture to get to cords. • Do not tie cords together. Make sure cords do not twist together and create a loop.
INSTALLATION INSTRUCTIONS Step 1.
Outside Mounting - Inside Mounting For Inside Mounting: Place a bracket on both ends of the head rail Hold the blind in place and make a pencil mark at the rear of each bracket where it contacts the inside of the window frame. Remove the brackets from the head rail and align them with the marks. Attach each bracket using the 11/8” screws, predrill the screw holes using a 5/64" drill bit.
If the blind is fully raised with the slats in the “closed” position, the cord lock might not release when you attempt to lower the blind. If this happens simply rotate the tilt wand such that the slats are in the “open” position and the cord lock will function normally.
Step 8. Adjust Safety Cord Stops WARNING REDUCE RISK OF STRANGULATION TO INFANTS AND TODDLERS. POSITION SAFETY CORD STOPS BEFORE USING BLINDS. Lower blind to maximum desired length and lock into place. Measure the distance from head rail to cord stops. If cord stops are 1 to 6" below the head rail, no further adjustment is needed. If not, loosen but do not untie the knot surrounding the cord stop. Move the cord stop as close to the head rail as possible and tighten knot by pulling firmly on tassel.
REPLACEMENT PARTS In the event that replacement parts are ever needed, you may call: 1-800-264-1190 Please be sure to provide the following information, if possible: • The complete model or catalog number of your product • A description of the product • A description of the part needed Aluminum PrivacyBlind 9