
Specifications
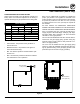


12
Installation
Initial Startup
The following is a check-list to be completed by qualied
personnel prior to turning on the appliance for the rst
time.
• Verify there are no gas leaks, by checking all gas
connections with a soapy water solution. Repair
leaks if necessary. (XR8-G only)
• Verify there are no water leaks to the oven. Repair
leaks if necessary.
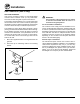
• Verify rack rotation as follows: Open oven doors and
turn the power switch to ON. Close the doors and
enter bake time of two minutes. Press start. Verify
the rack rotates smoothly. Open the doors. Verify
the rack stops square to the door opening. If rack
does not rotate and fan does not circulate, door
switch may be out of adjustment.
With the main burner on, check the following:
• Set the oven temperature to 300ºF. Verify that the
oven comes up to set temperature.
• Set a steam time of 20 seconds. Verify that the
owmeter has enough water to produce 27 GPH
(gallons per hour) when the water solenoid valve is
open. Adjust the oven pressure regulator if needed.
The water pressure gauge, regulator and owmeter
are located behind the right side panel of the oven.
Panel must be removed.
• Verify that the gas inlet pressure is correct. The inlet
pressure can be checked at the pressure tap located
on the gas valve. (XR8-G only)
• Verify that the manifold pressure is correct. The
manifold pressure can be checked at the outlet pres-
sure tap located on the burner gas manifold elbow
located on top of the oven. (XR8-G only)
• If the above pressure readings are set to the recom-
mended pressure requirements, allow the oven to
burn-off for two hours with oven vent opened. If the
pressure readings are not set correctly, turn off the
oven and readjust accordingly. Then recheck pres-
sure readings.
WARNING
The break in procedure burns off excess
oils present in the metals during fabrication.
Smoke may be produced. Proper ventilation is
required.
ADJUSTMENTS ASSOCIATED WITH INITIAL
INSTALLATION
Each oven, and its component parts, have been thorough-
ly tested and inspected prior to shipment. However, it is
often necessary to further test or adjust the oven as part
of a normal and proper installation. These adjustments
are the responsibility of the installer, or dealer. Since
these adjustments are not considered defects in mate-
rial or workmanship, they are not covered by the Original
Equipment Warranty. They include, but are not limited to:
• calibration of the thermostat
• adjustment of the doors
• burner adjustments (XR8-G only)
• leveling
• testing of gas pressure (XR8-G only)
• tightening of fasteners
• rack rotation stop position
No installation should be considered complete without
proper inspection, and if necessary, adjustment by quali-
ed installation or service personnel.