Built-in Oven User manual IMPORTANT installer should leave these instructions with appliance. Consumer should read these instructions before using the appliance and should retain them for future reference.
IMPORTANT SAFETY INSTRUCTIONS READ AND SAVE THESE INSTRUCTIONS WARNING: Read all safety Instructions before using the product.
GE) IMPORTANT: This appliance is intended for normal household use only. It is not approved for outdoor or other non-household uses (including sea or air-going vessels). See the Statement of Limited Warranty.
ZA Please read these instructions before installation or using your appliance! Dear Customer, We would like you to obtain best performance with your product that has been manufactured in modern facilities and passed through strict quality control procedures. Therefore, we advise you to read through this user manual carefully before using your product and keep it for future reference.
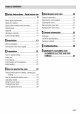
Safety Instructions Read before use Basic safety instructions .. Safety for children... Safety when working with el Intended use Disposal. Packaging material Future transportation Installation 13 Before installation... Connection to the main supply Preparation 21 Rigs for saving energy . Initial vse Time SWUNG veer First cleaning of the appliance. Initial heating How to operate the oven 23 General information on baking, roasting and baiting How tn operate the electric oven. Operating mods.
satiety instruction 2D Basic safety instructions «The manufacturer reserves its and grounded by a qualified technician right to make changes in the technical specifications in order to improve the appliance quality without any prior notice. Figures included in this manual are for schematic purpose only and may not match exactly with your appliance.
result in burns from steam. De not let potholder touch hot heating elements. Do not use a towel or other bulky clothes. Do rot heat unopened food containers. Pressure could build up and the container could burst, causing an injury. Keep oven vent duct sun destructed. Ensure that no flammable materials are adjacent fo the appliance as the sides be-come hot during use. Do not place baking trays, dishes or aluminum foil directly onto the bottom of the oven.
BEN touching hot surfaces of the door ar oven walls. A WARNING: Do not use the vane to dry newspapers. If overheated, they can catch on fire. & WARNING: Storage in or an Appliance Flammable materials should not be stored In an oven or near surface units. A WARNING: Do nat leave paper products, cooking utensils of food In the oven when not in use. A WARNING: After broiling, always take any broiler pan out of the oven and clean it. Leftover greasy ina broiler pan can catch fire next time you use the pan.
taken to avoid touching heating elements. Children less than 8 years of age shall be kept away unless continuously supervised. ZA WARNING: Only use the connection cable specified in the “Technical specifications”. If the supply cord damaged, it must be replaced by a special cord or assembly available from the manufacturer or its service agent or similarly qualified persons in order to avoid a hazard. ZA WARNING: During self cleaning, surfaces may become hotter than with standard use. Keep children away.
malfunctions; see Troubleshooting. s Be careful when using alcoholic drinks in your dishes. Alcohol evaporates in high temperatures and may cause fire since it will catch fire when it gets in contact with hot surfaces. «AN WARNING: Keep appliance area clear and free from combustible materials, gasoline, and other flammable vapors. . £5 WARNING: Keep the oven free from grease buildup. Grease in the oven may ignite. «Only authorized replacement parts may be used in performing service on the range.
sufficient time to cool. Among these areas are (identification of areas) for example, the cook-top and surfaces facing the cook-top. £5 WARNING: Do not store ferns of interest to children in the cabinets above the range or on back guard of a range. Children climbing on the range to reach items could be seriously injured. The packaging materials will be dangerous for children. Keep the packaging materials away from children. Please dispose of all parts of the packaging according to environmental standards.
drying towels and dish cloths. Commercial use will void the guarantee. « All openings in the wall behind the appliance and in the floor under the appliance shall be sealed, « This appliance is not intended to use at mobile homes, recreational vehicles. oD WARNING: Do not obstruct the flow of ventilation alr. «The manufacturer shall not be held liable for any damage caused by improper use or handling errors.
Installation IMPORTANT: he product should only be installed by| suitably qualified electricians. Preparation of location and electrical installation for fe product is under customer's responsibility. The product must be installed in accordance wile all local electrical regulations. Prior to installation, visually check if the product has any defects not have it installed. Damaged products cause risks for your safety.
Installation Under a Counter top Installation in a High Cupboard * Tha cabinet should have the dimensions in + The cabinet should have the dimensions in Figure A Figure G. » Base plate dimension must 3 (19 mm), «Junction box may be locate din adjacent «Junction box may be locate din adjacent cabinet.
Flush Installation in a High Cupboard + Junction box may be locate din adjacent «The cabinet should have the dimensions in cabinet. Figure E + For flush installation you need 10 have two reveal cleats died. .
Positioning and Fixing the Oven ® Use safety gloves before carry the oven. » Put the oven into the cabinet by two or more people. Ban't carry or [ift he oven farm its handle or + Push the oven info te cabinet from the seal area (7). Don't push against the control panel or ages.
Installation and connection IMPORTANT: [Material damage! he road and/or handle must not be used for Sitting or swinging the appliance. If the appliance has wire handles, push the handles, ack into the side walls after moving the appliances. Carry the accomplice with af least fo persons. For installation the appliance must be con in accordance with all lo vat electrical landlord gas regulations.
Connection to the main supply IMPORTANT: [Electrical installation should comply with national and focal codes. IMPORTANT: Tis appliance must be grounded! WARNING ‘Risk of Electric Shock or Fire. Grounding through the neutral conductor is prohibited for new brass circuit installations {1996 NECK, mobile homes, and recreational vehicles, or In an area where local codes prohibit grounding through the neutral FP WARNING Avoid fire hazard or electrical shock.
Wire branch circuit (for US and Canada) Figure B Grounded Neutral Ate tom pow sop union ux While wives Red wees | oy Back wires groan uot fos eon UE alto cocci comer Refer fo Figure B: » Disconnect ground from neutral at free end af conduit. + Connect the green GROUND wire from the oven to the GROUND wire in the junction box fare or green colored wire) «Connect the red and black leads from the oven to the corresponding leads in the junction box.
Tips for saving energy The following information will help you to use your appliance in an ecological way, and io save energy: » Use dark colored or enamel coated cookware in the oven since the heat transmission will be healer » While cooking your meals, preheating operation if iris advised in the user manual or cooking instructions. » During cooking, the not open the oven door frequently.
ti surface might get damaged by some detergents or cleaning materialism Po rot uss aggressive detergents, scanning powders/arears or any sharp objects during Clearing. Da not use harsh abrasive cleaners or sharp natal scrapers ko Clean the Sven door glass since they can scratch the surface, which may result in shattering of the glass. 1. Remove all packaging materials, 2. Wipe the surfaces of the appliance with a damp cloth or sponge and dry with a cloth.
I How to operate the oven General information on baking, roasting and 1d broiling A WARNING ¥ Hot surfaces cause bums! duct may be hot when iris 13, § putting in or removing dishes info/from the hol oven, CE DANGER: Be careful wham opening the oven door as steam may escape. Exiting steam van scald your hands, face landlord suss, Tips for baking Use non-sticky coated appropriate metal plates or aluminum vessels or heat-resistant silicone molds.
ver an entire rack with germanium foil. Doing sa blocks airflow through the oven and may cause carbon marinade poisoning, Arminius foil linings may lase trap heat, causing a fire hazard Select temperature and operating mode 1 Function knocks 2 Thermostat knob The operating modes of the electric oven are selected with the function knob. The temperature is adjusted with the thermostat knob. All oven functions are muted off by turning the relevant knob to off upper) position. 1.
Fan Leafing Warm ir heated by the rear heater is evenly distributed throughout the oven rapidly by means of the fan, It is suitable for cooking your meals in different rack levels and preheating is not required in most cases. Suitable for cooking with mall rays. 30" function Top heating, bosom heating and fan assisted heating (in the roar wally are in operation. Food is cooked evenly and quickly all around. Cook with one tray only. Broil AA) Large broil at the calling of the oven is in operation.
4. Place the dish into the oven and set the temperature with temperature knob. Cooking will start » Cooking time starts to count down on display when caning starts and all parts of ime slice symbol is lit. The set cooking time is divided into 4 equal parts and when the time of each parts ends, the symbol of that parts tus off. So vou can understand the ratio of remaining cooling time to total cooking time easily.
i ey —— splay brightness and temperature keys should be at 0 (OFF) position. » £3 symbol will remain ft and the alarm time wil appear on the display once the alarm Hume is set. 9. At the end of the alarm time, & symbol starts flashing and the audio warming is heard. Turning off the alarm 1. Audio warning sounds far 2 minutes. To stop the audio warning, just press any key. + Audio warning wil be silenced and current time will be displayed. Canceling the alarm; 1.
Cooking times table [i] sf rack of #0 oven is the bottom rack, Aden load capacity of oven tray: 4 kg [3:8 1b.
Tips for baking cake If the cake is too diy, increase the temperature by SOF (10°C) and decrease the cooking time. « [the cake is wet, use less liquid or lows the temperature by 50°F * lithe cake is too dark on top, place tonality [wore rack, lower the temperature and increase the cooking time. * [Cooked well on the inside but slick on the outside, use less liquid, lower the temperature and increase he cooking time.
General information Service life of the product will extend and the possibility of problems will decrease If the rotund is cleaned at regular intervals. ‘DANGER; Risk of electric shock! Switch off the electricity before cleaning appliance to avoid an electric shock, \: DANGER: ; Hot surfaces may cause burns! "Allow the appliance to coo! down before vou clean it IMPORTANT: The surface might get damaged by some tee gents or cleaning malarial Do rot use aggressive detergents, caning preponderance of any sharp
Clean oven door Ta clan the oven door, use warm water with washing liquid, a soft cloth or sponge to clean the product and wipe it with a dry cloth, sort use any harsh abrasive cleaners or share metal scrapers for cleaning Bie oven four, Hay could scratch the surface and desirous he glass. Removing the oven door 1. {pen the front door {1}. 2. Open the clips at the hinge housing (2) on the right and left hand sides of the front door by pressing thee down as lust rated in the figure.
2. Turn off power at the main power supply {your fuse or breaker box). 4. Pull out oven lamp and replace It with new ane. 5. Install the glass cover and then the wire racks.
[ General informs Overview 1 Control panel § Fan motor behind steal plate) 2 Wire shelf 7 Lamp 3 Tray 8 Top heading element 4 Handle 9 Shelf positions 9 Door Function knob 3 Taramasalata knob 2 Digital mer 4 Taramasalata lamp SHE
Package contents upped oa vary & product madam, Not el the sor manual may eds product 1. User manual 2. Wire Shelf Used for roasting and for placing the food to tie baked, roasted or cooked in casserole dishes to the desired rack. bonding an 3 toning of the wire shelf on sliding shelves tis important to position fe broil and/or dripping pan on the wire shelves correctly.
operate. » The mains fuse is defective or has tripped, >> Check fuses in the fuse bax, If necessary, replace or reel thee. » Product is not plugged into the (grounded) socket. Check the plug connection. o Buttonsknabs/keys on the control panel do not function. >> Locke may be enabled. Please disable Jt (See. using the key lock. page Rx Oven lamp is defective. Replace oven lamp. Power 1s cul. Check if there is power. Check the fuses in the fuse box. If necessary, replace or reset the fuses.
The warranties provided by Bloomer in these statements only apply to Bloomer electric and gas ranges sold to the original purchaser or homeowner in the US and Canada. This warranty is not transferable. To obtain warranty service, please contact our nearest distributor as listed by stale or call 1800-459-9848. You will need your electric and gas range model number serial number, retailer name and address, where purchased and purchase date / installation date.
terms for his Bloomer household appliance is not valid if the product is altered, tampered, modified, additional parts assembled, fixed and re-packed by an authorized distributor, service, a third party retailer, reseller or by any other unauthorized personify. TO THE EXTENT PERMITTED BY LAW, THIS WARRANTY 13 IN LIEU OF ALL OTHER EXPRESSED AND IMPLIED WARRANTIES, INCLUDING THE IMPLIED WARRANTIES OF MERCHANT ABILITY AND FITNESS FOR A PARTICULAR PURPOSE.