A\ WARNING: the information in this manual is not fallowed exactly, a fire or explosion may result causing property damage, personal injury or death, Anti-Tip stability device /A WARNING: "A child or adult can tip the range and be killed. “Failure to do so can result in death or serous burns to children or adults.” Install the anti-tip device to the structure and/or the range.” "Engage the range to the anti-tip device by anti-tip brackets given with oven as shown in Figure.2.
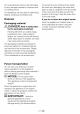
Please read these instructions before installation or using your appliance! Dear Customer, We would like you to obtain best performance with your product that has been manufactured in modem facilities and passed through strict quality control procedures.
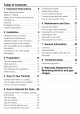
Table of Contents o 1 Important Instructions Basic safety instructions Satiety for children Safety when working with elev Intended use Disposal . . Packaging material . . . Future transportation Installation 9 Installation and connection 9 Clearances & Dimensions . 9 Important notes to the consumer. .. @ Important Notes to the Installer .. 1 Natl-Tip stability device installation st ructions e 12 Connection to the main supply 12 Backslash. Preparation 15 Tips for saving energy Initial operation .
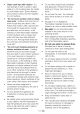
Important Instructions Basic safety instructions . + This appliance is not intended for use by persons (including children) with reduced physical, sensory or mental capabilities, or lack of experience and knowledge, unless they have . been given supervision or instruction concerning use of appliance by a person responsive for their safety, Nichiren should be supervised to ensure that they do not play with the appliance, .
Clean cook-top with caution if a wet sponge or cloth is used to wipe spills on a hot cooking area, be careful to avoid steam burn. Some cleaners can produce noxious fumes if applied o a hot surface. ‘Do not touch surface units or areas near units Surface units may be hot even though they are dark in color.
* Do nol use the oven with front door glass removed or broken. v Check that all controls on the appliance are switched off after use. [ IMPORTANT: cai tre authorized service for Installation of the appliance to be used. After this procedure, guarantee period will be started, Safety for children A WARNING Stepping. kayaking or sitting on the door or drawers of this range can result in serious injuries and also cause damage to the range. D not allow children o climb or play around the range.
The manufacturer shall not be held liable for any damage caused by improper use or handling errors. The appliance can be used for defrosting, baking, roasting and broiling food. Disposal Packaging material N\ DANGER: Risk of suffocation by the packaging materials! Packing elements {L.e. plastic bags, polystyrene foam, nails, packing straps, et} should not be left around within easy reach of children, as these may cause serious injuries.
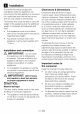
. Installation To ensure that critical alr gaps are maintained under the appliance, we recommend that this appliance is mounted on solid base and that the feet do not sink into any carps or soft flooring. The Kitchen floor must be able to carry the weight of the appliance plus the additional weight of cookware and bake ware and food. * appliance hood is to be fitted, refer to the manufacturer's instructions regarding fixing height.
13 330 SERE omnil® L B ot insane closer i, P than 1/2” (12mm) from T any adjacent surface ™\ Proper positioning of outlet must be flush . Nothing located in shared! area can extend more their 2° (5, form) from wall Fig. 1-A : or range will not slide al the way back.
Important Notes to the Installer Read manual before installing the range. Observe all governing codes and ordinances. Be sure to leave these instructions with the consumer, Be sure your range is installed and grounded properly by a qualified installer or service technician.
Anti-Tip stability device installation instructions There is only one anti-tip stability device within product. You can use it for right back goat or left back foot. 1. The anti-tip device has 1o be attached to the floor as shown in Figure 3. The dimension for the bracket location farm the floor is to be determined after the appliance feet have been adjusted to the proper installation height shown in the installation instructions and the appliance has been leveled.
Cur company shall not held responsible * The range is equipped with a C3A for any damage caused by using the International Certified Power Cord appliance without grounded receptacle. intended to be plugged into a The range must be electrically grounded standard 14-50 R wall receptacle. in accordance with local codes or, n the Be sirs the wall receptacle is within absence of local codes, with the National reach of range's final location. Electrical Code, ANSHAN No.
2. Assembling Screw hole 3. Backslash Place the backslash (3) on to boomers’ plate (1) as seen on picture Sower the screws {2 ont he rear left and rear right side also below of boomers plate. For products with cooling fan The cooling fan cools both the butt-in cabinet and the front of the product. [T} Cooling fan continues to operate for about 20-30 minutes naffer the oven is switched off, 1. Cooling fan 2. Control panel 3.
Preparation Tips for saving energy The following tips will help you to use your ay dance in an ecological way and ta save energy: . Use dark colored and enamel coated frays, since the heat transmission wil be better. While cooking your meals, perform a preheating operation if it is advised in the user manual or cooking instructions. Bering cooking, do not open the oven door frequently.
Electric oven 1. Press key 4 1 2. Set clock with key & or key 6. By passing the key shortly, you advance 2 or reset the clock by one minute. 3. When you keep the individual key pressed, the minutes are advanced or 4 reset quickly, ! First cleaning of the appliance . /N IMPORTANT: when removing~ © appliance for cleaning and/or service; 6. Disconnect AC power supply. Carefully remove the tangs by Biro puling outward. 1. Range is heavy, use care in handing.
B3 How To Use The Hob General information on cooking A DANGER: Risk of fire by overheated oil! When you heat ofl, do not leave it unattended. Never try to extinguish the fire with water! When oil has caught fire, immediately cover the pof or pan with a lid. Switch off the burner/plate if safe to do so and phone the fire service, Only use flat bottomed pots or pans, * Use pans which have sufficient capacity for the amount of food being cooked so they don’t boll over and cause unnecessary cleaning.
not extend over adjacent surface units. To recce the risk of burns, ignition of flammable maternal, and spillage due to unintentional contact with the utensil, the handle of a utensil should be positioned so that iris med inward, and does not extend over adjacent surface units. Splashes may damage the ceramic surface and can cause fire. Dakotan use pots that have concave ar convex bottoms, Use pot and pans with smooth bosoms. They ensure a good heat transfer.
penetrate the broken cook-top and create a risk of electric shock. Contact a qualified technician immediately.
B How to Operate the Oven General information on baking, roasting and broiling A DANGER Risk of scalding by hot steam! Stand away from the range when opening oven door. Mot air or steam which escapes can cause burns fo hands, face, and/or eyes. Let hot air or stern escape before removing of replacing food. Tips for baking * Use non-stick coated appropriate metal pall or aluminum containers or heat-resistant silicone molds. * Make best use of the space on the rack.
/N WARNING: Aver cover any slots, holes or passes in the vane bottom or cover an entire rack with materials such as aluminum foil. Doing so blocks airflow through the oven and may cause carbon monoxide poisoning, Aluminum foll innings may also trap heat, causing a fire hazard. Select temperature and operating mode 340 1. Function lamp 2. Function knob 3. Thermostat knob 4, Thermostat lamp The operating modes of the electric oven are selected with the function knob.
Hot air o Warren air heated by the rear &i heater is evenly distributed throughout the oven rapidly by means of the fan, it is suitable for cooking your meals in different rack levels and preheating is not required in most cas Suitable for cooking with multi trays. "3D* function @ Top heat, bottom heat plus ring S, heat with fan (in the rear wall) are on. The fond to be cocked is every and quickly cocked all around. Cook with one tray only.
4. Set the cooking time with key 5 or key 6. By pressing the key shortly, you advance or reset the clock by one minute. When you keep the key pressed, the minutes ars advanced or reset quickly, 5. Pul your dish into the oven. 8. Select aerating mode and temperature. » The oven i heated up to the set temperature and keeps this temperature until the end of the cooking time that has been selected, During the cooking process, the caking symbol on the display is it 9.
Food Cooking level Rack Temperature {'F) Cooking number position time {min} pepping) Cake in tray One level o 4 350 25 .30 Cae in mold One level & 2 355 40 .. 50 Cakes in paper | One level o 3 350 25,80 2 levels 1-5 350 80 .. 40 levels B 1-3-5 360 45 .. 55 Sponge cake One level o 3 390 5. 10 2 levels @ 1-5 350 20..30 Cookies One level o 3 350 levels & 1-8 380-375 30 .. 40 levels 1-3-5 350 35 46 Dough pastry | One level = 2 390 loves 1-5 390 45 .. 868 coevals @3 1-3-5 390 85 ..
Tips for baking cakes 1. if pastry is too dry, » Increase the temperature by 50°F and reduce the caking time. if pastry dropped, > Use less liquid or lower the temperature by 50°F, 3. pastry is too dark on top, = Place it on slower rack, lower temperature, and increase the cooking time. 4. if cooked well on the inside but sticky on the outside, e » Use less liquid, lower the temperature, and increase the cooking time. Tips for baking pastry 1.
Cooking times table for broiling Broiling with electric broil Food Rack Riling time position] {Approx. Fish 4.5 20..25 min, # Sliced 4 25,36 min. chicken Lamb chops 4.5 20,25 min, Roast beef [4..5 25..30 min.# Veal chops [4..
n Maintenance and Care General information /& DANGER: Risk of electric shock! Switch off the electricity before cleaning appliance (o avoid an electric shock. DANGER Hot surfaces may cause burns! Allan the appliance to cool down before you clean it. A NOTICE The surface might get damaged by some detergents or cleaning materials, Do not use aggressive detergents, cleaning powder/cream or any sharp objects. Be careful to avoid steam burn. Some cleaners can produce noxious fumes if applied to a hot slicer.
1. Remove the front section of the side rack by pulling it in the opposite direction of the side wall, 2. Remove the side rack completely by pulling i towards yau, Catalytic walls Side walls or just back wall of oven interior may be covered with catalytic enamel. The catalytic walls of the oven must not e cleaned. The porous surface of the walls fs self-cleaning by absorbing and converting spitting fat {steam and carbon dioxide.
The lenses rust be in place when using the vane. The lenses serve to protect the light buy from breaking, The lenses are made of glass. Handle carefully 10 avoid breakage. Broken glass could cause an injury. A NOTICE Position of lamp might vary farm diagram. 8l socket Pager bub r— g Each oven is equipped with one halogen fights located in the back wall of the oven, The lights are switched on when the door is opened or when the oven is in a cocking cycle.
General Information Overview Ceramic hotplate Wire shelf Handle Front door Bottom drawer Function lamp Function knob Single-circuit couching plate rear left Hotplate warning lamp Dual-circuit cooking plate front left & Foot 7 Shelf positions 8 Control panel g Ceramicist surface 10 Splash back Digital timer Single-circuit cooking plate Front right Single-circuit cooking plate Rear right Thermostat knob O Thermostat lamp
Technical Data GENERAL 207240 Total e\ecm consumption R type / cross section Length {Burners Berg 24100 SS f Rear left Single-circuit cooking plate inches SOUNDTRACK AWG / max, B 1t Fr()n left : Size 7 83 i Inches i Power 802200 W 5 Previewer .
Accessories supplied 1. Oven roller with the unit 2. Drawer roller m IMPORTANT: E IMPORTANT rot remove Accessories supplied can vary drawer while hot or during operation. depending on the product model. Be sure drawer is empty before removing. All the accessories described in the user manual may not exist on your product, Proper positioning of the wire shelf on sliding shaves.
B Troubleshooting A\ DANGER Risk of electric shock, short circuit or fire by unprofessional repairs! Repairs on the appliance must be carried out by an approved service center. Electrical equipment Normal operating conditions * Smoke and smell may emit for a couple of hours during the first operation. * [list normal that steam escapes during operation. * When the metal parts are heated, they may expand and cause noise.
B Warranty Statement for Bloomer electric and gas ranges The warranties provided by Bloomer in these statements only apply to Bloomer electric and gas ranges sold to the original purchaser or homeowner in the US and Canada. This warranty is not transferable. To obtain warranty service, please contact our nearest distributor as listed by state or call 1800-458-0848.
TITHE EXTENT PERMITTED BY LAW, THIS WARRANTY IS IN LIE OF ALL OTHER EXPRESSED AND IMPLIED WARRANTIES, INCLUDING THE IMPLIED WARRANTIES Of MERCHANT ABILITY AND FITNESS FOR PARTICULAR PURPOSE. BLOOMER UNDERTAKES NO RESPONSIBILITY FOR THE QUALITY OF THIS PRODUCT EXCEPT AS OTHERWISE PROVIDED IN THIS WARRANTY STATEMENT, BLOOMER ASSUMES NO RESPONSIBILITY THAT THE PRODUCT WILL BE FIT FOR ANY PARTICULAR PURPOSE FOR WHICH YOU MAY BE BUYING THIS PRODUCT, EXCEPT A3 OTHERWISE PROVIDED IN THIS WARRANTY STATEMENT.