Bloomer Gas Range User Manual IMPORTANT Installer should leave these instructions with appliance. Consumer should read these instructions before using the appliance and should retain them for future reference. 9% BGR305228S EN 285.6002, 221R ANZAC.
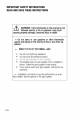
IMPORTANT SAFETY INSTRUCTIONS READ AND SAVE THESE INSTRUCTIONS 2/EN WARNING: If the Information in this manual is not followed exactly, a fire or explosion may result causing property damage, personal injury or death. — Do not store or use gasoline or other flammable vapors and liquids in the vicinity of this or any other appliance. ~— WHAT TO DO IF YOU SMELL GAS Do net try to light any appliance. * see [i immediately cal your ges supplier rom neighbor's phone. Follow the gas supplier's instructions.
TO PREVENT TIPPING: IT t he information in this manual is nol followed exactly, a fire or explosion may result causing property damage, personal injury or death /N\ WARNING: ALL RANGES CAN TIP INJURY TO PERSONS GOULD RESULT INSTALL ANTI-TIP DEVICES PACKED WITH RANGE SEE INSTALLATION INSTRUCTIONS WARNING: “After installation cautiously grip the rear of the range to ensure the anti-dip DO NOT OPERATE THE RANGE WITHOUT ANTI TIP DEVICE IN PLACE AND ENGAGED nickel i hing the rear foot of range.” tied Warranty.
Explanation of symbols Throughout this User Manual the following symbols are used: riparian information or useful hints about usage. Marinading for hazardous situations vain regard to life and property. A Warning for electric stock. Sing for risk of fire, Baring for hot surfaces. DANGER indicators a hazardous situation which, if not avoided, wil result in doth or serious injury. WARNING indicates a hazardous situation which, if not avoided, could result in death or serious injury.
Dear Customer, ‘Your product has hen manufactured in modern facilities and has passed strict quality control procedures. To obtain the best performance, we request that you read through this user manual carefully, especially the safely instructions, before using your product and that you keep it for future reference. If this product is given to another consumer, please give them this manual for their reference. IMPORTANT: Save these instructions for the local electrical inspectors use.
Safety Instructions 7 Basic safety instruction: Safety for children... Safety when working with electricity Safety when working with gas... Interned use. Disposal Packaging material Future transportation 12 Installation 14 Installation and connection... Connection to the main supply Preparation 24 Tips for saving energy . Initial vse First cleaning of the appliances Initial heating. How to use the hob 25 General information about cooking: Using te hobs...
A Basic safety instructions « This appliance is not intended for use by persons {including children) with reduced physical, sensory or mental capabilities, or lack of experience and knowledge, unless they have been given supervision or instruction concerning use of appliance by a person responsible for their safety. «Children should be supervised to ensure that they do not play with the appliance. «Never use when judgment or coordination is impaired by the use of alcohol candor drugs: 3.
Do not heat closed food containers and glass jars. Pressure that may build-up in the jar can cause it to burst. WARNING: {1a drain has vis Ruminated knob 0 0 knobs. Service auto should do it. There is a steel spring | inside i ¢ knob.
Kind of dishes should not be used to keep food either. Do not use aluminum foil to line surface unit drip bowls or oven bottoms or oven bottoms, except as suggested in the manual. Improper installation of these liners may result in a risk of electric shock, candor fire. The manufacturer declines all liability for injury to persons ar damage to property caused by incorrect or improper use of the appliance.
broiler pan can catch fire next time you use the pan. ® Check that all controls on the appliance are switched off after use. * IMPORTANT: Call the authorized service for installation of the appliance to be used. After this procedure, guarantee period will be started. Safety for children + WARNING: Stepping, leaning or sitting on the door or drawers of this range can result in serious injuries and also cause damage to the range. Do not allow children to climb or play around the range.
. Ensure that the fuse rating is correct. Do not operate the appliance barefooted. Never touch the appliance with wet hands or feet. Safety when working with gas . Use an extinguisher only if: WARNING: To reduce the risk of personal injury in the event of a grease fire, observe the following: Smasher flames with a close fitting lid, cookie sheet, or metal tray, then turn off the burner. Exercise caution to prevent burns. If the flames do nat go out immediately, evacuate and call the fire department.
proper functioning. Please arrange for annual maintenance. s Clean the gas boomers regularly. The flames should be blue and burn evenly. * Good combustion is required in gas appliances. In case of incomplete combustion, carbon monoxide (CQ) might develop. Carbon monoxide is a colorless, odorless and very toxic gas, which has a lethal effect even in very small doses. + Request information about gas emergency telephone numbers and safety measures in case of gas smell from you local gas provider.
Disposal Packaging material DANGER: isk of suffocation by the packaging laterals! Packing elements plastic bags, polystyrene foam, nails, packing straps, tee) should not be left around within easy reach of children, as these may cause serious injuries. NOTICE: Lo not place other items on the top of he appliance. The appliance must be transported upright. Store the appliance’s glaring box and transport the appliance in its original carton.
Substantiation To ensure that critical air gaps are maintained under the appliance, we recommend that this appliance is mounted on a solid has and that the feet do not sink into any carpet or soft floating. The kitchen floor must be able to carry the weight of the appliance plus the additional weight of cookware and bake ware and food. « [fan appliance hood & to befitted, refer to the manufacturer's instructions regarding fixing height. * The appliance corresponds to device class 1, i.e.
13 08x (330 py curtail T4756 Gain Tu amen “Worktop depth 25° 17 Cupboard depth 24734 sas my EG 762 cr) 15/EN
NOTICE: Material damage! [Do aot place other items on the top of the appliance. The appliance must be transported upright. The dear candor handle must not be used for lifting or moving the appliance «The appliance must be placed directly on the floor. It must not be placed onto a has or a pedestal How fo move the appliance \ f favorite oF Koo mig anti placed i TEEN Clearances & Dimensions Dimensions that are shown in figure mast be used. Given dimensions provide minims clearance.
wood or metal cabinets or a 24-inch {E08mg minimum when bottom of wood or metal cablecasts are protected by not less than a {nm) flame retardant billboard covered with not less than na. 29 mag sheet steel, {tromp) stainless steel, © aluminum or (3.05mi copper. To eliminate the risk of bums or fire by reaching over heated surface units, cabinet storage space toccata! above the surface units should be avoided.
Ls a a NUMBER 2 BRACKET SEES FECES Sam 3 4 SE ilo 16 v0 30 Beeton omen Ra pug 0 210m 53 CT ERECTED BE ay BUMPER 1 BRACKET THEN
JA WARNING: Tip Over Hazard ¥ CA child or adult can tip the rang and be lied, Complected anti-tip bracket to anti-tip hale at the hack of the range, Re tip bracket, if th folio th seniors burns fo chi WARNING: Electrical shock hazard! oe Use extreme caution when drilling holes into “ths wall or floor.
NOTICE: [B= careful not fo crimp flexible connector 6. Carefully lip range forward to insure that ant tip bracket engages and prevents tip-over, Rigid Pipe Method The configuration of the rigid pipe connection will vary depending on te location of the gas pipe stub. Refer to Figure below for details. 1. Marks sure circuit breaker is off and then plug range cord in to electrical outset Pressure regulator Flare upon adapter 20/EN 2.
Test for Gas Leaks Leak testing shall be conducted by the installer according to He instructions given in this section. Turn on Gas. Apply a non-corrosive leak detect an fluid to all joints and fittings in the gas connection between the shut-off valve and the range. Include gas firings and joints in the range if connections may have been disturbed during installation. Bubbles appearing around fittings and connections indicate a leak.
Call Service if; 1. Any of the burners do not light, 2.
El Preparation Tips for saving energy The following information will help you to use your appliance in an ecological way, and io save energy: » Use dark colored or enamel coated cookware in the oven since the heat transmission will be better, » While cooking your dishes, perform a preheating operation if it is advised in the user manual or cooking instructions. » Do not open the door of ihe oven frequently during cooking.
WARNING Never fil the pan with of more tan ons tid of it. Do not fae of when heating off. Overheated pli of fire. Never attempt to extinguish a possible fire with water! When oft catches fire, cover ft with a fire Blanket, Tue off the hob call the firs department fk. CAUTION 9 (Never dandy tha flame beyond the tuts eis] 4 th: cooking utensil. A higher flame wastes energy.
igniting the gas burners Gas| burners are controlled with gas hob knobs. [api ens Lingual wore Wok turkey 2 Turn it ra clockwise 3 level “LITE”. Gas ig ignited with the spark created. 3. Adjust if to the desired cooling power. Turning off the gas boomers Turn the knob to off (upper) position. 26/EN Wok burner Wok burners help you to cook faster.
General information on baking, roasting and broiling A WARNING ¥ Hot surfaces cause Dis! Product may be hot when if is in use, Near faucet the hot burners. inner sections of the wen, heaters and ele. Ke children away, Malaysia use heat resistant oven gloves when putting in or raving dishes interoffice the hot av AN DANGER: 7 be careful when opening the oven door as team may escape. Exiting steam can sad your hands. face #0e/or eyes.
How to use the gas oven Thermostat knob Set the Function knob to the desired opera ing mode. 2. Set the Temperature knob fo the desired temperature. » Oven heats up to the adjusted temperature and sy malting it, During heating, signal lamp stays on. Switch an the gas oven The gas oven is automatically ignited by means of the function and thermostat knobs, 1. Keep the function knob pressed and turn it clockwise to desired operating mode.
Broil Bro bis and personal preferment ailing times ~The heath of same birds and pets is extreme i sens hive to the fumes haven off dung te sabbath mode. Always move birds and pets to] anther closed and well tentative room.
a lion ee There are lights on keys. Descriptions of thee lights are given in the table below Ome Secs chin a peg li it red for 3 Seconds, When blue tights are out all buttons: S0/EN Bh Tue fame gas knob ts mule; sine 21 wil bb Dateline En lough id. active cooking zone is turned off all rooking zones will be ft bug fora Son grid: Lien isl cs blu Pe closed Linen knob rer (antiperspirant.
How to operate the broil WARNING Hot surfaces may cause burns! Keep children away from the product. Case vane door during grilling The roll is operated hy the function and thermostat nab. In off position {op) the gas supply is locked. For equipment with a cooling fan The cooling fan cages the front of the products, 1 Function knob 2 Thesaurus knob Switching on Broil Broil is ignited automatically with broil knob. 1. Keep the function knob pressed and tar it clockwise to the “Broil” 2.
General information Service life of the product will extend and the possibility of problems will decrease If the pro duel is cleaned at regular intervals. : DANGER: \; Disconnect tha product from mains supply before starting maintenance and cleaning works. There is the risk of electric shock! (DANGER: Allow the product to cool down before you clean ft Hat surfaces may cause bums! * Keep the appliance area clear and free from combustible materials, gasoline and other flammable vapors and liquids.
i Function knock: 2 Thermostat knob ANGER: surfaces case burns! 1 rot touch the product during sof cleaning spat and keep philodendron away from 2. Keep at ghost 30 minutes before removing the rem rants The oven is equipped with self-cleaning function. The oven is heated to approx. 760 °F (420°C and existing dirt is boomed to ashes. A strong smoke development may arise. Provide for good ventilation. The self-cleaning should be used after approx. every 10M oven usage. The self-cleaning has three levels.
roving the oven door SH wick i ned 50 hal tie Oven road can be removed in order to clean the inside of oven easily CG Quin g 36/EN that the product is disconnected from mains and cooled down in order to avoid the risk of rock 5 May cause buns! Hot surface he oven lamp is a special C that can resist up to B73 °F See Technical specifications. for details.
The oven lights are not Eliminated during self clean. 1. Turn off power at the main power supply {your fuse or breaker box), 2. Remove the wire racks as described. See Cleaning the oven. 3. Remove the protective glass cover with a screwdriver. 4. Pull out oven lamp and replace It with new ane. 5.
Tl Generation Overview Splash hack 5 Front door 2 Burner plate 6 Foot 3 Control panel i Lower part.
technical | specifications i ns eight Wid tin io 77.38 ti Tami b pe SEO Bra Secs wie 30 War. 0 | Nek Ca SUE AP GIS DWE i rent bier: 2500 BEER SRE RT Middle Wok burner. 8 Essen Ess SEs ESE SEES SEES LC HB000 BER LISTED Montrachet Rapid burlier Eee HOGSHEAD REORG CRIES RIG Got bat ha] Rear right Normal boomer: CIRCLET LOHENGRIN aoe.
s supplied can vary deg en on product model, Nat Avery in the user manual my your product, 1. User manual 2. Oven fray Used for pastries, frozen foods and big 3. Wire Shelf Used for roasting and for placing the ford to be baked, roasted or cooked in casserole dishes to the desired ra 4. Broiler tray Its placed onto the tray In order to collect the dripping fal while grilling so that the oven AD/EN 5.
Injector table SN WARNING: This product cen be converted © LP Gas. Bas conversation must always bo performed by Authorized Serine Agents | Accosting the gas type that will be used correct injector type must be used.
Mal Bur Boomers are wet. > 19.828; nn gas valve Is closed. Gen gas valve. pipe is bent. install gas pipe properly. ty DUTY Components. = Dry the boomer components. Ter cap is not mounted safely. Mount tie boomer cap properly. {Gas valve is closed.
Bl Removing the Package | [1 Anne 1 gibbon 4 pd Remove nylon bag on gosling. the product. 5 Remove Styrofoams of the front door, ‘Upper Frame poe erst we Ron A: 18x40 Wooden support Remove upper frame and rear and front Mods. Remove cut-out protozoans and bie tapes. Remove grill styrofosms and shrink packaging.
Remove protective Styrofoams on chassis inside the. nd burner caps. Remove upper pet and blue tapes on it 9 Remove blue tapes on the edges of cast grill. Push the product 0 the back and Hi the prosiest w < . Remove Styrofoams on pet and the lower pet.
3 jy 0 the original pic of flied in the us and Canada. This warrant y is not ‘nontransferable. To obtain warranty service, please contact our nearest distributor as listed by state or call 1800-458-9848, You will need your medal number, serial number, relater name and address, where purchased and purchase date / installation date. This warranty gives you specific legal rights, and you may also have other rights which vary from state to state. All warranties stated below are based pen normal household use.
terms for this Bloomer household appliance is nat valid if the product is altered, tampered, modified, additional parts assembled, fixed and re-packer by an authorized distributor, sar vicar, a third party retaliate, reseller or by any other unauthorized person(s). TO THE EXTENT PERMITTED BY LAW, THIS WARRANTY 13 IN LIEU OF ALL OTHER EXPRESSED AND IMPLIED WARRANTIES, INCLUDING THE IMPLIED WARRANTIES OF MERCHANT ABILITY AND FITNESS FOR A PARTICULAR PURPOSE.