
Concealed Ducted Air Handler Installation Manual


NOTE:
1. Do not place the connecting duct weight
on the indoor unit.
2. When connecting the duct, use an
nonammable canvas tie-in to prevent
vibrating.
3. Insulation foam must be wrapped outside
the duct to avoid condensate. An internal
duct underlayer can be added to reduce
noise, if the end-user requires.
NOTE: All the gures in this manual are for
demonstration purposes only. The air con-
ditioner you have purchased may be slightly
dierent in design, though similar in shape.
Indoor Unit
Installation
Page 19
Revised 5/14/2020
Step 3: Duct and accessories installation
1. Install the lter at the register for
maintenance access, or on the unit if direct
return.
2. Install eld-supplied berboard supply and
return plenums (if any).
3. The air inlet and air outlet duct should be far
enough apart enough to a avoid air passage
short-circuit.
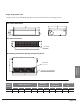
4. Connect the duct according to the following
diagram:
5. Refer to the following static pressure
guidelines when installing the indoor unit.
Step 4: Instructions for converting from rear
air return to bottom air return
1. Take o the ventilation panel and ange.
Bend the rear ventilation panel 90 degrees along
the dotted line into a descending ventilation
panel. (some models)
2. Change the mounting positions of the
ventilation panel and air return ange.
3. When installing the lter mesh, t it into the
ange as illustrated in the following gure.
Canvas tie-in Canvas tie-in
Air outlet
Isolation booth
checking orifice
Isolation booth
Air inlet
Air dust filter
MODEL
(Btu/h)
Static Pressure
(in.wg)
12k 0~0.2
18k 0~0.4
Change the fan motor static pressure according
to external duct static pressure.
Ventilation panel
Air return flange
Ventilation panel
Air return flange
Air return flange
Ventilation panel
Or