
Installation Manual


P/N 750323 Page 24
All specifications are subject to change without prior notification.
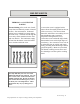
OVEN BURNER AIR SHUTTER
ADJUSTMENT
Before attempting to adjust the oven burner
air shutter, insure the following has been
checked and is correct:
Proper gas type - match serial plate
Proper regulator setting
Orifice aligned - parallel with the ven-
turi to the burner
After verifying the gas, regulator and ori-
fices adjust the air shutter by:
1. Remove bottom panel from inside oven
cavity.
2. Remove lower kick panel held in place
by two sheet metal screws
3. Pre-heat oven for 10-15 minutes. DO
NOT turn on convection oven fan dur-
ing adjustment procedure
4. Use a screwdriver to loosen the air shut-
ter tightening screw
5. Turn the air shutter as required to adjust
the flame - open gap for “lazy” flame,
close gap for “lifting” flame.
6. Test burner.
7. If necessary, turn off burner and read-
just.
8. Turn off burner, tighten shutter screw
and replace kick panel and oven bot-
tom.
CARE AND MAINTENANCE
REPLACING OVEN LAMPS
Your oven comes with either one or
two oven lights. When changing a
burned out lamp it is necessary first to
insure the oven is cool. Grasp the clear
globe lens and turn counter clock-wise
to loosen. Replace the burned out lamp
with a 40 watt Appliance style bulb
only. Do not use normal lamp bulbs -
they are not suited for the higher tem-
peratures of your oven. Replace the
clear globe.