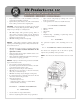
Gas Powered Generator Operator’s Manual BNG2000 (2KW) BNG3000 (3KW) BNG5000 (5KW) BNG6500 (6.
Contents INTRODUCTION............................................................. 3 SAFETY RULES............................................................... 3 ADDING OR DRAINING FUEL........................................ 4 SECTION 2 - GENERAL INFORMATION....................... 5 2.1 - UNPACKING........................................................... 5 2.1.1 PACKING CONTENTS............................................ 5 2.2 - ASSEMBLY............................................................. 5 2.
DANGER - indicates a hazard which, if not avoided, will result in death or serious injury. INTRODUCTION Thank you for purchasing products by our company, we appreciate your business. The generator is a compact, high performance, air-cooled, engine driven generator designed to supply electrical power to operate electrical loads on job sites, or remote locations where utility power is available or in place of a utility due to a power outage.
WARNING - This generator does not meet U.S. Coast Guard Regulation 33CFR-183 and should not be used in marine applications. Failure to use the appropriate U.S. Coast Guard approved generator could result in death or serious injury and/or property damage. WARNING - Starter cord kickback (a rapid retraction) will pull hand and arm toward engine faster than you can let go which could cause broken bones, fractures, bruises, or sprains resulting in serious injury.
• • Keep at least 5 feet (1.5 m) of clearance on all sides of generator including overhead. Replacement parts must be the same and installed in the same position as the original parts. CAUTION - Excessively high operating speeds could result in minor injury and/or generator damage. Excessively low speeds impose a heavy load. • • DO NOT tamper with governor spring, links or other parts to increase engine speeds. Generator supplies correct rated frequency and voltage when running at governed speed.
• • • • • • Refer to Figures to install wheels as shown. Slide the axle through the frame brackets. Slide on the wheel and flat washer, then assemble flange nuts. Refer to Figure to install the bracket as shown. Insert an M8 bolt through the bracket. Secure the bolt with an M8 flange nut. Insert an M8 bolt through the bracket. Secure the bolt with an M8 flange nut.
• • • • • • Place generator on a flat, level surface. Clean area around oil fill and remove oil fill cap and dipstick. Wipe dipstick clean. Slowly fill engine with oil through the oil fill opening until it reaches the full mark on the dipstick. Stop filling occasionally to check oil level. Be careful do not over fill. Do not fill to the top of the tank. Install oil fill cap and finger tighten securely. Check engine oil level before starting each time thereafter. 4.
WATTAGE REFERENCE GUIDE Tool or Appliance Running* (Rated) Watts Additional Starting (Surge) Watts Electric Water Heater Essentials Light Bulb - 75 watt Garage Door Opener - 1/2 HP 875 2350 4700 11700 75 — Furnace Fan Blower - 1/2 HP 800 2350 Quartz Halogen Work Light 1000 — Sump Pump -1/3 HP 800 1300 Airless Sprayer 1/3 HP 600 1200 Refrigerator/ Freezer 700 2200 Reciprocating Saw 960 — 600 900 1000 2100 Electric Drill - 1/2 HP, 5.
Unplug all electrical loads from the unit’s receptacles before starting the engine. Make sure the unit is in a level position. then fully into ON position. NOTICE - If battery is discharged, use manual starting instructions. Turn the Fuel Shut-off level Valve to the “On” position. Move engine choke lever to the ON position. For Recoil start, firmly grasp the recoil handle and pull slowly until increased resistance is felt. Pull rapidly up and away.
DO NOT touch hot muffler and AVOID hot exhaust gases. Allow equipment to cool before touching. Keep at least 5 feet (152 cm) of clearance on all sides of generator including overhead. Contact the original equipment manufacturer, retailer, or dealer to obtain a spark arrester designed for the exhaust system installed on this engine. Replacement parts must be the same and installed in the same position as the original parts. Add up the total wattage of all electrical devices to be connected at one time.
main emissions compliant, high altitude adjustment is required. Operation without this adjustment will cause decreased performance, increased fuel consumption, and increased emissions. See an authorized dealer for high altitude adjustment information. Operation of the engine at altitudes below 2,500 feet (762 meters) with the high altitude kit is not recommended. Some adjustments will need to be made periodically to properly maintain the generator.
6.2.3 ENGINE MAINTENANCE DANGER - When working on the generator, always disconnect spark plug wire from spark plug and keep wire away from spark plug. 6.2.4 CHANGE OIL • Stop the engine and pull the spark plug wire off of the spark plug. • Clean the area around the spark plug and remove it from the cylinder head. • Set the spark plug’s gap to 0.70-0.80 mm (0.0280.031 in.). Install the correctly gapped spark plug into the cylinder head and torque to 15 ft/lbs. .
DANGER - Drain fuel into approved container outdoors, away from open flame. Be sure engine is cool. Do not smoke. DANGER - NEVER cover the generator while engine and exhaust area are warm. SECTION 7 - STORAGE It is important to prevent gum deposits from forming in essential fuel system parts such as the carburetor, fuel hose or tank during storage.
• • Replace the gasoline can if it has started to rust. Rust and/or dirt in the gasoline will cause problems with the carburetor and fuel system. If possible, store the unit indoors and cover it to give protection from dust and dirt. BE SURE TO EMPTY THE FUEL TANK. If it is not practical to empty the fuel tank and the unit is to be stored for some time, use a commercially available fuel stabilizer added to the gasoline to increase the life of the gasoline.
SECTION 9 - TROUBLESHOOTING Problem Cause Correction Engine is running but no AC output is available 1.One of the circuit breakers is off. 2.Fault in generator. 3.Poor connection or defective cord set. 4.Connected device is bad. 1.Turn circuit breaker to ON. 2.Contact Authorized Service facility. 3.Check and repair. 4.Connect another device that is in good condition. Engine runs good but bogs down when loads are connected. 1.Short circuit in a connected load. 2.Engine speed is too slow. 3.
Page | 16