Bome MIDI Translator Pro USER MANUAL 2019-08-18
Bome MIDI Translator: User's Manual Table of Contents 1 Welcome........................................................................................5 2 Quick Start.....................................................................................6 2.1 Installation on Windows.............................................................6 2.1.1 General Installation.............................................................6 2.2 Installation on macOS.....................................................
Bome MIDI Translator: User's Manual 7.3 Changing Presets.....................................................................27 7.4 Default MIDI Ports...................................................................29 8 The Translator Entry......................................................................30 8.1 Overview................................................................................30 8.2 Translator Options...................................................................30 8.2.
Bome MIDI Translator: User's Manual 9.9.1 AppleScript Outgoing Action................................................61 9.9.2 Control MT using External AppleScript..................................63 10 Rules and Variables......................................................................65 10.1 Overview..............................................................................65 10.2 Rule Types............................................................................66 10.2.1 Assignment............
Bome MIDI Translator: User's Manual 13.6 Performance Optimization.......................................................84 13.6.1 Deactivate Presets...........................................................84 13.6.2 Use “Stop Processing”......................................................85 13.6.3 Avoid Redundancy...........................................................86 13.6.4 Use Project/Preset Default Ports.........................................86 13.6.5 Use the Log Window For Development........
Bome MIDI Translator: User's Manual 1 Welcome 1 Welcome Thank you for choosing Bome MIDI Translator! This document contains: MIDI Translator Quick Start MIDI Translator User's Manual Video Tutorials In our YouTube channel, we provide dozens of video tutorials – from simple setup to common solutions, to advanced techniques. Bome Account In the Bome Account, you can find all your licenses, downloads, purchases. Newsletter: In order to get update notifications, sign up to the MIDI Translator newsletter.
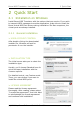
Bome MIDI Translator: User's Manual 2 Quick Start 2 Quick Start 2.1 Installation on Windows Install Bome MIDI Translator with the options that you require. If you wish to transmit MIDI messages to another application, make sure to install the Bome Virtual MIDI Port drivers during installation. On Mac computers, the virtual ports are always installed. 2.1.
Bome MIDI Translator: User's Manual 2 Quick Start > INSTALLATION Pressing Next will install Bome MIDI Translator Pro on your computer. > COMPLETION That's it! You have installed Bome MIDI Translator successfully. Bome MIDI Translator Pro will start now. You can pin it to the task bar (right-click the task bar icon), to always have it accessible from the task bar. > STARTING MIDI TRANSLATOR Start Bome MIDI Translator by double-clicking the desktop icon. (c) 2019 by Bome Software GmbH & Co.
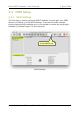
Bome MIDI Translator: User's Manual 2 Quick Start 2.2 Installation on macOS After downloading the .dmg installer file, double click the file: it will open as a volume and display a window similar to the one at right. To install Bome MIDI Translator in your Applications folder, simply double-click the MIDI Translator icon. Click on Install when prompted to install Bome MIDI Translator Pro. Note: if you want to use AppleScript with MIDI Translator, you must install it in the Applications folder. 2.
Bome MIDI Translator: User's Manual 2 Quick Start 2.4 MIDI Setup 2.4.1 MIDI Settings The first step in setting up Bome MIDI Translator to work with your MIDI device is to define it in the MIDI settings. To access the MIDI settings, simply press the MIDI settings icon in the toolbar or select the top project filename (“Untitled Project”) in the left pane. Project MIDI Ports MIDI settings (c) 2019 by Bome Software GmbH & Co.
Bome MIDI Translator: User's Manual 2.4.2 2 Quick Start Define MIDI Ports Next, specify the MIDI input and output ports you will be using. The MIDI OUT ports will be the ports to which translated MIDI messages are sent to. The MIDI IN port will be used as the source of MIDI data, typically connecting with an external MIDI device, e.g. via USB or a MIDI interface on a sound card. Select the appropriate MIDI input source(s) by checking it.
Bome MIDI Translator: User's Manual 2 Quick Start To create a MIDI route, click and drag a MIDI IN connection on the left side of the screen to the desired MIDI OUT connection to enable a MIDI thru connection between the ports. Any data NOT particularly processed by your preset will be routed directly to the designated output port. 2.5 Add a first Translator Entry You now should have the MIDI interface settings properly configured.
Bome MIDI Translator: User's Manual 2 Quick Start The properties panel is where you specify the incoming and outgoing actions that the translator operates with, as well as the rules and processes that take place between those actions. 2.6.1 Incoming Action To start, you will need to specify an incoming action to work with. Be sure the Incoming type is set to MIDI message. Now click the Capture MIDI checkbox.
Bome MIDI Translator: User's Manual 2.6.2 2 Quick Start Translator Rules Next, select the Rules tab to view the rules entries for the translator. In this screen, you can specify rules that affect the values local to the translator, or use values stored in global variables. Click on the Add Rule dropdown list to select the type of rule that you wish to enter. After adding the basic rule, edit the rule parameters with the drop-down lists.
Bome MIDI Translator: User's Manual 3 MIDI Setup Guide 3 MIDI Setup Guide 3.1 Virtual MIDI Ports A virtual MIDI port driver is included with the application which enables you to send MIDI messages to other programs running on the same computer, and to receive MIDI messages back from them. The virtual MIDI ports in MIDI Translator are unidirectional MIDI ports, requiring the MIDI Translator application running on one end, and any other program destination on the other.
Bome MIDI Translator: User's Manual 3 MIDI Setup Guide Bome MIDI Translator can communicate directly with any MIDI device or application, allowing it to serve as a powerful hub for MIDI information. A common use for MIDI Translator's virtual ports would be to synchronize the MIDI clocks of two applications. Using MIDI Translator's virtual ports, this is a simple task of linking each application to a Bome virtual MIDI ports, then connecting them in the MIDI Router. 3.
Bome MIDI Translator: User's Manual 3 MIDI Setup Guide particular device or devices. Lastly, individual translator entries can have specific port assignments that override both the Preset and Project default ports. Devices represent actual hardware and software MIDI ports Aliases are pointers to these devices which can be reconfigured to point to other devices on the fly.
Bome MIDI Translator: User's Manual 4 Program Interface 4 Program Interface 4.1 Main Window From the main window of Bome MIDI Translator, a user can manage projects, presets and translators from start to finish. The main interface is subdivided into five main sections: the menu/toolbar, the preset list, the translator list, the property editor, and the activity area. Project Presets Translators Properties Project: clicking the project filename will activate the Project Properties.
Bome MIDI Translator: User's Manual 4 Program Interface 4.2 Toolbar The Toolbar enables easy access to the most commonly used menu items in Bome MIDI Translator. There is an equivalent menu item for each of these icons, which can be accessed via the menu or via keyboard shortcut.
Bome MIDI Translator: User's Manual 4 Program Interface 4.3 Menu There are 5 main menu items: File – operations on the file and the entire project, like open/save, restart, etc. Edit – operations on the currently selected Preset or Translator MIDI – MIDI settings and options View – show/hide sub-windows Help – show this user manual, link to program update and support 4.4 The Project Pressing the filename at top of the Preset List will activate the project.
Bome MIDI Translator: User's Manual 4 Program Interface If the properties panel is visible, selecting a Translator will show its properties in the properties panel. You can double-click a translator or press ENTER to activate the translator properties. 4.7 Properties Pane When activated, the properties pane takes the entire right side. It displays editors for the currently selected project, preset, or translator.
Bome MIDI Translator: User's Manual 4 Program Interface 4.9 Log Window The Log Window shows a continuous text stream with real time notifications what the MIDI Translator engine is currently doing. Use the checkboxes at the bottom to select the types of events to display and whether you want the displayed events to include a time stamp. The Log Window is a great help when developing complex presets with rules and other logic.
Bome MIDI Translator: User's Manual 5 MIDI Translator Concepts 5 MIDI Translator Concepts This chapter outlines the main concepts of MIDI Translator's concept. Refer to the following chapters for in-depth descriptions of the respective topics. 5.1 Project Level In MIDI Translator, a Project is equivalent to a .bmtp file that you can load and save from within MIDI Translator.
Bome MIDI Translator: User's Manual 5 MIDI Translator Concepts Preset Properties Name, active/inactive, “always active” convenience setting Preset Default MIDI Input ports Set the MIDI devices (aliases) that the Translators in this Preset receive from by default. If you don't define specific MIDI Input ports in a Translator, it will receive MIDI only from the ports selected here. Preset Default MIDI Output ports Set the MIDI devices (aliases) that the Translators in this Preset send MIDI to by default.
Bome MIDI Translator: User's Manual 5.3.4 5 MIDI Translator Concepts Outgoing Action If the Incoming Action was triggered (and the Rules don't cancel the Translator action), the Outgoing Action is executed. There are many different action types: for example, you can send a MIDI message, or emulate typing a keystroke. You can also affect MIDI Translator's internal behavior by activating or deactivating Presets, or by starting a Timer. 5.
Bome MIDI Translator: User's Manual 6 The Project 6 The Project 6.1 Author Info The Author Info screen lets you attach information to your Bome MIDI Translator project file that will travel with the file if you decide to redistribute it. This section is particularly of use if you are sharing project template files with other users.
Bome MIDI Translator: User's Manual 6 The Project 6.3 MIDI Ports and Aliases The MIDI Ports list is where you set your incoming and outgoing MIDI ports, as well as where you specify project aliases. Simply mark the checkbox next to the MIDI IN and OUT ports you wish to use in your project and they will become available for use in translators. Any project that is opened from another user with different MIDI hardware will STILL have entries for their unique MIDI incoming and outgoing settings.
Bome MIDI Translator: User's Manual 7 The Preset 7 The Preset 7.1 Overview Bome MIDI Translator encapsulates Translator entries into 'Presets' which can be managed at a more detailed level than a normal 'Global' setup where every translator is active all the time. A preset's active or inactive state can be determined by looking at the checkbox next to its name. If the checkbox is checked, the preset is active and its translators are being processed.
Bome MIDI Translator: User's Manual 7 The Preset Presets can be activated via Preset Change action by one of three primary methods: Activate Previous/Next Preset This outgoing action will cycle through the available presets in order, activating only one at a time. Presets must be arranged in the order of which the user desires to cycle them on and off. This is normally the preferred way of cycling through presets.
Bome MIDI Translator: User's Manual 7 The Preset 7.4 Default MIDI Ports Individual Presets can have default MIDI ports defined. Default Input MIDI ports are useful if you have multiple MIDI IN devices you wish to manage independently from one another, or you have MIDI hardware on the same MIDI channel that you wish to separate. Default Output ports are useful if you are working with multiple software programs or outboard devices, and you wish to divide and manage translator data amongst them.
Bome MIDI Translator: User's Manual 8 The Translator Entry 8 The Translator Entry 8.1 Overview Translator Entries comprise the core functionality of Bome MIDI Translator. In simple terms, translators listen for an 'incoming action', optionally do some processing on the incoming action (see the Rules section of the manual), and then optionally output an 'outgoing action.
Bome MIDI Translator: User's Manual 8.2.1 8 The Translator Entry Name This is the simple descriptive property of the translator. It does not have any function other than for reference in presets and activation rules. The Translator name is not a unique value, therefore multiple translators can have the same name. It is recommended that the Translator name be something simple that will make identifying multiple translators in large presets more easy.
Bome MIDI Translator: User's Manual 8 The Translator Entry See the Rules chapter for more information. 8.5 Outgoing Actions Outgoing Actions are executed when the Incoming Action is triggered. Bome MIDI Translator can output a range of different outgoing actions, as well as function with translators that are composed solely of rules with no defined outgoing action. See the next chapter for a description of the different action types. 8.5.
Bome MIDI Translator: User's Manual 8 The Translator Entry Cannot Cancel a Delayed Action It is not possible to cancel a delayed action once it's triggered. 8.6 Editing Actions The actions are edited in the right properties inspector. The Incoming and Outgoing areas have a drop down list where you you define the type for the given action. Depending on the type, an editor will be visible with more or less options. All edits are generally immediately active so it is easy to test different variations.
Bome MIDI Translator: User's Manual 9 Actions 9 Actions 9.1 MIDI 9.1.1 Incoming MIDI With MIDI Translator, you can use any MIDI message as a trigger for your actions. You can either select from a number of predefined messages (simple mode), or use the raw/system exclusive mode to enter the MIDI message as raw hexadecimal values (raw mode). Whenever a MIDI message is received, all translators with the incoming action type MIDI are checked in the order they appear in the preset(s).
Bome MIDI Translator: User's Manual 9 Actions Capture Options Use the gear icon next to the X icon in order to select how and which MIDI messages are captured: Raw Capture: if checked, all captured messages are displayed in raw, hexadecimal format. By default Raw Capture is not checked, so that captured MIDI messages are displayed in simple format. Capture Timing Messages: if checked, all timing messages are captured, too.
Bome MIDI Translator: User's Manual 9 Actions Swallow MIDI Message / Do Not Route This option indicated that you wish to NOT retransmit the incoming MIDI message on to the MIDI Thru destinations specified in the Project Routing connection screen. So, when an incoming MIDI message matches at least one Incoming MIDI trigger, the message will not be sent to the MIDI Router. By specifying None as outgoing action, you can filter out MIDI messages from the router.
Bome MIDI Translator: User's Manual C4 nn Program Change pp qq rr C2 10 B2 00 40 5 ANY n/a any 3-byte any MIDI message any any Program Change followed by Control Change Program #16 Controller #0 64 3 Master Volume F0 7F 7F 04 01 pp (Universal n/a qq F7 System Exclusive) 9.1.2 9 Actions pp receives LSB of master volume qq receives MSB Outgoing MIDI When using MIDI as the Outgoing Action, the translator sends one or multiple defined MIDI messages when the Incoming Action is triggered.
Bome MIDI Translator: User's Manual 9 Actions Capture MIDI Capturing MIDI messages for Outgoing MIDI works the same as Incoming MIDI: the capture list displays all MIDI messages that are received from all currently open MIDI devices. In particular, the list does not display MIDI messages that are sent out to MIDI OUT ports. See the Log Window for monitoring MIDI OUT activity.
Bome MIDI Translator: User's Manual 9 Actions 9.2 Keystrokes 9.2.1 Incoming Keystroke If you want to trigger a translator by pressing (or releasing) keys on your computer keyboard, use Keystroke as Incoming Action. Keystroke-based incoming translator actions can be defined in different ways. The Text incoming keystroke type lets you define a text (or just a letter) to be typed for use as a trigger. For example, if you enter the text “1”, the user needs to press the 1 key to trigger the action.
Bome MIDI Translator: User's Manual 9 Actions invent new combinations like “A(B(C))” which will only trigger if you press C while holding down A and B. Last, but not least, you can also create key sequences which must be fully typed to trigger the action. For example, you the sequence “A B Ctrl(D A)” will only trigger if you press A (down and up), then B, then Ctrl Down, followed by D and A, and then Ctrl Up.
Bome MIDI Translator: User's Manual 9 Actions The emulated keystrokes are always sent to the currently active application. When MIDI Translator is the active application, keystrokes are not sent. Text The Text mode (new in version 1.8) allows emulating keystrokes so that they type the given text (i.e. characters and not keys). This is particularly useful for entering numbers, special characters, and international letters which may have different positions or ways to enter on different keyboards.
Bome MIDI Translator: User's Manual 9 Actions press the MIDI key and select the Note On variant in from the captured events. Make sure you select “any” for the velocity. As outgoing action, use “Key Stroke Down”. Enter the letter/key to be “typed” in the text field (e.g. "X"). Enable the Key Repeat box. 2. Now duplicate the first translator and edit it: change the incoming message to Note Off (keep everything else). Change the Outgoing action's Key Stroke to “Up” and re-type the letter (e.g. “X”).
Bome MIDI Translator: User's Manual 9 Actions 9.3 Timer With a Timer, you can create delayed and reoccurring actions. A Timer will, when its time has elapsed, inject an Incoming Event into the processing engine. You can execute a Timer with an Incoming Action just like any other event. In general, this is how a timer works when activated in an Outgoing Action: 1. Wait for the Initial Delay. 2. Fire off an Incoming Timer Event with the name of the timer into the MT processing engine. 3.
Bome MIDI Translator: User's Manual 9.3.2 9 Actions Outgoing Timer There are two main types of Timer actions - Activate Timer and Kill Timer. Timers can be instantiated by selecting them as an outgoing action, and setting their appropriate repeat times and other options. Timers are usually associated with other translators that have the Timer name as their incoming action.
Bome MIDI Translator: User's Manual 9 Actions 9.4 Preset Change 9.4.1 Incoming Preset Change Preset change incoming actions are actions that are activated when the preset is changed through some means. Preset Change Actions are useful for "one-off" type of actions that only occur once at the very beginning of the preset change. These actions are often 'reset' actions that could either redefine global variables or reset controllers to default values.
Bome MIDI Translator: User's Manual 9 Actions 9.5 Disable/Enable Processing Actions 9.5.1 Incoming Disable/Enable Processing This incoming action is triggered in response to program events. 'Startup' actions occur when the project file is loaded. Certain actions that need to take place first before any other actions, and only once are best defined by here. For example, it's a good idea to initialize variables to start-up values when the project file is opened.
Bome MIDI Translator: User's Manual 9 Actions There are two functions - disabling MIDI Translator Processing and enabling MIDI Translator Processing. The program as a whole can be bypassed using the 'Disable Processing' outgoing action, preventing any of the translators from activating. If MIDI Translator is disabled in this way, the only way to re-enable it is by using the 'Enable Processing' outgoing action defined in a different translator. 9.
Bome MIDI Translator: User's Manual 9 Actions The X coordinate is the distance from left, and the Y coordinate is the distance from top of the screen. Therefore, specifying X=0 and Y=0 will put the mouse cursor in the upper left corner. You can use the Capture button to find the absolute position by positioning the mouse cursor and then clicking with the left mouse button to capture that position. You can also use variables for the X and Y coordinates. 9.6.3 Multiple Display Support Since version 1.8.
Bome MIDI Translator: User's Manual 9 Actions On Global Desktop When positioning (or capturing) the mouse cursor using the Global Desktop option, all screens are considered one big monitor. So if you have one screen with size 1000x700 pixels to the left of a second screen with 500x950 pixels, the resulting desktop has the size 1500x950 pixels. Use the OS display settings to arrange the monitors as you like it. Relative To Display 2, 3, ...
Bome MIDI Translator: User's Manual 9.6.5 9 Actions Wheel Mouse wheel events can also be transmitted. Mouse wheel events can either be Forward (away from you) or Backward (towards you). You can also specify variables for the amount wheel motion. Use a positive number for moving forward, and a negative number for moving backward. The wheel “ticks” are 1/10th of a wheel “click”, so specifying 10 will emulate moving the mouse wheel one “click” forward (away from you).
Bome MIDI Translator: User's Manual 9 Actions Sometimes, it works to directly inject, say, a mouse button click event to a button sub window, effectively clicking the button. In this example, the injected mouse button press clicks the TAP button of an Ableton Live window. Note: Injected mouse events cannot be targeted to a specific monitor. (c) 2019 by Bome Software GmbH & Co.
Bome MIDI Translator: User's Manual 9 Actions 9.7 Execute File (Outgoing) The Execute File outgoing action type lets you define an executable file with parameters to run as a resultant outgoing action. Enter the executable file name with path in the File Name text box, along with any parameters you would like to pass to it in the Parameters text box (usually surrounded by quotation marks).
Bome MIDI Translator: User's Manual 9 Actions Opening a MIDI Translator Project File If you specify a .bmtp file in the Filename, it will be directly opened in the running instance of MIDI Translator, unloading the currently running project file first. Using Variables in Filename and Parameters You can include the value of variables in the filename and in the parameters using the %..% scheme: Number Representation: Normal (decimal) value of a variable: %var% or %d var% e.g.
Bome MIDI Translator: User's Manual 9 Actions Now you can define which PDF file to show, based on the variable g0. If g0 is 0, the PDF viewer is called like this: PDFViewer slides/slide00.pdf If, later on, g0 is 13 (by way of Rules or the Incoming Action), it is called like this: PDFViewer slides/slide13.pdf So, by creating single PDF files for every page/slide, you can control exactly which slide to show with the PDF viewer (and jump to particular pages, etc.). (c) 2019 by Bome Software GmbH & Co.
Bome MIDI Translator: User's Manual 9 Actions 9.8 Serial Port With the Serial Port trigger and action, you can trigger your translators from arbitrary data received on a serial port, and send any data you like on a serial port. So you can easily implement a Serial-to-MIDI converter, and vice versa, with just a few translators, or convert the serial data flow on the fly, or control devices which only have a serial port. 9.8.
Bome MIDI Translator: User's Manual 9 Actions In the example, the first byte is specified as a decimal number 255, the second number in hexadecimal form, which equals 127 decimal. Then two more decimal numbers, followed by the two variables pp and g0. For incoming serial port actions, embedded variables are set to the received byte at that position. For outgoing serial port actions, variables in the outgoing string are replaced by their values before being sent ot the serial port.
Bome MIDI Translator: User's Manual 9 Actions To define the physical port to an alias, click the Edit button. In order to remove an alias, use the Delete button. If the alias is used in other translators, it will likely be recreated. Also, if you load a project file with the deleted alias, it will be recreated. The alias assignments are stored on a local computer. When using a project with serial ports on a different computer, you will first need to define the serial port aliases. 9.8.
Bome MIDI Translator: User's Manual 9.8.4 9 Actions Using a Serial Port as a MIDI Device There are certain devices which send MIDI data over a standard serial port. For those scenarios, you can check the option “Use as MIDI Device” in the serial port configuration. This will create a MIDI device internal to MIDI Translator, as a direct pass-through: any MIDI messages sent to that MIDI OUT port will actually send it to the associated serial port.
Bome MIDI Translator: User's Manual 9 Actions Example: Incoming Action data string in Data/hexdump format: 6E 20 %pp% 70 %ga% 5F Now let this be a series of data bytes received on the serial port: ... 20 6E 6E 20 3A 70 51 5F 80 1A ... As soon as the byte 5F is received (last byte of the incoming action), the incoming action matches. The variable “pp” is set to hexadecimal 3A (decimal 58), and the variable “ga” is set to the value hexadecimal 51 (decimal 81).
Bome MIDI Translator: User's Manual 9 Actions Example: Outgoing Action data string in Data/number format: 10 20 30 pp 67 0xFF h1 0 Now let variable pp be 56 and h1 be 126. Then this is the string to be sent out: decimal: hexadecimal: 10 20 30 56 67 255 126 0 0A 14 1E 38 43 FF 7E 00 (c) 2019 by Bome Software GmbH & Co.
Bome MIDI Translator: User's Manual 9 Actions 9.9 AppleScript 9.9.1 AppleScript Outgoing Action You can invoke arbitrary AppleScript commands as an Outgoing Action. Although you can edit the AppleScript action on Windows, it will only execute on macOS. The AppleScript code that you enter in the Script text area will be executed when this Outgoing Action is triggered. For documentation, you can enter a Description text. It does not change the functionality.
Bome MIDI Translator: User's Manual 9 Actions The Script will use copies of the variables so any changes to the variables in AppleScript code will not be reflected back to the MIDI Translator engine. This is only possible via the setVariable() handler (see Modifying MT Variables below). Specifying a Unique Handler Name You can optionally specify a handler name for the Outgoing AppleScript action.
Bome MIDI Translator: User's Manual 9 Actions Project Global AppleScript Section In the Project Properties, there is a text area where you can enter free form AppleScript handlers. These handlers can be called from your outgoing action so that you have a space for AppleScript code that you need to run from multiple outgoing actions. Example: global handler for iTunes volume The following text, when entered in the global AppleScript section, defines a handler that lets you set the iTunes volume.
Bome MIDI Translator: User's Manual 9 Actions For example, the following script sets the global variable g0 to 123, and then reads it back and sets an Applescript variable “asVar” to the result: tell application "Bome MIDI Translator Pro" set variable "g0" to 123 set asVar to get variable "g0" end tell log asVar (c) 2019 by Bome Software GmbH & Co.
Bome MIDI Translator: User's Manual 10 Rules and Variables 10 Rules and Variables translator rules 10.1 Overview Translators are comprised of three main sections: incoming actions, outgoing actions, and rules. This part of the documentation covers Rules, how to use and to be related to Variables, and what they can be used for. Rules are basically simplified programming steps that take data from the incoming actions, or global variables, and can affect what happens with the translator's outgoing action.
Bome MIDI Translator: User's Manual 10 Rules and Variables Rules are normally processed from top to bottom: the rule on the first line is processed first, followed by the second and so on. Rules can also use Labels and Goto to direct programming flow. Existing rules can be moved up and down in the rules box by first selecting the rule, then clicking the 'Up' or 'Down' buttons next to the Rules list. Variables can either be defined in an incoming action, or through the Rules section of a translator.
Bome MIDI Translator: User's Manual 10 Rules and Variables Expression rules use basic arithmetic (plus:+,minus:-,multiply:*,divide:/, modulo: %) or binary operators (AND:&,OR:|,XOR:^, shift right: >>, shift left: <<) to enter a value into a variable. A variable is selected from a dropdown box on the left side of the equation, while the two variables and/or numbers and operator are selected on the right side of the equation.
Bome MIDI Translator: User's Manual | ^ >> << 10 Rules and Variables bit-wise OR Calculate the combination of the left operand's bits OR the right operand's bits. A given bit is set in the result when it is set in the left operand, or in the right operand, or in both. Example: h0=0x90 | 3 → h0 has the value 0x93 Note: variables and calculations use 32-bit signed integer numbers. bit-wise XOR Calculate the XOR combination of the left operand's bits with the right operand's bits.
Bome MIDI Translator: User's Manual 10.2.4 10 Rules and Variables Exit Rules and execute Outgoing Action This is a direct action. Upon processing this rule, the Translator will immediately stop processing the rules and execute the Translator's Outgoing Action. These rules are commonly found coupled with Conditional rules and Labels to create complex processing statements. 10.2.5 Exit Rules and ignore Outgoing Action This is a direct action.
Bome MIDI Translator: User's Manual 10 Rules and Variables Conditional Rule Operators: == EQUALS (true example: IF 10 == 10 THEN) != DOES NOT EQUAL (true example: IF 10 != 45 THEN) >= GREATER THAN OR EQUAL (true example: IF 86 >= 45 THEN) TO <= LESS THAN OR EQUAL TO (true example: IF 34 <= 34 THEN) > GREATER THAN (true example: IF 10 > 4 THEN) < LESS THAN (true example: IF 24 < 80 THEN) 10.
Bome MIDI Translator: User's Manual 10.3.2 10 Rules and Variables Global Variables Global variables are defined by two-character combinations in the following ranges: ga-gz/g0-g9, ha-hz/h0-h9, ..., na...n9, and ya-y9, za-z9 Examples for global variables: h4, kd, j0, nb, zg, etc Global variables retain their value for the life time of the project. Global variables are useful for passing information between translators, and for remembering state.
Bome MIDI Translator: User's Manual 11 Settings 11 Settings Settings for Bome MIDI Translator allow the end user to modify the general behavior of the program. The settings are stored on your computer and are not part of the project file. Setup options for Bome MIDI Translator are divided up into these general categories: Startup Appearance Options Confirm Virtual MIDI Ports Serial Ports Export/Import Reset (c) 2019 by Bome Software GmbH & Co.
Bome MIDI Translator: User's Manual 11 Settings 11.1 Startup Options The Startup section deals with how Bome MIDI Translator initially starts. Having the program start up automatically with the operating system can be useful once you have all your Translators created. Start Minimized: If checked, MIDI Translator Pro will start in minimized form, i.e. it will not show the main window. You need to (double-)click the program icon to show MT's window.
Bome MIDI Translator: User's Manual 11 Settings Notify when minimized to tray / menu bar: If this option is checked, minimizing to tray/menu bar will pop up a balloon window to tell you where MT Pro had been minimized to – i.e. the tray / menu bar icon. Show Tool Tips If this option is enabled (default), most buttons and other program elements show a small explanation when hovering the mouse over it. You can disable this behavior by unchecking this option. 11.
Bome MIDI Translator: User's Manual 11 Settings Naming of Virtual Ports There are two different ways for how these virtual ports appear in other software on the same computer: Long Names: This is the default, port names are named using the scheme “Bome MIDI Translator 1”. Short Names: When selected, the virtual ports appear as “BMT 1” in other applications. This is particularly useful for applications which only display a small text field for the name of a MIDI port. 11.
Bome MIDI Translator: User's Manual 11.7.2 11 Settings Export Settings to .bmts file In the Options menu, use the “Export Settings” function. It allows you to export your settings to a .bmts file. These settings include: Window size and position Selected translator preset All program settings and preferences from the settings window. 11.7.3 Manually Import .bmts file Use the “Import Settings” function in the Options menu and specify a previously saved .bmts file.
Bome MIDI Translator: User's Manual 11 Settings 11.8 Reset This settings screen lets you reset certain settings of MIDI Translator: 11.8.1 Reset All Clicking this button will reset all settings to their defaults. 11.8.2 Remove MIDI Aliases This button will remove all MIDI aliases and their associations. Note that loading a project file with stored MIDI port settings will recreate those MIDI aliases in the project file. (c) 2019 by Bome Software GmbH & Co.
Bome MIDI Translator: User's Manual 12 Behind the Scenes 12 Behind the Scenes In this chapter, the inner workings of the translation engine are explained. 12.1 Incoming Event Processing MIDI Translator is entirely event driven: nothing happens until an event comes in. Only when an event enters MIDI Translator's engine will it become alive. An example for an event is a MIDI message coming in on a MIDI INPUT port. The engine looks at the first preset. If the preset is active (i.e.
Bome MIDI Translator: User's Manual 12 Behind the Scenes Flowchart Incoming Event Processing Wait Wait for for Incoming Incoming Event Event Process Process Incoming Incoming Action Action Get Get First First Translator Translator Get Get First First Preset Preset Yes Yes Translator Translator is is active? active? Incoming Incoming Action Action matches matches event? event? Yes Yes Yes No No Process Process Rules Rules No No Preset Preset is is active? active? Yes Get Get next next Translat
Bome MIDI Translator: User's Manual 12 Behind the Scenes Keystroke emulation takes a while to execute. So if you generate keystrokes from a MIDI message but also do a lot of MIDI-to-MIDI translation, the emulated keystroke would interrupt the MIDI translations until the keystrokes are sent. For that reason, Outgoing Keystrokes are usually enqueued for asynchronous execution. Asynchronous execution has the advantage that it allows for much better runtime performance.
Bome MIDI Translator: User's Manual 13 Tips & Tricks 13 Tips & Tricks 13.1 Make Backups! Creating and refining MIDI Translator projects can be a lot of work. Many people only realize that when it is too late... It cannot be said often enough: hard disks will die eventually, so regularly save your project files on an external hard drive, USB thumb drive, or network drive. At best, use a tool that seamlessly does that for you. macOS users can conveniently use Time Machine for automatic backups. 13.
Bome MIDI Translator: User's Manual 13 Tips & Tricks 13.3 Running from a USB Thumb Drive Many users need to be mobile and sometimes need to run their setup on other computers, or have a backup solution available. 13.3.1 Windows If you need virtual MIDI ports, we recommend to put the installer on the thumb drive. There is no other convenient way to install the virtual ports other than to run the installer of MIDI Translator.
Bome MIDI Translator: User's Manual 13.3.5 13 Tips & Tricks Using Multiple Configurations As shown in the tip Quick Access to Different Configs above, just add multiple copies of the executable app on the thumb drive and use a matching settings file and project file to go along. 13.3.6 Using Script Files For the more advanced user, you can create start scripts that use the command line switches for using particular settings and project files. See also: Use Command Line for Importing Settings. 13.
Bome MIDI Translator: User's Manual 13 Tips & Tricks executed one after another, because both Incoming Actions will be triggered from the (matching) event. Note that for this to work, you must uncheck “Stop Processing”. 2. For the MIDI outgoing action, you can use the Raw MIDI outgoing type and concatenate multiple message directly in the MIDI message field, e.g.: 90 40 7F 90 44 7F 90 4A 7F will play 3 notes directly. 3.
Bome MIDI Translator: User's Manual 13 Tips & Tricks This works, and will give the performance gain. However, there is a practical problem: when working on the Project, saving it will save the “Initialization” preset in deactivated state. So the next time you load it, it won't be called, because it's not active. So you'd need to activate it manually every time before you save the project to ensure it's saved in “active” state.
Bome MIDI Translator: User's Manual 13.6.3 13 Tips & Tricks Avoid Redundancy When a project grows over time, often similar things are done in two different ways, or too much use of copy/paste caused duplicated Translators. Also a common thing is to forget to remove Translators that were once added for testing only. So it is a good idea to look through the Presets with an eye for duplicated functionality. 13.6.
Bome MIDI Translator: User's Manual 14 Usage Example 14 Usage Example 14.1 Traktor / Ableton Live Sync Virtual MIDI ports are available for use as unidirectional MIDI ports, so you only need one virtual MIDI port to get MIDI data into a target application like Traktor, and to get data back from it. 1. The first step is to select the Bome virtual port as the MIDI output in your MIDI clock source application. In this example we're using Traktor to act as the MIDI clock master.
Bome MIDI Translator: User's Manual 14 Usage Example 3. Next you'll need to make a link between the IN device and the OUT device in the MIDI Router. Open the MIDI Router by clicking on Settings / MIDI Router / Project Properties. Drag a link between Bome MIDI Translator 1 Virtual IN and Bome MIDI Translator 1 Virtual OUT. This will tell MIDI Translator to pass all data from Traktor thru to our MIDI clock destination source Ableton Live. 4.
Bome MIDI Translator: User's Manual 15 MIDI Translator in Hardware: the BomeBox 15 MIDI Translator in Hardware: the BomeBox Many users of Bome MIDI Translator Pro use it in environments where using a computer is not convenient, risky, or dangerous: on stage, on tour, or in a recording room of a studio (fan noise!). For that, we've developed the BomeBox: (c) 2019 by Bome Software GmbH & Co.
Bome MIDI Translator: User's Manual 15 MIDI Translator in Hardware: the BomeBox The BomeBox has MIDI connectivity via USB (host) MIDI-DIN in and out Ethernet (Cat-5) WiFi And, of course, it runs all your MIDI Translator Pro project files, standalone, without a computer. You can even use Incoming Keystroke actions (by connecting a QWERTY keyboard via USB / wireless dongle), and serial port input/output (by connecting serial port adapter(s) to the USB connector.
Bome MIDI Translator: User's Manual 16 Reference 16 Reference 16.1 Terminology Project: A Project is a collection of Presets, grouped by a set of common attributes such as MIDI in/out/thru settings, appearance settings, and other common application-wide attributes. Preset: A Preset is a collection of Translators. There are individually named Presets, which may be switched and activated separately, as well as an '[always active]' preset, which is perpetually active.
Bome MIDI Translator: User's Manual 16 Reference 16.2 Keyboard Shortcuts On macOS, the shortcuts are used with the Command key instead of the Ctrl key.
Bome MIDI Translator: User's Manual Lists Ctrl+C Ctrl+V Ctrl+X Ctrl+D Del/Backspace F2 Ctrl+A Ctrl+Up/Ctrl+Down Translator Editor Alt+C 16 Reference Copy to clipboard Paste from clipboard Cut to clipboard Duplicate selected preset/translator Delete currently selected object Rename currently selected object Select All objects in active viewing area move selected object up/down in list view MIDI Capture (for MIDI as Incoming or Outgoing Action) (c) 2019 by Bome Software GmbH & Co.
Bome MIDI Translator: User's Manual 16 Reference 16.3 Command Line Switches /debug /info /error /timedebug debugging output /silent no output /nodebug /nosilent reverse the meaning /settings use the given .bmts file instead of using the last session's settings. At program exit, the settings will be written to that file. /project load .bmtp file at startup /addproject add the presets in the given project file to the current project.
Bome MIDI Translator: User's Manual 16 Reference 16.4 Menu Reference File New: close the current project and start a fresh one Open: Open Project - Opens an existing MIDI Translator project file Save: Save Project - Saves current project, prompting for a name if first save Save As: Save Project As... - Saves current project as a new file name Export Project as Text…: create a human readable text file with all your presets and translators.
Bome MIDI Translator: User's Manual 16 Reference Deactivate: Disable currently selected preset or translator from processing incoming and outgoing events Move: Submenu - Move selected preset or translator up/down/top/bottom Export Preset As Text File: Save currently selected preset as a readable text file for easy display Properties: Show and activate properties pane for the currently selected preset or translator MIDI Project Default Ports: Select the default MIDI ports for your project Preset Default Po
Bome MIDI Translator: User's Manual 16 Reference Translator sub-menu: show Translator properties in the right pane and focus on General options, Incoming action, Rules, or Outgoing action. Settings: open the settings window with general options for the entire program. On macOS, the Settings are available from the left application menu.