
User guide


1. Select the caption.
2. Move the caption with the arrow keys.
For more information on moving objects,see "Moving objects" on page 42.
3. To create another column with this same spacing as the previous, select the Text tool and press TAB. A third cap-
tion text box appears.
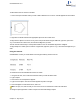
Creating a new row
To start a new row that is aligned with the first, press TAB twice at the end of a row.
A caption text box appears under the first caption positioned exactly 20 points below the first caption in the first row.
To change the spacing between rows as you create the table:
1. Select all the captions in a row.
2. Move the captions using the arrow keys.
For more information on moving objects, see "Moving objects" on page 42.
Adjusting row or column spacing
1. Select all the captions in the row or column with a selection tool.
2. SHIFT and drag the captions.
The movement is constrained to the X-axis or Y-axis so that you can maintain the row or column alignment.
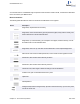
Inserting a new row
To insert a row:
1. Select a selection tool and select a row of captions.
2. SHIFT+drag the selected row.
3. SHIFT constrains the movement to the Y-axis to maintain the column alignment.
4. Select the first caption in the row above or below the space you created.
5. CTRL+SHIFT+drag to create a copy of the caption and position it in the empty space you created.
6. The placement of this copied caption sets the position of the inserted row.
To fill in the inserted row with caption text:
1. Click the Text tool and select the first caption in the inserted row.
2. Type new text.
3. Press TAB to move to the second caption in the inserted row, and so on.
ChemBioDraw 13.0
Chapter 14: Page layout 287 of 401