
Server User Manual


Table Of Contents
- Developing Applications for J2EE™ Servers
- Contents
- Ch 1: Introduction
- Ch 2: Programming for the Java 2 Platform, Enterprise Edition
- Ch 3: Creating applications with J2EE technologies
- Ch 4: Configuring the target server settings
- Ch 5: Using JBuilder with Borland servers
- Configuring Borland servers in JBuilder
- Making the ORB available to JBuilder
- Configurations, partitions, partition services, and J2EE APIs
- Starting the configuration or server
- Remote deploying
- Remote debugging
- Web module workarounds
- Displaying the Borland Management Console in JBuilder
- International issues
- Borland servers and JDataStore 7.0
- Ch 6: Using JBuilder’s CORBA tools
- Ch 7: Using JBuilder with BEA WebLogic servers
- Ch 8: Using JBuilder with IBM WebSphere servers
- Ch 9: Using JBuilder with JBoss servers
- Ch 10: Using JBuilder with Tomcat
- Ch 11: Editing J2EE deployment descriptors
- Ch 12: Integrating with Enterprise Information Systems
- Ch 13: Building J2EE modules
- J2EE modules
- Setting module build properties
- Adding custom file types
- Sample build scenarios
- EJB JAR without any bean classes
- EJB JAR with custom files
- EJB JAR without EJB designer XML descriptors
- WAR with custom descriptor(s) in the WEB-INF directory
- WAR without any classes
- WAR with custom class filters
- WAR with custom file types
- EAR with custom files
- RAR with classes and dependencies
- Application client module with classes and dependencies
- Improving module build performance
- Index
50 Developing Applications for J2EE Servers
Setting up JBuilder for CORBA applications
2 Make sure VisiBroker is selected as your IDL compiler.
3 Enter the following options into the Additional Options field:
-VBJprop borland enterprise.licenseDir=<visibroker license directory>
-VBJjavavm<jdk1.4.1 java or javaw path>
The license directory is <BES_install>\var\servers\SERVER_NAME\adm. The <server
directory>
is same as the server name assigned when you configured the server
using Enterprise|Configure Servers. You can find the server name on the Custom
page of the Configure Servers dialog box.
4 Click OK to close the Project Properties dialog box.
You must still perform one step: starting the VisiBroker Smart Agent. This handles the
initial bootstrap issues such as how the client locates the naming service and so on. To
start the Smart Agent, choose Tools|VisiBroker Smart Agent.
You’ve now completed setting up your system to use the JBuilder CORBA features.
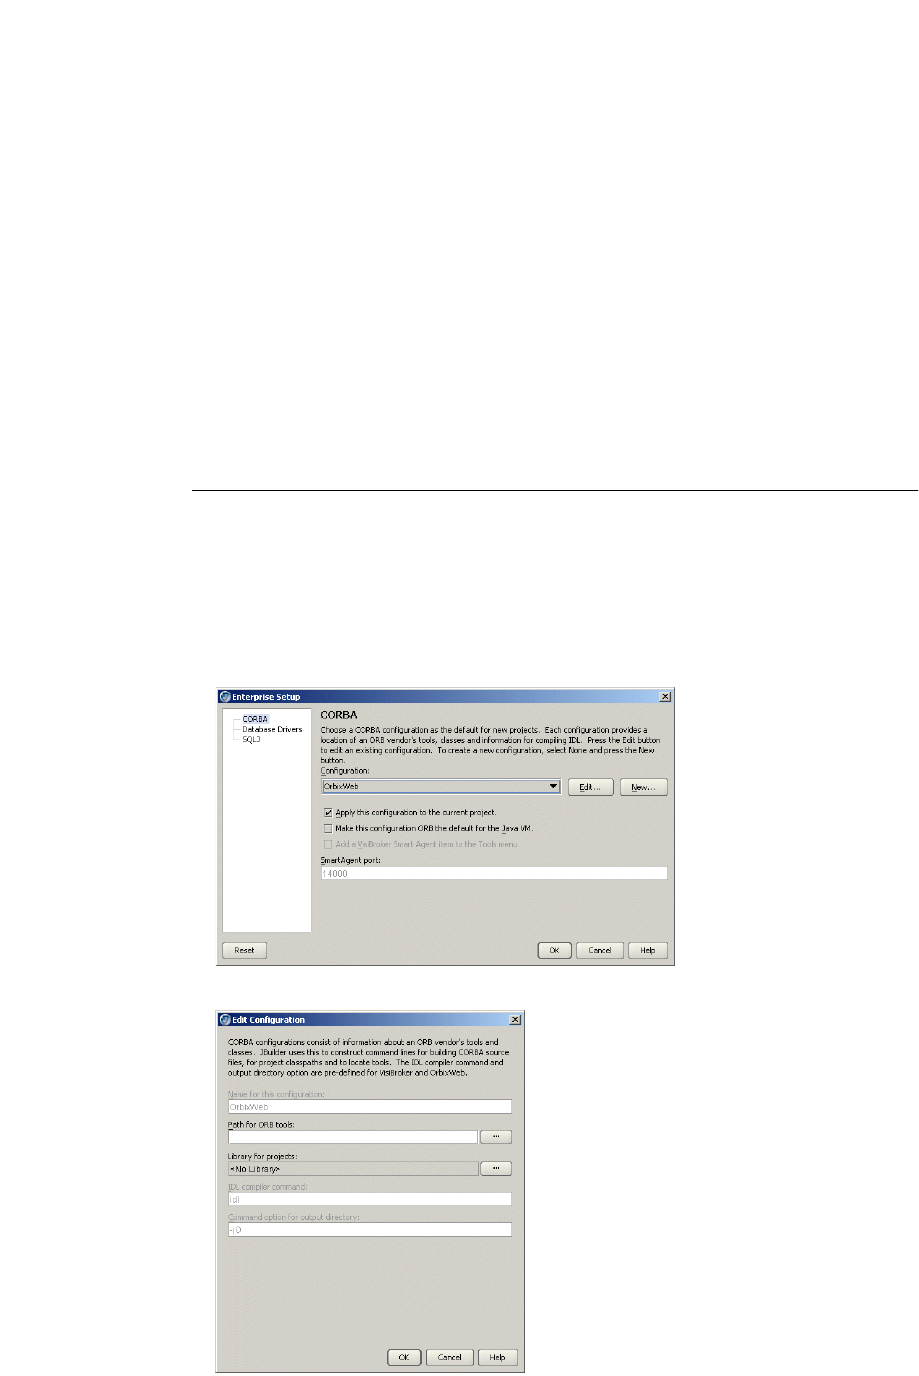
Configuring the OrbixWeb ORB
Follow the steps in this section to set up JBuilder for use with the OrbixWeb ORB.
To configure the OrbixWeb ORB,
1 Choose Enterprise|Enterprise Setup to display the Enterprise Setup dialog box.
Select the CORBA page. The parameters in this dialog box allow JBuilder to see the
ORB.
2 Select the OrbixWeb option from the Configuration drop-down list.
3 Click the Edit button to display the Edit Configuration dialog box.