
User Manual


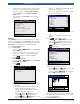


Table Of Contents
- 1 Safety Precautions
- 1.1 Read All Instructions
- 2 Important Safety Warnings and Instructions
- 3 Getting Started
- 4 Using the Scan Tool
- 5 Heavy Duty Standard Diagnostics
- 6 OBD II Diagnostics
- 7 Troubleshooting
- 8 Appendix A—Global OBD II PID Definitions
- 9 Appendix B—Glossary
- 10 Third Party Licenses
- 11 Limited Warranty

581618 | REV. B | 11.2018
Bosch Automotive Service Solutions Inc.
HDS 200/HDS 250
HD Scan Tool for Class 4-8 Diesel, Light and Medium Vehicles
|
User guide | 11
|
en
4.3 Display
The display has a large viewing area for displaying mes-
sages, instructions, and diagnostic information.
The back-lit liquid crystal display (LCD) is a QVGA pixel
display. Display icons used to help operate the scan tool
are:
• Indicates additional information is available by
scrolling down.
• Indicates additional information is available by
scrolling up.
• Indicates the internal batteries need replaced or
are not installed.
• √ Indicates selected items in a data list or that data
is available for items on the Review Data and Print
Data Menu.
• Indicates graphical viewing of data items is
available in View Data and when playing back previ-
ously recorded data.
Keypad
The keypad is used to move through the different menus
of the scan tool. The scan tool’s software is designed for
ease in operating and navigating through menus.
CAUTION
Do not use solvents such as alcohol to clean
keypad or display. Use a mild nonabrasive
detergent and a soft, cotton cloth.
CAUTION
Do not soak keypad as water might find
its way inside the scan tool.
4.4 Power
Internal Battery Power
• Battery power is not required to use tool.
• Press and hold ON/OFF key for at least 1 sec-
ond to turn ON scan tool.
• The scan tool will autmatically turn OFF after a
user-selectable period of inactivity when powered
from the internal batteries. The default is 2 minutes.
• When powered from the internal batteries, the scan
tool will dim display backlighting.
• The scan tool must be attached to the vehicle to
perform diagnostic functions. The scan tool disables
the diagnostic functions when powered from the
internal batteries.
• Each time the scan tool is powered up, voltage of
the internal battery is checked. If voltage is low, the
Low Battery symbol ( ) displays on screen.
Replace the battery using instruction provided in
Battery Replacement.
CAUTION
If the scan tool will not be used for an
extended period of time, remove the
batteries to prevent battery leakage from
damaging the battery compartment.
Vehicle Power
When the scan tool is connected to the vehicle’s DLC,
the tool is powered by the vehicle and will automatically
turn on once connected. If you use the cigarette lighter
adapter cable, be aware that some vehicle cigarette
lighters are not powered when the ignition is in the OFF
position. Therefore, you may wish to use the optional
battery clip adapters (7-0136).
USB Power
When the tool is connected to a PC via a USB cable, the
tool will automatically power up. Refer to “7.2 Scan
Tool Does Not Power Up” on page 41 if there are
problems.
4.5 System Setup
System Setup allows:
• Measurement units to be changed.
• Auto-Power off time to be changed.
• Printer Header to be turned ON or OFF.
• Scan tool information to be viewed.
• Display to be checked.
• Operation of the keypad to be checked.
• Memory of the tool to be checked.
• Scan tool to be upgraded.
• Language to be changed.
• Quick Test to be turned ON, OFF, or set to the
desired method.
• Long PID/SPN names to be turned ON or OFF.
• Change the number of Pre-Trigger frames when
recording data.
From the Main Menu, Heavy Duty Standard menu, HD
OBD, or Global Automotive OBDII menu:
1. Select System Setup.
• Use the UP and DOWN keys until System
Setup is highlighted.
• Press .
Main Menu
HD SAE (J1708/J1587, J1939)
HD OBD (ISO 15765-4)
Global Automotive OBDII
Review Data
Print Data
System Setup
Changing Measurement Units
English is the default measurement unit. Measurement
units can be changed in View and Record Data.