3FHJTU FS \RXU QHZ GH YLFH RQ 0\%RV FK QRZ DQG JHW IUH H EHQH ILWV CPTDI IPNF XFMDP DPN NF Built-in oven CSG636B.
en Table of contents [en]I nst r uct i on manual Bui l t - i n oven 8 Intended use . . . . . . . . . . . . . . . . . . . . . . . . . . . . . 4 ( Important safety information . . . . . . . . . . . . . . . 5 General information . . . . . . . . . . . . . . . . . . . . . . . . . . . 5 Steam. . . . . . . . . . . . . . . . . . . . . . . . . . . . . . . . . . . . . . 6 ] Causes of damage . . . . . . . . . . . . . . . . . . . . . . . . 6 General information . . . . . . . . . . . . . . . . . . . . . . . . . . .
en Intended use J Tested for you in our cooking studio. . . . . . . . 38 Silicone moulds . . . . . . . . . . . . . . . . . . . . . . . . Cakes and small baked items . . . . . . . . . . . . . Bread and rolls. . . . . . . . . . . . . . . . . . . . . . . . . Pizza, quiche and savoury cakes . . . . . . . . . . . Bakes and soufflés. . . . . . . . . . . . . . . . . . . . . . Poultry . . . . . . . . . . . . . . . . . . . . . . . . . . . . . . . Meat . . . . . . . . . . . . . . . . . . . . . . . . . . . . . . . .
Important safety information (Important safety information I mpor t ant saf et y i nf or mat i on General information : Warning – Risk of fire! Combustible items stored in the cooking compartment may catch fire. Never store combustible items in the cooking compartment. Never open the appliance door if there is smoke inside. Switch off the appliance and unplug it from the mains or switch off the circuit breaker in the fuse box. Risk of fire! ■ Loose food remnants, fat and meat juices may catch fire.
en Causes of damage Steam : Warning – Risk of scalding! The water in the water tank may become very hot if you continue to operate the appliance. Empty the water tank after every operation with steam. Risk of steam scalding! ■ Hot is generated in the cooking compartment. Do not reach into the cooking compartment during any operation with steam. Risk of liquid scalding! ■ Hot may spill over the sides of the accessory when it is removed from the cooking compartment.
Environmental protection Steam Caution! ■ Baking tins: Ovenware must be heat and steam resistant. Silicone baking tins are not suitable for combined operation with steam. ■ Ovenware with areas of rust: Do not use any ovenware which displays areas of rust. Even the smallest spots of rust can lead to corrosion in the cooking compartment. ■ Dripping liquids: When steaming with a perforated cooking container, always insert the baking tray, the universal pan or the solid cooking container underneath.
en ■ ■ ■ Environmental protection Open the appliance door as infrequently as possible when the appliance is in use. It is best to bake several cakes one after the other. The cooking compartment stays warm. This reduces the baking time for the second cake. You can place two cake tins next to each other in the cooking compartment. For longer cooking times, you can switch the appliance off 10 minutes before the end of the cooking time and use the residual heat to finish cooking.
Getting to know your appliance en Control panel *Getting to know your appliance In the control panel, you can use the various buttons, touch fields, touch-screen displays and the rotary selector to set the different appliance functions. The current settings are shown on the display. The overview shows the control panel when the appliance is switched on with the menu display. In this chapter, we will explain the indicators and controls.
en Getting to know your appliance Display The display is structured so that the information can be read at a glance in any situation. The value that you can currently set is highlighted and displayed in white text. The value in the background is displayed in grey. Highlighted The highlighted value can be changed directly without first being selected. After starting an operation, either the temperature or the level is always highlighted.
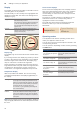
Getting to know your appliance en Heating types In order for you to find the correct heating type for your dish, we have explained the differences and scopes of application here. Type of heating 4D hot air * < Temperature 30-250 °C Use For baking and roasting on one or more levels. The fan distributes the heat from the ring heating element in the back panel evenly around the cooking compartment. For traditional baking and roasting on one level. Especially suitable for cakes with moist toppings.
en Getting to know your appliance Steam To enable you to find the correct steam type of heating for your dish, we have explained the differences and scopes of application here. Type of heating Steaming Temperature 30-100 °C Use For vegetables, fish, side dishes, for juicing fruit and for blanching Reheating 80-180 °C T Dough proving 30-50 °C B Defrosting 30-60 °C For plated meals and baked items Cooked food is gently reheated. The steam ensures that the food does not dry out.
Accessories _Accessories Your appliance is accompanied by a range of accessories. Here, you can find an overview of the accessories included and information on how to use them correctly. en Inserting accessories The cooking compartment has three shelf positions. The shelf positions are counted from the bottom up. Ac es or i es Accessories included Your appliance is equipped with the following accessories: Wire rack For ovenware, cake tins and ovenproof dishes.
en Accessories Combining accessories You can insert the wire rack and the universal pan at the same time to catch drops of liquid. When inserting the wire rack, ensure that both spacers ‚ are at the rear edge. When inserting the universal pan, the wire rack is on top of the upper guide rod of the shelf position. Example in the picture: Universal pan D D D Small steam containers may only be placed in the cooking compartment with the wire rack.
Before using for the first time KBefore using for the first time Before you can use your new appliance, you must make some settings. You must also clean the cooking compartment and accessories. Bef or e usi ng f or t he f i r st t i me Before using for the first time Before using the appliance for the first time, ask your water supplier about the hardness of your tap water. To ensure that the appliance can reliably remind you to descale it when required, you must set your water hardness range correctly.
en Operating the appliance 4. Heat up the appliance following calibration. Caution! Enamel damage Do not use the appliance if there is water on the cooking compartment floor. Before using the appliance, wipe away the water from the cooking compartment floor. 5. Dry the cooking compartment floor. 6. Set the specified type of heating and temperature for heating, then start the appliance.
Operating the appliance en Selecting an operating mode Once the appliance is switched on, the default operating mode is displayed. If you would like to select a different operating mode, you can do so using the menu. You can find detailed descriptions of the individual operating modes in the corresponding sections. The following always applies: 1. Touch the appropriate text field. The function is highlighted. 2. Turn the rotary selector to change the highlighted selection. 3.
en Steam Cancelling To cancel the rapid heating, touch the "Rapid heating" text field again. "Off" is displayed in the text field. `Steam Food can be cooked particularly gently using steam. With some heating modes, you can prepare food with steam assistance. In addition, the Dough proving, Defrost and Reheat heating modes are available. St eam : Warning – Risk of scalding! When you open the appliance door, hot steam can escape. Steam may not be visible, depending on its temperature.
Steam Changing You can change the settings as usual. To change the temperature or the duration, touch the corresponding text field and change using the rotary selector. The change is adopted immediately. To change the type of heating, interrupt the operation beforehand using the l Start/Stop button. Menu cooking With steam, you can cook a whole menu at once, without the different flavours mixing.
en Steam Starting 1. Fill the water tank. Note: Only switch on the Dough proving setting once the cooking compartment has completely cooled down (to room temperature). 2. Touch the Menu field. 3. Touch the "Steaming" text field. 4. Touch the "Dough proving" text field. The temperature is in focus. 5. Set the temperature using the rotary selector. 6. Touch the "Duration" text field and set the duration. Note: A duration is always required for the steam types of heating. 7.
Steam 1. Touch the v field. The control panel is pushed forwards automatically. 2. Pull the control panel forwards with both hands and then push it upwards until it locks into place (Fig. !). 3. Lift the water tank and remove it from the water tank recess (Fig. "). 2I 1 en Refilling the water tank Notes ■ Steam-assisted operations continue without adding steam.
Steam en Cleaning the drip trough Drying the cooking compartment by hand 1. Allow the appliance to cool down. 2. Open the appliance door. 3. Soak up the water in the drip trough ‚ with a sponge cloth and wipe it carefully (figure !). 1. Allow the appliance to cool down. 2. Remove any food remnants from the walls of the When you wipe it, be careful not to detach the seal ƒ from the drip trough (figure "). 1 2 E D The drip trough ‚ is located below the cooking compartment (figure #).
Time-setting options 4. Press the l Start/Stop button to start. OTime-setting options Ti me- set i ng opt i ons en The cooking time counts down. Your appliance has different time-setting options. Time-setting option Use q Cooking time After the set cooking time has elapsed, the appliance ends the operation automatically. r End Enter a cooking time and the required end time. The appliance starts automatically so that the operation ends at the required time. t Timer The timer functions like an egg timer.
Time-setting options en 4. Set a later end time using the rotary selector. 7\SH RI KHDWLQJ +RW DLU HFR 7HPSHUDWXUH & Setting the timer &RRN WLPH P V U (QG (QG 5. Press the l Start/Stop button to start. The time at which the appliance will start is shown in the display. &RRN WLPH P V 6WDUW (QG The appliance is in standby mode. When the appliance starts, the cooking time counts down on the display. Once the cooking time has elapsed, an audible signal sounds.
Childproof lock en AChildproof lock QBasic settings Your appliance is equipped with a childproof lock so that children cannot switch it on accidentally or change any settings. The control panel is locked and no settings can be made. The appliance can only be switched off using the ÿ On/Off button. There are various settings available to you in order to help use your appliance effectively and simply. You can change these settings as required. Activating and deactivating 1. Touch the menu field.
en Basic settings List of basic settings Power cut Depending on the features of your appliance, not all basic settings are accessible. The changes you make to the settings are saved even after a power cut. You only have to reset the settings for the initial use following a long-term power cut. The appliance can bridge a short-term power cut. Setting Language Clock Water hardness Options Additional languages are possible.
Sabbath mode FSabbath mode With the Sabbath mode, a cooking time of up to 74 hours can be set. You can keep the food in the cooking compartment warm without having to switch the oven on or off. en DCleaning agent With good care and cleaning, your appliance will retain its appearance and remain fully functioning for a long time to come. We will explain here how you should correctly care for and clean your appliance.
en Cleaning agent Door panels Door handle Hot soapy water: Clean with a dish cloth and then dry with a soft cloth. Do not use a glass scraper or a stainless steel scouring pad. Hot soapy water: Clean with a dish cloth and then dry with a soft cloth. If descaler comes into contact with the door handle, wipe it off immediately. Otherwise, any stains will not be able to be removed.
Cleaning function When the cooking compartment has cooled down, remove the brown or white residue with water and a soft sponge. Note: During operation, reddish spots form on the surfaces. This is not rust, but residues from food. These spots are not harmful and do not restrict the cleaning ability of the self-cleaning surfaces. Caution! Do not use oven cleaner on the self-cleaning surfaces. This will damage the surfaces.
en Rails 5. Close the control panel. 6. Touch the Menu field. The list of operating modes is displayed. 7. Touch the "Cleaning" text field. 8. Touch the "Descaling" text field. The duration of the descaling programme is displayed. It cannot be changed. 9. Press the Start/Stop button l to start. The appliance is now descaled. The time counts down in the display. Once the cooking time has elapsed, an audible signal sounds. First rinsing cycle 1. Open the control panel. 2.
Appliance door Attaching the rails The rails only fit on the right or the left side. For both rails, ensure that the curved rods are at the front. 1. First, insert the rail in the middle of the rear socket ‚, until the rail rests against the cooking compartment wall, and push it back ƒ (figure !). 2. Then insert the rail into the front socket „, until the rail also rests against the cooking compartment wall here, and press it downwards … (figure ").
Appliance door en Fitting the appliance door Removing the door cover 1. Press down on the seal ‚ along the drip trough (figure !); otherwise, the seal ‚ may become The stainless steel inlay in the door cover may become discoloured. To carry out thorough cleaning, you can remove the cover. detached during cleaning. 1. Open the appliance door slightly. 2. Press on the right and left side of the cover (figure !). 3. Remove the cover (figure "). 1 Close the appliance door carefully. 1 2 D 2.
Appliance door 4. Loosen and remove the screws on the left and right of the appliance door (figure #). 5. Before closing the door again, trap a tea towel which has been folded several times in the door (figure $). en Caution! Do not use the cooking compartment again until the panels have been correctly fitted. Pull out the front panel upwards and lay it on a flat surface with the door handle facing downwards. Clean the panels with glass cleaner and a soft cloth.
en Trouble shooting 3Trouble shooting If a fault occurs, there is often a simple explanation. Before calling the after-sales service, please refer to the fault table and attempt to correct the fault yourself. Tr oubl e sho t i ng Fault The appliance does not work. "Sprache Deutsch" appears on the display. The time does not appear when the appliance is switched off. The appliance does not heat up; the m symbol lights up on the display.
Trouble shooting The "Fill water tank" message appears even though the water tank is full en The panel is open The water tank is not clicked into place Close the panel Click the water tank into place ~ "Steam" on page 18 Faulty sensor Call the after-sales service The water tank has fallen off. Order a new water tank Due to the impact, components inside the water tank have come loose, and the tank is leaking.
en Customer service 4Customer service Our after-sales service is there for you if your appliance needs to be repaired. We will always find an appropriate solution, also in order to avoid after-sales personnel having to make unnecessary visits. Cust omer ser vi ce E number and FD number When calling us, please quote the full product number (E no.) and the production number (FD no.) so that we can provide you with the correct advice.
Dishes en Selecting a dish Applying settings for dishes The dishes are arranged in a uniform structure: You will be guided through the entire setting process for your chosen food. Use the rotary selector to scroll through the individual levels. ■ ■ ■ Category Food Dish The following table lists the categories with the corresponding food. One or more dishes are listed beside each food.
en Tested for you in our cooking studio JTested for you in our cooking studio Here, you can find a selection of dishes and the ideal settings for them. We will show you which type of heating and temperature are best suited to your dish. You will get information on suitable cooking accessories and the height at which they should be placed in the oven. You will also get tips about cookware and preparation methods.
Tested for you in our cooking studio The setting values apply to food that is placed into a cold cooking compartment; by doing this, you can make energy savings of up to 20 per cent.If you preheat the oven, you can reduce the indicated baking times by several minutes. Preheating is necessary for selected food, and this is indicated in the table. Do not place your food or accessories into the cooking compartment until it has finished preheating.
en Tested for you in our cooking studio Dish Accessories/cookware Shelf posi- Heating tion function Temperature in °C Swiss flan Yeast cake with dry topping Yeast cake with dry topping Yeast cake with moist topping Yeast cake with dry topping, 2 levels Yeast cake with moist topping, 2 levels Plaited loaf, savarin Plaited loaf, savarin Swiss roll Swiss roll Stollen with 500 g flour Stollen with 500 g flour Strudel, sweet Strudel, sweet Strudel, frozen Strudel, frozen Universal pan Baking tray Baking t
Tested for you in our cooking studio en Tips on baking You want to find out whether the cake Push a cocktail stick into the highest point on the cake. If the cocktail stick comes out clean with no dough resis completely cooked in the middle. idue, the cake is ready. The cake collapses. Next time, use less liquid. Alternatively, set the temperature to be 10 °C lower and extend the baking time. Adhere to the specified ingredients and preparation instructions in the recipe.
en Tested for you in our cooking studio Accessories Ensure that you always use suitable accessories and that they are placed in the oven the right way around. Wire rack Insert the wire rack with the open side facing the appliance door and the curved lip pointing downwards. Always place ovenware, tins and dishes on the wire rack. Universal pan or baking tray Slide the universal pan or the baking tray in carefully as far as the limit stop with the bevelled edge facing the appliance door.
Tested for you in our cooking studio en Dish Accessories Shelf posi- Heating tion function Temperature in °C/grill setting Wholemeal bread, 1 kg Universal pan 1 < Flatbread Flatbread Universal pan Universal pan 1 2 % % 210-220 180-190 220-240 220-230 Steam in- Cooking tensity time in mins.
en Tested for you in our cooking studio Baking on two levels Use 4D hot air. Baked items that are placed into the oven on trays or in baking tins/dishes at the same time will not necessarily be ready at the same time. ■ Universal pan: Level 3 Baking tray: Level 1 ■ Baking tins/dishes on the wire rack First wire rack: Level 3 Second wire rack: Level 1 By preparing several dishes at the same time, you can make energy savings of up to 45 per cent.
Tested for you in our cooking studio en Dish Accessories Shelf posi- Type of tion heating Temperature in °C Pizza baguette Mini pizza Wire rack Baking tray 1 1 < % 200-220 210-230 Steam in- Cooking tensity time in mins.
Tested for you in our cooking studio en The levels of steam intensity are indicated as numbers in the table: ■ ■ ■ 1 = Low 2 = Medium 3 = High Dish Accessories/cookware Shelf posi- Type of tion heating Temperature in °C Bake, savoury, cooked ingredients Bake, savoury, cooked ingredients Bake, sweet Lasagne, fresh, 1 kg Lasagne, fresh, 1 kg Lasagne, frozen, 400 g Lasagne, frozen, 400 g Potato gratin, raw ingredients, 4 cm deep Potato gratin, raw ingredients, 4 cm deep Soufflé Soufflé Soufflé * Prehea
Tested for you in our cooking studio Larger pieces require a longer heating-up time and a longer cooking time. If you are using several pieces which are the same weight, the heating-up time is increased, and not the cooking time. Poultry items do not have to be turned. Use the perforated steam container (size XL) and slide the universal pan in underneath. You can also use a glass tray and place this onto the wire rack. Grilling Keep the appliance door closed when using the grill.
en Tested for you in our cooking studio Dish Accessories/cookware Shelf posi- Type of tion heating Temperature in °C/ grill setting Poulard, 1.5 kg Wire rack 1 7 180-200 Steam in- Cooking tensity time in mins.
Tested for you in our cooking studio Observe the manufacturer's instructions for your roasting cookware. Uncovered cookware Use a deep roasting tin/dish for roasting meat. Place the tin/dish onto the wire rack. If you do not have any suitable cookware, use the universal pan. Covered cookware When cooking with covered cookware, the cooking compartment remains considerably cleaner. Ensure that the lid fits well and closes properly. Place the cookware onto the wire rack.
en Tested for you in our cooking studio Dish Accessories/cookware Shelf posi- Type of tion heating Temperature in °C/ grill setting Steam in- Cooking tensity time in mins.
Tested for you in our cooking studio en Dish Accessories/cookware Shelf posi- Type of tion heating Temperature in °C/ grill setting Saddle of lamb on the bone***** Lamb cutlet*** Cookware, uncovered Wire rack 1 2 7 ( 200-210* 3 Steam in- Cooking tensity time in mins.
en Tested for you in our cooking studio Shiny roasting dishes made from stainless steel or aluminium reflect heat like a mirror and are therefore not particularly suitable. The fish cooks more slowly and browns less. Use a higher temperature and/or a longer cooking time. Observe the manufacturer's instructions for your roasting cookware. Uncovered cookware To cook a whole fish, it is best to use a deep roasting tin/dish. Place the tin/dish onto the wire rack.
Tested for you in our cooking studio Dish Accessories/cookware Fish, grilled, whole 1.5 kg, e.g. Wire rack salmon Fish, steamed, whole 1.5 kg, e.g. cod Steam container Shelf posi- Type of tion heating Temperature in °C/grill setting 1 7 170-190 Steam in- Cooking tensity time in mins.
en Tested for you in our cooking studio Cooking on two levels Use 4D hot air. Food on baking trays that are placed into the oven at the same time will not necessarily be ready at the same time. ■ Universal pan: Level 3 ■ Baking tray: Level 1 Accessories Ensure that you always use suitable accessories and that they are placed in the oven the right way around. Wire rack Insert the wire rack with the open side facing the appliance door and the curved lip pointing downwards.
Tested for you in our cooking studio en Dish Accessories/cookware Shelf posi- Type of tion heating Temperature in °C/grill setting Steam in- Cooking tensity time in mins.
en Tested for you in our cooking studio Making rice pudding 1. Weigh the rice and add 2.5 times as much milk. 2. Fill a bowl with the rice and milk so that the mixture is max. 2.5 cm deep. You can also use the universal pan for large quantities. 3. Use the settings indicated in the table. 4. Stir after cooking. The remaining milk is quickly absorbed. Compote Weigh the fruit and add approx. Y as much water. Add sugar and spices to taste. Use the settings indicated in the table.
Tested for you in our cooking studio Eco heating functions Hot air eco and Top/bottom heating eco are intelligent heating functions that allow you to gently cook meat, fish and baked items. The appliance optimally controls the supply of energy to the cooking compartment.The food is cooked in phases using residual heat. This means that it remains more succulent and browns less. Depending on the method of preparation and the type of food, it is possible to save energy.
en Tested for you in our cooking studio Dish Accessories/cookware Shelf posi- Type of tion heating Temperature in °C Small cakes Puff pastry Choux pastry Biscuits Piped cookies Small yeast cakes Baking tray Baking tray Baking tray Baking tray Baking tray Baking tray 1 2 1 2 2 1 . . . . . # 150-160 170-190 200-220 140-160 140-150 150-160 Cooking time in mins. 25-35 25-50 35-45 15-30 25-40 30-40 Bread & bread rolls Multigrain bread, 1.
Tested for you in our cooking studio Cookware Use flat cookware, e.g. a glass/porcelain serving dish. Place the cookware into the cooking compartment to preheat it. Always place the uncovered cookware onto the wire rack at level 1. You can find additional information in the tips on slow cooking attached to the settings table. Your appliance features the heating type "Slow cook". Only start operation when the cooking compartment has fully cooled down.
en Tested for you in our cooking studio Drying With 4D hot air, you can dry foods with outstanding results. With this type of preserving, flavourings are concentrated by the dehydration. Only use unblemished fruit, vegetables and herbs and wash them thoroughly. Line the wire rack with greaseproof paper or parchment paper. Drain the excess water from the fruit and dry it. If necessary, cut it into equal chunks or thin slices. Place unpeeled fruit onto the dish with the sliced surfaces facing upwards.
Tested for you in our cooking studio Juicing Before juicing, place the berries in a bowl and sprinkle with sugar. Leave to stand for at least one hour to draw out the juice. Then fill the perforated steam container (size XL) with the berries and insert into the oven at level 2. Slide the universal pan in underneath to collect any juice. Use the settings indicated in the table. After cooking, wrap the berries in a cloth and squeeze out the remaining juice. Wipe the cooking compartment clean afterwards.
en Tested for you in our cooking studio Do not open the appliance door during the proving process, as moisture will escape. Do not cover the dough. Final fermentation Place your baked item into the oven at the shelf position indicated in the table. Wipe moisture from the cooking compartment before baking. Recommended setting values The temperature and proving time are dependent on the type and quantity of the ingredients. The values in the table are therefore only meant to be average values.
Tested for you in our cooking studio en Dish Accessories Shelf posi- Type of tion heating Temperature in °C Cooking time in mins. Bread, bread rolls General Baking tray 1 < 50 40-70 Cake Cake, moist Cake, dry Baking tray Baking tray 1 1 < < 50 60 70-90 60-75 Fruit, vegetables Berries Vegetables Steam container Steam container 2 2 B B 30-40 40-50 10-15 15-50 Reheating Using heating type "Reheating", food is reheated gently using steam.
en Tested for you in our cooking studio Keeping warm You can keep cooked dishes warm using the "Keeping warm" heating type. You can use the various moisture levels to prevent the cooked dishes from drying out. Do not cover the food. Do not keep cooked dishes warm for longer than two hours. Be aware that some dishes may continue cooking whilst being kept warm. Do not cover the food.
Tested for you in our cooking studio Steam Slide the universal pan in under the perforated steam container (size XL) if indicated in the table. Any dripping liquid is caught. Shelf positions for steaming on two levels (use a maximum of 1.8 kg per level): ■ Perforated steam container (size XL): Level 3 ■ Perforated steam container (size XL): Level 2 Shelf positions for steaming on one level (use a maximum of 2.
6
6
5IBOL ZPV GPS CVZJOH B #PTDI )PNF "QQMJBODF 5HJLVWHU \RXU QHZ GHYLFH RQ 0\%RVFK QRZ DQG SURILW GLUHFWO\ IURP t &YQFSU UJQT USJDLT GPS ZPVS BQQMJBODF t 8BSSBOUZ FYUFOTJPO PQUJPOT t %JTDPVOUT GPS BDDFTTPSJFT TQBSF QBSUT t %JHJUBM NBOVBM BOE BMM BQQMJBODF EBUB BU IBOE t &BTZ BDDFTT UP #PTDI )PNF "QQMJBODFT 4FSWJDF )UHH DQG HDV\ UHJLVWUDWLRQ ² DOVR RQ PRELOH SKRQHV XXX CPTDI IPNF DPN XFMDPNF -PPLJOH GPS IFMQ :PV}MM GJOE JU IFSF ([SHUW DGYLFH IRU \RXU %RVFK KRPH DSSOLDQFHV QHHG KHOS ZLWK SUREOHPV RU