Extractor hood [en] Instructions for installation and use .............................
en Table of contents INSTRUCTION MANUAL.......................................................... 2 s no i t c u r t s n I ] ne [ rof 8 Intended use................................................................... 2 ( Important safety information ........................................ 3 7 Environmental protection ............................................. 5 Ç Operating modes ........................................................... 5 1 Operating the appliance....................................
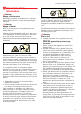
Important safety information en (Important safety information : Warning no i t amro f n i y t e f as t na t ropmI Danger of suffocation! Packaging material is dangerous to children. Never allow children to play with packaging material. : Warning Danger of death! Risk of poisoning from flue gases that are drawn back in. Always ensure adequate fresh air in the room if the appliance is being operated in exhaust air mode at the same time as room airdependent heat-producing appliance is being operated.
en Important safety information : Warning Risk of burns! The accessible parts become very hot when in operation. Never touch hot parts. Keep children at a safe distance. : Warning Risk of injury! ■ Components inside the appliance may have sharp edges. Wear protective gloves. Risk of injury! ■ Items placed on the appliance may fall down. Do not place any objects on the appliance. Risk of injury! ■ The light emitted by LED lights is very dazzling, and can damage the eyes (risk group 1).
Environmental protection 7Environmental protection Your new appliance is particularly energy-efficient. Here you can find tips on how to save even more energy when using the appliance, and how to dispose of your appliance properly. no i t ce t orp l a t nemnor i vnE en ÇOperating modes Exhaust air mode sedom gn i t arepO The air which is drawn in is cleaned by the grease filters and conveyed to the exterior by a pipe system.
Operating the appliance en 1Operating the appliance These instructions apply to several appliance variants. It is possible that individual features are described which do not apply to your appliance. Note: Switch on the extractor hood when you start cooking and switch it off again several minutes after you have finished cooking. This is the most effective way of removing the kitchen fumes.
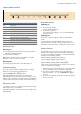
Operating the appliance en Control panel model 2 SRZHU ERRVW ERRVW Automatic mode Explanation # > Fan on/off Switching on Automatic mode 1-3 Fan settings Intensive setting 1 Touch the # symbol. The fan starts at setting 2. ■ Touch the > symbol. The optimum fan setting 1, 2 or 3 is automatically set via a sensor.
en Cleaning and maintenance Saturation display When the metal grease filters or the activated charcoal filter are/is saturated, an audible signal sounds for approximately four seconds after the fan is switched off. The indicator above the corresponding symbol flashes as well: ■ ■ Metal grease filter: E Activated charcoal filter: F If you have not yet done so, the metal grease filters should now be cleaned or the activated charcoal filter changed.
Cleaning and maintenance Area Stainless steel Cleaning agents Hot soapy water: Clean with a dish cloth and dry with a soft cloth. Clean stainless steel surfaces in the direction of the grain only. Special stainless steel cleaning products are available from our after-sales service or from specialist retailers. Apply a very thin layer of the cleaning product with a soft cloth. Painted surfaces Hot soapy water: Clean using a damp dish cloth and dry with a soft cloth/towel.
en Trouble shooting 3Trouble shooting Malfunctions often have simple explanations. Please read the following notes before calling the after-sales service. gn i t o h s e l buo r T : Warning Risk of electric shock! Incorrect repairs are dangerous. Repairs may only be carried out and damaged power cables replaced by one of our trained after-sales technicians. If the appliance is defective, unplug the appliance from the mains or switch off the circuit breaker in the fuse box.
Customer service en INSTALLATION INSTRUCTIONS Installation instructions These instructions apply to several appliance variants. It is possible that individual features are described which do not apply to your appliance. ■ ■ ■ Appliance width 60 cm: This appliance is installed in a upper cabinet. Follow the enclosed installation instructions for additional special accessories (e.g. for circulating-air mode). The surfaces of the appliance are sensitive. Avoid damaging them during installation.
en Important safety information (Important safety information Read these instructions carefully. Only then will you be able to operate your appliance safely and correctly. Retain the instruction manual and installation instructions for future use or for subsequent owners. The appliance can only be used safely if it is correctly installed according to the safety instructions. The installer is responsible for ensuring that the appliance works perfectly at its installation location.
General information : Warning Risk of fire! Grease deposits in the grease filter may catch fire. The specified safety distances must be observed in order to prevent an accumulation of heat. Observe the specifications for your cooking appliance. If gas and electric hobs are operated together, the largest specified distance applies. Only one side of the appliance may be installed directly next to a high-sided unit or a wall.
General information en Electrical connection : Warning Risk of electric shock! Components inside the appliance may have sharp edges. These may damage the connecting cable. Do not kink or pinch the connecting cable during installation. The required connection data can be found on the rating plate inside the appliance; to do this, remove the metal mesh grease filter. Length of the cable: approx. 1.30 m This appliance complies with the EC interference suppression regulations. 1.
Installation Body wall thickness: 16 mm 1. Screw the mounting pieces to the body on the left and right. ¨ 2. Remove the tabs from the bottom of the mounting pieces. © en 5Installation Sliding the appliance up into place no i t a l a t s n I 1. Slide the appliance up into place and make sure it is positioned correctly. ¨ 2. Measure the distance between the appliance and the wall, and mark this on the filler strip. 3. If required, shorten the filler strip to the required dimension.
en Installation 4. Screw in the filler strip fully. Sliding out the appliance Note: Before you remove the appliance, protect the hob with a piece of polystyrene from the packaging. 1. Use a flat-blade screwdriver to push in the fastening bolt, and turn it 90° until it locks into place. ¨ 2. Push in the fastening bolt gently with your fingers, and turn it until it comes out of the housing along with the spring. When doing this, grip the bottom of the appliance with the other hand.
Installation Appliance width 90 cm: You must also screw the appliance to the wall-hanging cupboards either side of it. en Connecting the pipes Note: If an aluminium pipe is used, smooth the area where it is to be connected before you connect it. Exhaust air pipe, dia. 150 mm (recommended size) Fit the exhaust air pipe directly to the air-pipe connector and seal the joint. Exhaust air pipe, dia. 120 mm 1. Fit the reducing connector directly to the air-pipe connector. 2.
Robert Bosch Hausgeräte GmbH Carl-Wery-Straße 34 81739 München Germany www.bosch-home.