
Interactive User Manual
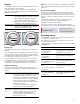
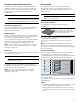
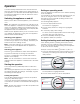
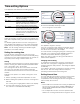
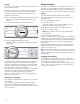
Table Of Contents
- Built-in oven
- Table of Contents Use and care manual
- Produktinfo
- IMPORTANT SAFETY INSTRUCTIONS
- READ AND SAVE THESE INSTRUCTIONS
- Proper Installation and Maintenance
- Fire Safety
- WARNING
- WARNING
- WARNING
- TO REDUCE THE RISK OF INJURY TO PERSONS IN THE EVENT OF A GREASE FIRE, OBSERVE THE FOLLOWING:
- a. SMOTHER FLAMES with a close-fitting lid, cookie sheet, or metal tray, then turn off the burner. BE CAREFUL TO PREVENT BURNS. If the flames do not go out immediately, EVACUATE AND CALL THE FIRE DEPARTMENT.
- b. NEVER PICK UP A FLAMING PAN – You may be burned.
- c. DO NOT USE WATER, including wet dishcloths or towels – a violent steam explosion will result.
- d. Use an extinguisher ONLY if:
- Burn Prevention
- Child Safety
- Cleaning Safety
- Cookware Safety
- Proposition 65 Warning:
- Causes of Damage
- Protecting the environment
- Getting to know the appliance
- Note:
- Parts
- Control panel
- Operating controls
- Buttons and touch fields
- Rotary selector
- Display ring
- Temperature display
- Touch-screen displays
- Default values
- Opening the appliance door
- Interior lighting
- Cooling fan
- Accessories Included
- Inserting accessories
- Locking function
- Special accessories
- With HomeConnect
- On the appliance
- Setting the language
- Setting the time
- Cleaning the cooking compartment
- Cleaning the accessories
- Switching on the appliance
- Switching off the appliance
- Pausing the operation
- Changing
- Setting
- Cancelling
- Setting
- Changing and cancelling
- Setting
- Changing and cancelling
- Setting
- Changing and cancelling
- Cancelling
- List of basic settings
- Power failure
- Changing the time
- 2. Touch the "Basic settings" text field.
- 3. Touch the "Clock" text field.
- 5. Touch the menu field to confirm.
- 3. Before starting the operation, touch the "Cooking time" text field.
- 4. Set the required cooking time using the rotary selector.
- 5. Press the Start/Stop button l to start.
- Changing and cancelling
- FCC COMPLIANCE STATEMENT
- INDUSTRY CANADA STATEMENT
- Cleaning Enamel Surfaces
- Cleaning self-cleaning surfaces
- Before running the cleaning function
- Cleaning the cooking compartment floor and the inside of the appliance door
- Setting the cleaning function
- Setting a later end time
- Cancelling
- Once the cleaning function has ended
- Detaching and refitting the rails
- Detaching the rails
- Attaching the rails
- Removing and fitting the appliance door
- Removing the appliance door
- Refitting the appliance door
- Removing the door cover
- Removing and installing the door panels
- Removing door panels from the appliance
- Refitting door panels on the appliance
- Error messages on the display
- Maximum operating time
- Replacing the cooking compartment bulb on the ceiling
- 3. Pull out the bulb – do not turn it (figure "). Insert the new bulb, making sure that the pins are in the correct position. Push the bulb in firmly.
- 4. Screw the glass cover back on. Depending on the appliance model, the glass cover may have a sealing ring. If the glass cover has a sealing ring, put it back in place before screwing the cover back on.
- 5. Remove the dish towel and switch on the circuit breaker.
- Glass cover
- Customer Service
- STATEMENT OF LIMITED PRODUCT WARRANTY
- Dishes
- 2. Touch the "Assist" text field.
- 3. Touch the required category.
- 4. Touch the required food.
- 5. Touch the required dish.
- 6. Press the Start/Stop button l to start.
- Continue cooking
- Setting a later end time
- Changing and cancelling
- Rack positions
- Accessories
- Recommended setting values
- Tips on baking
- Rack positions
- Accessories
- Frozen Products
- Recommended Setting Values
- Rack positions
- Accessories
- Frozen Products
- Recommended Setting Values
- Rack positions
- Accessories
- Recommended Setting Values
- Roasting in Cookware
- Recommended Setting Values
- Roasting and Braising
- Roasting and Braising in Cookware
- Broiling
- Recommended Setting Values
- Tips for Roasting and Braising
- Roasting and Steaming in Cookware
- Recommended Setting Values
- Rack positions
- Accessories
- Recommended Setting Values
- Cookware
- Recommended Setting Values
- Recommended Setting Values
- Recommended Setting Values
- Recommended Setting Values

20
--------
Power failure
The changes you make to the settings are retained even
after a power failure.
You only have to reset the settings for the initial use
following a long-term power failure. The appliance can
bridge a short-term power failure.
Changing the time
If you want to change the time, for example from summer
to winter time, you must change the basic setting.
The appliance must be switched on.
1.
Touch the menu field.
The list of operating modes is displayed.
2.
Touch the "Basic settings" text field.
The settings appear on the touch-screen displays.
3.
Touch the "Clock" text field.
The time appears on the display.
4.
Turn the rotary selector to change the time.
5.
Touch the menu field to confirm.
A query is displayed asking whether the changes
should be saved.
6.
Touch the "Save" text field.
A message is shown on the display to confirm that the
settings have been saved.
Sabbath mode
With the Sabbath mode, a cooking time of up to 74
hours can be set. You can keep the food in the cooking
compartment warm without having to switch the oven on
or off.
Starting Sabbath mode
Before you are able to use the Sabbath mode, you must
activate it in the basic settings. ~ "Basic Settings"
on page 19
When the basic setting has been changed accordingly,
Sabbath mode is listed with the heating modes as the
last type of heating.
The appliance heats up with Bake. You can set a
temperature between 150° F and 300° F (85 °C and
140 °C).
The "Heating modes" operating mode must be selected.
The selection list for the heating modes appears on the
touch-screen displays.
1.
Touch the "Sabbath" text field.
The default temperature is highlighted white in the
display.
2.
Set the required temperature using the rotary selector.
3.
Before starting the operation, touch the "Cooking time"
text field.
The default cooking time is highlighted white in the
display.
4.
Set the required cooking time using the rotary selector.
Note: The end time is calculated automatically but
cannot be changed.
5.
Press the Start/Stop button l to start.
The cooking time will count down on the display.
The appliance begins to heat up.
When the cooking time for Sabbath mode has ended, an
audible signal sounds. The appliance stops heating up.
The cooking time 00 m 00 s is shown in the display.
Press the ÿ On/Off button to switch off the appliance.
Note: The operation is not interrupted if you open the
appliance door.
Changing and cancelling
After starting the appliance, the settings can no longer be
changed.
If you would like to cancel Sabbath mode, switch the
appliance off using the ÿ On/Off button. You can no
longer pause the operation using the l Start/Stop
button.
Sabbath mode Switched on
Switched off*
* Factory setting (factory settings may vary depending
on the appliance model)