
Interactive User Manual

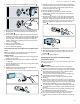


Table Of Contents
- Oven
- en-us
- Table of contents
- 1 IMPORTANT SAFETY INSTRUCTIONS
- 2 Preventing material damage
- 3 Environmental protection and energy-saving
- 4 Familiarizing yourself with your appliance
- 5 Accessories
- 6 Before using for the first time
- 7 Basic Operation
- 7.1 Setting the heating mode and temperature - 500 Series double ovens
- 7.2 Setting the heating mode and temperature - 500 Series single ovens
- 7.3 Setting the heating mode and temperature - 800 and Benchmark® Series
- 7.4 Temperature range by heating mode
- 7.5 Heating time limitation
- 7.6 Fast preheat
- 7.7 Meat probe
- 7.8 Turning the panel lock on or off
- 8 Timer functions
- 9 Basic settings
- 10 Home Connect™
- 11 Getting the most out of your appliance
- 11.1 Rack positions
- 11.2 Getting the best results
- 11.3 General tips for heating modes
- 11.3.1 How to use Bake mode
- 11.3.2 How to use Conv Bake mode
- 11.3.3 How to use Conv Multi Rack mode
- 11.3.4 How to use Pizza mode
- 11.3.5 How to use Roast mode
- 11.3.6 How to use Conv Roast mode
- 11.3.7 How to use Broil (high/low) mode
- 11.3.8 How to use Conv Broil mode
- 11.3.9 How to use Frozen Foods mode
- 11.3.10 How to use Air Fry mode
- 11.3.11 How to use Proof mode
- 11.3.12 How to use Warm mode
- 11.3.13 How to use EcoChef™ mode
- 12 Cleaning and maintenance
- 13 Troubleshooting
- 14 Cooking charts
- 15 Disposal
- 16 Customer Service
- 17 STATEMENT OF LIMITED PRODUCT WARRANTY
- fr-ca
- Table des matières
- 1 IMPORTANTES CONSIGNES DE SÉCURITÉ
- 1.1 Définitions des termes de sécurité
- 1.2 Informations générales
- 1.3 Utilisation prévue
- 1.4 Restriction sur le groupe d'utilisateurs
- 1.5 Utilisation sécuritaire
- 1.6 Sécurité des enfants
- 1.7 Fonction de nettoyage
- 1.8 Installation et entretien appropriés
- 1.9 Fonctionnement à distance
- 1.10 Mises en garde conformément à la proposition 65 de l'État de Californie
- 2 Prévenir les bris matériels
- 3 Protection de l'environnement et économies
- 4 Description de l'appareil
- 5 Accessoires
- 6 Avant d'utiliser pour la première fois
- 7 Opération de base
- 7.1 Réglage du mode de chauffage et de la température - fours doubles série 500
- 7.2 Réglage du mode de chauffage et de la température - fours simples série 500
- 7.3 Réglage du mode de chauffage et de la température - 800 et Benchmark™ série
- 7.4 Plage de température par mode de chauffage
- 7.5 Limitation du temps de chauffage
- 7.6 Préchauffage rapide
- 7.7 Sonde thermométrique
- 7.8 Activer ou désactiver le verrouillage du panneau
- 8 Fonctions de minuterie
- 8.1 Minuterie de cuisine
- 8.2 Minuterie du four
- 8.3 Cuisson différée
- 8.4 Mode sabbat
- 9 Réglages de base
- 10 Home Connect™
- 11 Tirer le meilleur parti de l’électroménager
- 11.1 Positions des grilles
- 11.2 Obtenir les meilleurs résultats
- 11.3 Conseils généraux pour les modes de chauffage
- 11.3.1 Comment utiliser le mode Bake
- 11.3.2 Comment utiliser le mode Conv Bake
- 11.3.3 Comment utiliser le mode Conv Multi Rack
- 11.3.4 Comment utiliser le mode Pizza
- 11.3.5 Comment utiliser le mode Roast
- 11.3.6 Comment utiliser le mode Conv Roast
- 11.3.7 Comment utiliser le mode Broil (high/low)
- 11.3.8 Comment utiliser le mode Conv Broil
- 11.3.9 Comment utiliser le mode Frozen Foods
- 11.3.10 Comment utiliser le mode Air Fry
- 11.3.11 Comment utiliser le mode Proof
- 11.3.12 Comment utiliser le mode Warm
- 11.3.13 Comment utiliser le mode EcoChef™
- 12 Nettoyage et entretien
- 12.1 Produits de nettoyage
- 12.2 Fonction autonettoyante
- 12.3 Entretien
- 13 Dépannage
- 14 Tableaux de cuisson
- 15 Élimination
- 16 Service à la clientèle
- 17 ÉNONCÉ DE LA GARANTIE LIMITÉE DU PRODUIT

Cleaning and maintenance en-us
31
Part Suitable cleaning method Recommendations
Black stainless sur-
faces/ anti-fingerprint
surfaces
¡ Clean with a soft, dry towel.
¡ For stubborn dirt, use warm wa-
ter diluted with a non-abrasive,
mild cleansing soap.
Never use stainless steel polish.
Plastic and controls When cool, clean with soapy wa-
ter, rinse and dry.
Probe Wipe with soapy water. ¡ Do not submerge in water.
¡ Do not wash in the dishwasher.
Printed areas (words
and numbers)
Do not use abrasive cleaners or petroleum based solvents.
1
These marks are registered trademarks of their respective owners. All other trademarks are trademarks of BSH Home
Appliances Corporation or its affiliated companies.
12.2 Self clean function
With pyrolytic self cleaning the oven is heated to a very
high temperature. Stubborn soil is burnt off and can be
wiped out after self clean is finished.
After the completion of a self-clean cycle, the oven will not
allow you to start another self-clean cycle for 24hours.
For a double oven, if one cavity runs self clean, neither
cavity may operate a self clean cycle for 24hours.
Preparing self clean
WARNING
During the elimination of soil during self-cleaning, small
amounts of carbon monoxide can be created and the fiber-
glass insulation could give off very small amounts of
formaldehyde during the first several cleaning cycles.
▶
To minimize exposure to these substances, provide
good ventilation with an open window, or use a ventila-
tion fan or hood.
During the self clean cycle, parts of the appliance may be-
come potentially harmful to persons who lack adult knowl-
edge of appliances and adult reactions to potentially harm-
ful conditions.
▶
Children should not be left alone or unattended in an
area where appliances are in use.
The oven heats up to a very high temperature during self
cleaning. Opening the door can result in injury.
▶
When self-cleaning, confirm that the door locks and will
not open.
▶
If the door does not lock, do not run Self Clean. Contact
Customer Service.
CAUTION
Remove broiler pans, pots, and other utensils and excess
spillage before self-cleaning.
Do not leave food or cooking utensils, etc., in the oven
during the pyrolytic self-cleaning mode of operation.
CAUTION
The oven vents are important for air circulation. Covering
the oven vents will cause the oven to overheat. Refer to
the appliance overview for the location of the oven vents.
→
Page9
▶
Do not obstruct oven vents.
NOTICE:
Do not clean parts or accessories with the self clean func-
tion.
1. Remove all accessories and racks from the oven.
2. Wipe out excessive spillage from the oven cavity.
Starting self clean - 500 Series
Requirements
¡ The oven is in standby mode, no timers are running.
¡ You have carried out the steps for preparing the oven
for self clean.
→
"Preparing self clean", Page31
1. For double ovens: Select the oven cavity you want to
clean.
2. Turn the heating mode knob to Self Clean.
3. For single ovens: Turn the temperature knob to Self
Clean. For double ovens, the correct temperature for
self clean is set automatically.
a After 3seconds the display blinks "- - : - -".
4. Set the cleaning time. For single ovens: Press or . For
double ovens: Press or .
You can set a self clean time between 2 and 4hours.
a After 3seconds the self clean cycle starts.
a lights up on the control panel.
a The oven door locks automatically.
a When self clean is finished, the display shows 0:00.
5. Wipe the remaining ash from the oven with a moist
cloth.
Canceling self clean - 500 Series
1. Turn the heating mode knob to Off.
2. For single ovens: Turn the temperature knob to Off.
a The oven door remains locked until the oven has cooled
off.
Starting self clean - 800Series
Requirements
¡ All heating modes or timers are canceled.
¡ You have carried out the steps for preparing the oven
for self clean.
→
"Preparing self clean", Page31
1. For double ovens: Select the oven cavity you want to
clean.
2. Press Self Clean.
a lights up on the display.
a The default self clean time "4:00" blinks on the timer
display.
3. You can set a self clean time between 2 and 4hours
with the numeric keypad.
Tip:Use a longer setting for a heavily soiled oven.
4. Press Enter.