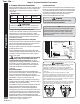
Installation Instructions Freestanding Dual Fuel Range For Use With Bosch Dual Fuel Ranges Quick Finder: Safety Preparation Installation Final Steps 1 3 5 7
Important Safety Instructions Important Safety Instructions .......................................................................................... Preparation ................................................................................................................... Installation .................................................................................................................... Final Steps ..........................................................................................
Safety Instructions Your Life ... WARNING Before installing, turn power OFF at the service panel. Lock service panel to prevent power from being turned ON accidentally. CAUTION Unit is heavy and requires at least two persons or proper equipment to move. WARNING Preparation Stepping, leaning or sitting on the doors or drawers of this range can result in serious injuries and also cause damage to the range. Do not allow children to climb or play around the range.
... Our Inspiration Steps 1 through 4: Preparation Safety Instructions 1. Install Ventilation Bosch strongly recommends the installation of a ventilation hood above this range. For most kitchens a certified hood rating of not less than 300 CFM is recommended. The range hood must be installed according to instructions furnished with the hood. 30” Minimum Centered 2. Prepare Cabinets This unit is designed for installation near adjacent walls and projecting surfaces constructed of combustible materials.
Safety Instructions Your Life ... Step 5: Prepare Electrical Connection 5. Prepare Electrical Connection Install Strain Relief Ranges are dual rated for use on either 120/240 VAC or 120/208 VAC. See chart below for power ratings and circuit breaker sizes based on the supply voltage for each model. MODEL: HDS VOLTS HZ RATING CIRCUIT A.C. KW BREAKER 120/240 60 6.5 30 AMPS 120/208 60 4.8 30 AMPS Place strain relief in knockout below terminal block (See Figure 4).
... Our Inspiration Step 6: Installation - Connect Electric Safety Instructions Three Wire Connection The Four Wire Connection is preferred, but where local codes and ordinances permit grounding through neutral and/or conversion to four wire is impractical, unit may be connected to the power supply via a three wire connection. 1. Disconnect electrical power at breaker box. 2. Remove the terminal block cover to expose the terminal block (See Figure A). 3.
Final Steps Installation Preparation Safety Instructions Your Life ... Step 7: Installation - Connect Gas Supply Important note for LP users: The range is shipped from the factory for use with natural gas. For use with propane (LP) gas, your range must first be converted using the LP conversion kit. The gas connection is located below the back panel of the range (See Figure 4, Page 4). It is accessible through the warming drawer access panel or from the back of the range.
Step 8: Test the Installation 8B. Test/Adjust Flame Turn on power at breaker. High Setting: Caution: If the display flashes and beeps, the polarity of the wiring may be reversed. Reversed polarity can damage the range and can result in electrical shock hazard. Immediately switch off power at the breaker and return to step 6. Select a rangetop burner knob. Push down and turn to the flame symbol. If the ignitor/spark module is operating correctly, it will produce a clicking sound.
Instructions de sécurité importantes ... Our Inspiration Instructions de sécurité importantes ........................................................................... 1 Préparation .............................................................................................................. 3 Installation ............................................................................................................... 4 Étapes finales .......................................................................
Instructions de sécurité Your Life ... AVERTISSEMENT Avant d’installer, mettre l’alimentation hors circuit au panneau de service. Le verrouiller pour empêcher la mise en circuit accidentelle. ATTENTION L’appareil est lourd et requiert au moins deux personnes ou un équipement approprié pour le déplacer. AVERTISSEMENT Monter, s’appuyer ou s’asseoir sur les portes ou les tiroirs de cette cuisinière peut causer des dommages à l’appareil ou des blessures.
... Our Inspiration Étapes 1 à 4 : préparation 1. Installation de la ventilation Instructions de sécurité Bosch recommande fortement l’installation d’une hotte au-dessus de la cuisinière. Pour la plupart des cuisines, une cote de hotte certifiée de pas moins de 300 CFM est recommandée. La hotte doit être installée selon les instructions fournies avec la hotte. 30 po minimum centré 30 po Min.m 2.
Étapes finales Installation Préparation Instructions de sécurité Your Life ... Étape 5 - préparation de la connexion électrique 5. Préparation de la connexion électrique Installation du réducteur de tension Généralités Les cuisinières ont une cote jumelée pour utilisation avec 120/240 VAC ou 120/208 VAC. Voir le tableau à droite pour les cotes d’alimentation et les dimensions de coupe-circuit en fonction de la tension d’alimentation pour chaque modèle. MODÈLE HDS VOLTS HZ A.C.
... Our Inspiration Étape 6 : installation - connexion électrique Figure 6 Noir Rouge Blanc Préparation La connexion à 4 fils est préférée, mais là où les codes locaux et les lois permettent la mise à la terre par l’entremise du neutre et/ou la conversion à 4 fils n’est pas pratique, l’appareil peut être branché sur l’alimentation électrique via une connexion à 3 fils. 1. Débrancher l’alimentation électrique au disjoncteur. 2.
Étapes finales Installation Préparation Instructions de sécurité Your Life ... Étape 7 : installation - connexion de l’alimentation en gaz Remarque importante pour gaz LP : La cuisinière est expédiée de l’usine pour une utilisation avec le gaz naturel. Pour l’utilisation avec gaz propane (LP), la cuisinière doit d’abord être convertie avec le nécessaire de conversion LP à cette étape La connexion de gaz est située en dessous du panneau arrière de l’appareil. (Voir figure 4, page 4).
Étape 8 : test de l’installation ... Our Inspiration Mise en circuit au coupe-circuit. Réglage élevé : La qualité de combustion de la flamme de chaque brûleur doit être vérifiée visuellement. Pour le propane, la flamme doit être bleue avec une pointe jaune. Pour le gaz naturel, elle doit être d’un bleu doux. La flamme doit être propagée ou envelopper le brûleur et ne doit pas être soulevée ni vasciller. Pour vérifier, mettre le brûleur en circuit. Voir la figure 13 pour les caractéristiques de la flamme.
Instrucciones Importantes de Seguridad Instrucciones Importantes de Seguridad .............................................................................. Preparación ........................................................................................................................ Instalación .......................................................................................................................... Pasos Finales ........................................................................
Seguridad Your Life ... INSTRUCCIONES IMPORTANTES DE SEGURIDAD ADVERTENCIA Antes de instalar, APAGUE la corriente en el panel de servicio. Bloquee el panel para evitar que se PRENDA la corriente accidentalmente. CUIDADO La unidad está pesada y debe ser movida por al menos dos personas o con el equipo apropiado. ADVERTENCIA Preparación Pisar, recostarse o sentarse sobre las puertas o los cajones de esta estufa puede causar lesiones serias y también dañar la estufa.
... Our Inspiration Pasos 1 hasta 4: Preparación Bosch recomienda fuertemente instalar una campana de ventilación arriba de esta estufa. Para la mayoría de cocinas se recomienda una campana con un régimen eléctrico nominal no menor de 300 CFM. La campana debe ser instalada de acuerdo a las instrucciones incluidas con ésta. 30” Mínimo Centrado 30” Min. 2. Preparar los Gabinetes 4” Min.
Pasos Finales Instalación Preparación Seguridad Your Life ... Paso 5: Preparar la Conexión Eléctrica 5. Preparar la Conexión Eléctrica Instalar el Prensacable Información General Las estufas tienen doble régimen eléctrico nominal para 120/240 VAC o 120/208 VAC. Vea la tabla para el régimen eléctrico y el tamaño del cortacircuito basado en el voltaje de alimentación para cada modelo. Model HDS VOLTS HZ RÉGIMEN CORTAA.C. KW CIRCUITO 120/240 60 12.1 30 AMPS 120/208 60 9.
... Our Inspiration Paso 6: Instalación - Conexión Eléctrica Seguridad 6. Conectar el cable de la estufa Conexión con Tres Hilos Figura 6 Preparación La Conexión de Cuatro Hilos es el método preferido, pero donde los códigos locales permiten el aterrizaje a través del neutral y/o donde la conversión a cuatro hilos es algo poco práctico, se puede conectar la unidad a la fuente de alimentación vía una conexión de tres hilos. 1. Desconecte la corriente eléctrica en el cortacircuito. 2.
Pasos Finales Instalación Preparación Seguridad Your Life ... Paso 7: Instalación - Conectar el Suministro de Gas Aviso importante para usuarios de gas LP: Para el uso con gas propano (LP), Ud. debe convertir primero su estufa mediante el kit de conversión a gas LP en este momento. Verificar Fugas de Gas El instalador debe revisar si hay fugas de gas de acuerdo a las instrucciones indicadas en esta sección. Prenda el Gas.
Paso 8: Probar la Instalación Cuidado: Cuando la pantalla parpadea y emite pitidos, la polaridad del cableado está invertida. La polaridad invertida puede dañar la estufa y causar un riesgo de una descarga eléctrica. Apague la corriente de inmediato en el cortacircuito y regrese al paso 7: CONEXIÓN ELÉCTRICA” Algunas llamas amarillas al arranque inicial es algo normal. Permita que la unidad opere 4-5 minutos y reevalúe antes de hacer ajustes.
BSH reserves the right to change specifications or design without notice. Some models are certified for use in Canada. BSH is not responsible for products which are transported from the United States for use in Canada. Check with your local Canadian distributor or dealer. BSH Home Appliances Corporation, 5551 McFadden Avenue, Huntington Beach, CA 92649. For the most up to date critical installation dimensions by fax, use your fax handset and call 702/833-3600. Use code #8030.