
Installation Instructions
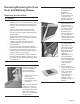


Installing Drawer to Housing
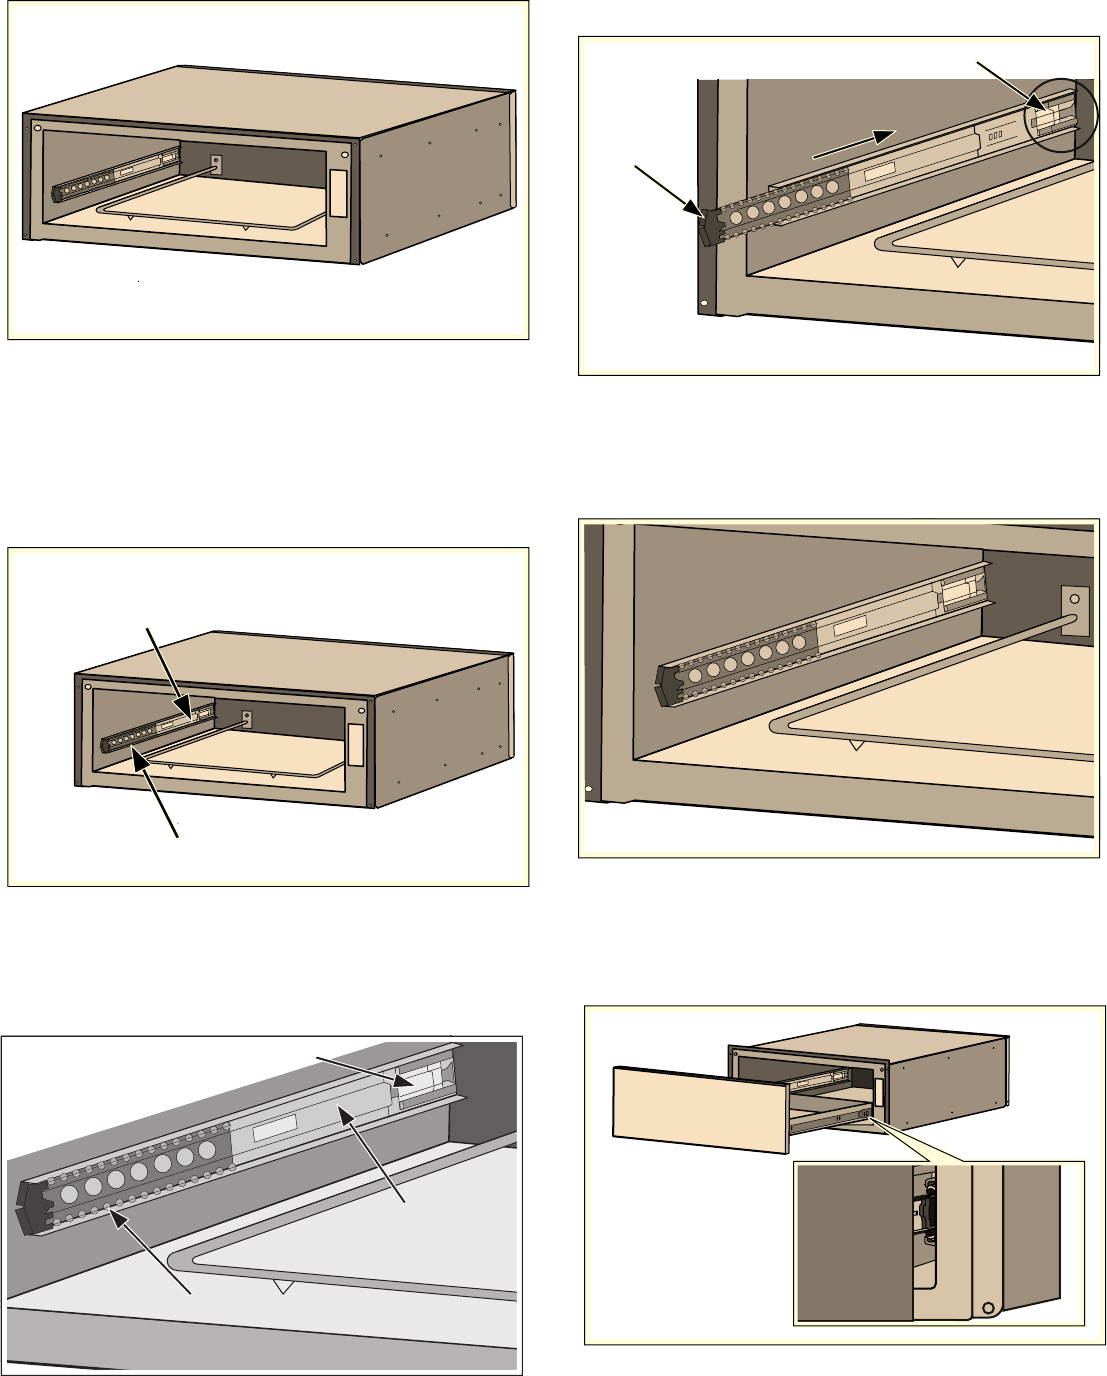
The slides mounted to each side of the housing wall
have two moving components, an inner rail and a ball
bearing carrier which need to be in the proper orientation
for accurate installation and alignment.
There is also a visible locking mechanism located at the
rear of each slide.
Note: The housing of your warming drawer should
match the image below identically before starting your
installation. The ball bearing carrier should be locked in
to the inner rail’s black plastic rail tip at the front of the
inner rail.
6OLGH,QQHU5DLO
%DOO%HDULQJ&DUULHU
/RFNLQJ0HFKDQLVP
%DOO%HDULQJ&DUULHU
6OLGH,QQHU5DLO
English 19
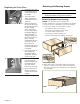
3.
Install or service (clean) housing with drawer removed.
1.
With the drawer removed, set the slide inner rail to the
drawer locked position by pushing the slide inner rail
toward the rear of the housing until it locks in place.
Note: A moderate force pushing on the black plastic
ball carrier locking mechanism is required to set the
slide to the drawer locked position. The drawer is
locked when it remains in place and does not spring
back to the open position.
4MJEF*OOFS3BJM
-PDLJOH.FDIBOJTN
4MJEF*OOFS3BJMJTJOMPDLFEQPTJUJPO
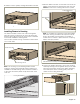
2.
Position the drawer assembly in front of the housing
assembly and align the rail (plastic rail tip) to the slide
ball carrier assembly. Keeping the drawer assembly
level and square to the housing, gently insert the
drawer to the housing assembly.