
Interactive User Manual
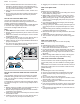


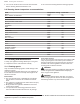
Table Of Contents
- _
- en-us
- Table of contents
- 1 IMPORTANT SAFETY INSTRUCTIONS
- 1.1 Safety definitions
- 1.2 General information
- 1.3 Intended use
- 1.4 Restriction on user group
- 1.5 Safe use
- 1.6 Child safety
- 1.7 Gas safety
- 1.8 Food safety
- 1.9 Cleaning function
- 1.10 Proper installation and maintenance
- 1.11 Conversion to Liquified Petroleum gas
- 1.12 High altitude installation
- 1.13 State of California Proposition 65 Warnings
- 2 Preventing material damage
- 3 Environmental protection and energy-saving
- 4 Familiarizing yourself with your appliance
- 5 Accessories
- 6 Before using for the first time
- 7 Oven operation
- 7.1 Setting the heating mode and temperature
- 7.2 Turning the oven off
- 7.3 Temperature range by heating mode
- 7.4 Heating time limitation
- 7.5 Fast preheat
- 7.6 Meat probe
- 7.7 Turning the panel lock on or off
- 7.8 Kitchen timer
- 7.9 Oven timer
- 7.10 Sabbath mode
- 7.11 Basic settings
- 7.12 General tips for heating modes
- 7.12.1 How to use bake mode
- 7.12.2 How to use convection bake mode
- 7.12.3 How to use convection multi-rack/true convection mode
- 7.12.4 How to use pizza mode
- 7.12.5 How to use roast mode
- 7.12.6 How to use convection roast mode
- 7.12.7 How to use convection broil mode
- 7.12.8 How to use proof mode
- 7.12.9 How to use warm mode
- 7.13 Getting the best results
- 8 Cooktop operation
- 9 Warming drawer operation
- 10 Cleaning and maintenance
- 11 Troubleshooting
- 12 Disposal
- 13 Customer service
- 14 STATEMENT OF LIMITED PRODUCT WARRANTY
- fr-ca
- Table des matières
- 1 IMPORTANTES CONSIGNES DE SÉCURITÉ
- 1.1 Définitions des termes de sécurité
- 1.2 Indications générales
- 1.3 Utilisation prévue
- 1.4 Restriction sur le groupe d'utilisateurs
- 1.5 Utilisation sécuritaire
- 1.6 Sécurité des enfants
- 1.7 Sécurité des gaz
- 1.8 Sécurité alimentaire
- 1.9 Fonction de nettoyage
- 1.10 Installation et entretien appropriés
- 1.11 Conversion au gaz de pétrole liquéfié
- 1.12 Installation à haute altitude
- 1.13 Mises en garde conformément à la proposition 65 de l'État de Californie
- 2 Prévenir les bris matériels
- 3 Protection de l'environnement et économies
- 4 Description de l'appareil
- 5 Accessoires
- 6 Avant d'utiliser pour la première fois
- 7 Fonctionnement du four
- 7.1 Réglage du mode de chauffage et de la température
- 7.2 Éteindre le four
- 7.3 Plage de température par mode de chauffage
- 7.4 Limitation du temps de chauffage
- 7.5 Préchauffage rapide
- 7.6 Sonde thermométrique
- 7.7 Activer ou désactiver le verrouillage du panneau
- 7.8 Minuterie de cuisine
- 7.9 Minuterie du four
- 7.10 Mode sabbat
- 7.11 Réglages de base
- 7.12 Conseils généraux pour les modes de chauffage
- 7.12.1 Comment utiliser le mode de cuisson
- 7.12.2 Comment utiliser le mode de cuisson par convection
- 7.12.3 Comment utiliser le mode de convection multi-grille/vraie convection
- 7.12.4 Comment utiliser le mode pizza
- 7.12.5 Comment utiliser le mode de rôtissage
- 7.12.6 Comment utiliser le mode de rôtissage par convection
- 7.12.7 Comment utiliser le mode de cuisson au gril par convection
- 7.12.8 Comment utiliser le mode de fermentation
- 7.12.9 Comment utiliser le mode maintenir au chaud
- 7.13 Obtenir les meilleurs résultats
- 8 Fonctionnement de la table de cuisson
- 9 Fonctionnement du tiroir réchaud
- 9.1 Niveaux du tiroir réchaud
- 9.2 Allumer le tiroir réchaud
- 9.3 Éteindre le tiroir réchaud
- 9.4 Utilisation du tiroir réchaud en mode Sabbat
- 9.5 Réchauffer des bols et des assiettes vides
- 9.6 Mettre croustillant des articles rassis
- 9.7 Conseils généraux pour le tiroir réchaud
- 9.8 Recommandations de température du tiroir réchaud
- 10 Nettoyage et entretien
- 11 Dépannage
- 12 Élimination
- 13 Service à la clientèle
- 14 ÉNONCÉ DE LA GARANTIE LIMITÉE DU PRODUIT

Warming drawer operation en-us
27
Always use cookware that is the right size and place it in
the center of the burner.
Tips
¡ Recommendations for cooking:
– Place all the ingredients into the cookware at the
same time when cooking soups, creams, lentil stews
or chickpeas.
– Preheat the oil when frying. Once you have started
frying the food, maintain the temperature by adjusting
the power if necessary. Maintain the temperature of
the oil between different batches and turn the food
frequently.
¡ Recommendations to reduce the cooking time:
– Use a pressure cooker to cook creamy soups and
legumes. Follow the manufacturer's instructions of
the pressure cooker. Add all the ingredients at the
same time at the start.
– Bring the water to a boil before adding pasta, rice or
potatoes and then adjust the power level to continue
boiling.
– Use a lid to cook rice and potatoes.
Cooking process Heat setting
Bringing water to a boil High
Pan frying, sauteing, browning meat,
deep fat frying
Medium high
Most frying, eggs, pancakes, slow boil Medium
Finish cooking covered foods, steaming Medium low
Melting chocolate and butter, simmer-
ing tomato sauces, soups, stews
Low
Warming drawer operation
9 Warming drawer operation
Warming drawer operation
The warming drawer will keep hot, cooked foods at serv-
ing temperature.
Always start with hot food. DO NOT use to heat cold food.
It is safe to use the drawer to crisp crackers, chips or dry
cereal and to warm plates.
CAUTION
To maintain food safety, follow these guidelines
▶
DO NOT use a warming drawer to heat cold food. It is
safe to use the drawer to crisp crackers, chips or dry ce-
real and to warm plates.
▶
Be sure to maintain proper food temperature. The
USDA recommends holding hot food at 140°F or
warmer.
▶
DO NOT leave food in the warming drawer for more
than one hour before or after cooking.
▶
Plastic containers, plastic wrap or aluminum foil can
melt if in direct contact with the drawer or a hot cooking
container. If it melts onto the drawer, it may not be re-
movable.
The warming drawer has a push-to-open (PTO) mecha-
nism. Press on the center of the warming drawer front
panel to open it.
9.1 Warming drawer levels
You can set 3different heating levels for the warming
drawer.
For best results, preheat the warming drawer when warm-
ing food.
Level Preheat time in min.
LOW 10
MED 15
HIGH 20
9.2 Turning the warming drawer on
You can operate the warming drawer with the oven control
panel.
1. Press Warming Drawer.
a The default level med is displayed.
2. Press Warming Drawer to cycle the available warming
drawer settings.
3. Press Enter to confirm.
a The warming drawer icon is displayed below the clock.
9.3 Turning the warming drawer off
▶
Press Warming Drawer.
a The warming drawer symbol turns off.
9.4 Using the warming drawer in Sabbath
mode
You can use the warming drawer in Sabbath Mode, while
the oven is in Sabbath mode. It is not possible to run Sab-
bath Mode only in the warming drawer.
1. Set the desired warming drawer temperature.
2. Set Sabbath mode for the oven cavity.
a The warming drawer and oven will operate in Sabbath
mode until the oven timer reaches zero.
9.5 Warming empty serving bowls and plates
Requirements
¡ Do not preheat drawer prior to placing dishes.
¡ Use only heat-safe dishes.
1. Place empty plates or dishes in the cold warming
drawer.
2. Select the warming drawer temperature "LOW".
3. Check the dish temperature during the warming period.
9.6 Crisping stale items
1. Place the food in a low-sided dish or pan.
2. Select the warming drawer temperature "LOW".
3. Preheat the warming drawer for 10minutes, then place
the food in the warming drawer.
4. Set the warming timer.
5. Check the crispness after 45minutes. Continue crisping
if needed.
9.7 General tips for the warming drawer
¡ To keep several different foods hot, set the temperature
for the food needing the highest setting.
¡ Place items needing the highest setting toward the side
of the drawer and items needing less heat in the center
of the drawer.
¡ You can warm empty serving dishes while the warming
drawer is preheating.
¡ Place cooked, hot food in the warming drawer in its
original cooking container or in a heat-safe serving dish.