
Use and Care Manual

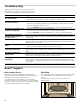

Table Of Contents
- Built-In Convection Microwave Oven (Speed Oven)
- Table of ContentsUse and care manual
- Produktinfo
- IMPORTANT SAFETY INSTRUCTIONS
- READ ALL INSTRUCTIONS BEFORE USING THE APPLIANCE
- 9 PRECAUTIONS TO AVOID POSSIBLE EXPOSURE TO EXCESSIVE MICROWAVE ENERGY
- WARNING
- WARNING
- Grounding Instructions
- TV / Radio Interference
- Intended Use
- Child Safety
- Cleaning Safety
- Cooking Safety
- In Case of Fire
- Liquids
- Cooking Items
- Cooking Utensils
- Metal Tray Turntable
- Thermometers
- Pacemakers
- Fan Motor Operation
- State of California Proposition 65 Warnings
- SAVE THESE INSTRUCTIONS.
- Causes of damage
- Protecting the environment
- Getting to know the appliance
- Before using the appliance for the first time
- Microwave
- Microwave utensil guide
- Microwave power levels
- Setting the microwave
- 1. Enter the desired cook time with the number keys. The timer display will fill in from right to left. Example: To set a microwave time of 20 minutes and 30 seconds, enter the numbers 2 0 3 0.
- 2. You can start microwave operation with the default power level 10 by touching Start/Enter, -or - you can set a different power level. Touch Power Level ‚‹ and start/enter are blinking in the upper left section of the display.
- 3. Enter the desired power level using the number keys.
- 4. Touch Start/Enter to start microwave operation.
- The microwave timer will start to count down.
- Change power level
- 1. Touch Power Level.
- 1. Enter the desired cook time with the number keys. The timer display will fill in from right to left. Example: To set a microwave time of 20 minutes and 30 seconds, enter the numbers 2 0 3 0.
- Suggestions for best results
- Convection
- Broil
- Automatic programs
- Speed Chef
- Note:
- Setting Speed Chef
- 1. Touch Speed Chef.
- 2. Select the desired food from the label at the oven cavity. For Beef Roast touch the number key 4. -or- Touch Speed Chef or +Amount repeatedly to scroll through all Speed Chef modes. When Beef Roast ist displayed ‹.‹‹ is blinking and the sele...
- 3. Enter the weight of the food you want to cook using the number keys. For example, to enter 3 lbs type 3 0 0. The weight and start/enter are blinking.
- 4. Touch Start/Enter.
- Opening appliance door during operation
- Cancel operation
- Speed Chef Programs
- Notes
- Auto Defrost
- Ovenware for defrosting
- Stand time
- Setting Auto Defrost
- 1. Take the food out of the packaging and weigh it, then place it in a suitable dish on the ceramic tray.
- 2. Touch Auto Defrost.
- 3. Select the desired program from the label at the oven cavity. For Ground Meat touch the number key 1. -or- Touch Auto Defrost or +Amount repeatedly to scroll through all Auto Defrost modes.
- 4. Enter the weight of the food you want to defrost using the number keys. For example, to enter 2 lbs type 2 0 0. The weight and start/enter are blinking.
- 5. Touch Start/Enter.
- Note:
- Opening appliance door during operation
- Cancel operation
- Auto Defrost programs
- Tips for defrosting
- Frozen Foods
- Pizza
- Pizza tips
- Setting Pizza mode for fresh or frozen pizza
- 1. Touch Pizza.
- 2. Touch Pizza or +Amount repeatedly to scroll through all pizza modes.
- 3. Touch Start/Enter. For frozen or fresh pizza the display reads bake on metal tray. The default temperature and ; light up on the display.
- 4. You can change the temperature by using the number keys. Touch Start/Enter to confirm.
- The appliance starts preheating.
- Opening appliance door during operation
- Setting Pizza mode for microwave pizza
- 1. Touch Pizza.
- 2. Touch the number key 3 or touch Pizza or +Amount repeatedly until Microwave pizza is displayed.
- 3. Touch Start/Enter. For microwave pizza the display reads use ceramic tray. start/enter is blinking.
- 4. Touch Start/Enter again. sensing and the microwave symbol Ý light up on the display.
- The appliance starts sensing.
- Note:
- Opening appliance door during operation
- Popcorn
- Beverage
- Speed Chef
- Sensor cooking
- More Modes
- Kitchen timer
- Panel Lock
- Automatic Shutoff
- Basic settings
- Cooking Charts
- Cleaning and Maintenance
- Troubleshooting
- Bosch® Support
- STATEMENT OF LIMITED PRODUCT WARRANTY
- READ ALL INSTRUCTIONS BEFORE USING THE APPLIANCE
- Table des MatièresNotice d’utilisation
- Produktinfo
- CONSIGNES DE SÉCURITÉ IMPORTANTES
- LISEZ TOUTES LES INSTRUCTIONS AVANT D'UTILISER L'APPAREIL
- 9Mesures de précaution pour éviter l'exposition excessive à l'énergie micro-onde
- AVERTISSEMENT
- AVERTISSEMENT
- Instructions de mise à la terre
- Interférences radio/télévision
- Utilisation prévue
- Sécurité des enfants
- Consignes en matière de nettoyage
- Sécurité de cuisson
- En cas d’incendie
- Liquides
- Articles de cuisson
- Utensiles de cuisson
- Plateau en metalle
- Thermomètres
- Pacemakers
- Fonctionnement du moteur du ventilateur
- Avertissements de la Proposition 65 de l’État de la Californie
- CONSERVEZ CES INSTRUCTIONS.
- Causes des dommages
- Protection de l'environnement
- Découvrir l'appareil
- Avant la première utilisation
- Micro-ondes
- Guide des ustensiles pour micro-ondes
- Niveaux de puissance du micro-ondes
- Réglage du micro-ondes
- 1. Entrez le temps de cuisson souhaité avec les touches numérotées. L’écran de la minuterie se remplira de droite à gauche. Exemple : Pour régler un temps de micro-ondes de 20 minutes et 30 secondes, entrez les numéros 2 0 3 0.
- 2. Vous pouvez relancer le fonctionnement du micro-ondes avec le niveau de puissance par défaut de 10 en touchant Start/Enter, -ou - vous pouvez régler un autre niveau de puissance. Touchez Power Level (Niveau de puissance). ‚‹ et start/enter c...
- 3. Entrez le niveau de puissance souhaité avec les touches numérotées.
- 4. Touchez Start/Enter pour lancer le fonctionnement du micro-ondes.
- La minuterie du micro-ondes lancera le compte à rebours.
- Modification du niveau de puissance
- 1. Touchez Power Level (Niveau de puissance).
- 1. Entrez le temps de cuisson souhaité avec les touches numérotées. L’écran de la minuterie se remplira de droite à gauche. Exemple : Pour régler un temps de micro-ondes de 20 minutes et 30 secondes, entrez les numéros 2 0 3 0.
- Suggestions pour les meilleurs résultats
- Convection
- Gril
- Programmes automatiques
- Speed Chef (Chef rapide)
- Remarque :
- Réglage de Speed Chef (Chef rapide)
- 1. Touchez Speed Chef (Chef rapide).
- 2. Sélectionnez l’aliment souhaité à partir de l’étiquette dans la cavité du four. Pour le rôti de bœuf, touchez la touche numérotée 4. -ou- TouchezSpeed Chef (Chef rapide) ou +Amount (+Montant) à plusieurs reprises pour faire défiler ...
- 3. Entrez le poids de l’aliment à cuire avec les touches numérotées. Par exemple, pour entrer 3 lbs (1,4 kg), touchez 3 0 0. Le poids et start/enter (démarrer/ entrer) clignoteront.
- 4. Touchez Start/Enter (Démarrer/Entrer).
- Ouverture de la porte de l’appareil en cours de fonctionnement
- Annuler le fonctionnement
- Programmes Speed Chef
- Remarques
- Décongélation automatique
- Plat de cuisson pour la décongélation
- Temps de repos
- Réglage de la décongélation automatique
- 1. Sortez l’aliment de son emballage, pesez-le, puis mettez-le dans un plat adapté sur le plat céramique.
- 2. Touchez Auto Defrost (Décongélation automatique).
- 3. Sélectionnez le programme souhaité à partir de l'étiquette dans la cavité du four. Pour la viande hachée, touchez la touche numérotée 1. -ou- Touchez Auto Defrost ou +Amount (+Quantité) à répétition pour faire défiler tous les modes d...
- 4. Entrez le poids de l’aliment à décongéler avec les touches numérotées. Par exemple, pour entrer 2 lb, tapez 2 0 0. Le poids et start/enter clignotent.
- 5. Touchez Start/Enter (Démarrer/Entrer).
- Remarque :
- Ouverture de la porte de l’appareil en cours de fonctionnement
- Annuler le fonctionnement
- Programme de décongélation automatique
- Conseils pour la décongélation
- Aliments congelés
- Pizza
- Trucs pour la pizza
- Réglage du mode Pizza pour pizza fraîche ou congelée
- 1. Touchez Pizza.
- 2. Touchez Pizza ou +Amount (+Montant) à répétition pour faire défiler le mode Pizza.
- 3. Touchez Start/Enter (Démarrer/Entrer). Pour la pizza fraîche ou congelée, l’écran affiche bake on metal tray (plat métal). La température par défaut et le témoin ; s’allument à l’écran.
- 4. Vous pouvez modifier la température au moyen des touches numérotées. Touchez Start/Enter (Démarrer/ Entrer) pour confirmer.
- Le préchauffage du four est lancé.
- Ouverture de la porte de l’appareil en cours de fonctionnement
- Réglage du mode Pizza pour la pizza au micro-ondes
- 1. Touchez Pizza.
- 2. Touchez la touche numérotée 3 ou touchez Pizza ou +Amount (+Montant) à répétition jusqu’à ce que Microwave pizza (Pizza micro-ondes) soit affiché.
- 3. Touchez Start/Enter (Démarrer/Entrer). Pour la pizza au micro-ondes, l’écran affiche use ceramic tray (Utiliser le plat céramique). start/enter clignote.
- 4. Touchez de nouveau Start/Enter. sensing (détection) et le symbole de micro-ondes Ý s’allument à l’écran.
- L’appareil se met à détecter.
- Remarque :
- Ouverture de la porte de l’appareil en cours de fonctionnement
- Popcorn
- Boisson
- Speed Chef (Chef rapide)
- Capteur cuisson
- Capteur réchauffage
- Réglage du Capteur Réchaffage
- 1. Touchez Sensor Reheat (Capteur Réchauffage). Le symbole de micro-ondes Ý et SENSOR REHEAT (CAPTEUR RÉCHAUFFAGE) s’affichent.
- 2. Touchez Start/Enter (Démarrer/Entrer). sensing (détection en cours) s'affiche. L’appareil est en marche prendant la détection.
- 3. Une fois la détection terminée, un signal sonore retentira et le compte à rebours du temps de cuisson calculé est lancé.
- Remarque :
- Remarques
- Suggestions pour le réchauffage des aliments
- Capteur cuisson
- Programmes Capteur cuisson
- Réglage du Capteur Cuisson
- 1. Touchez Sensor Cook (Capteur Cuisson).
- 2. Sélectionnez le programme souhaité à partir de l'étiquette dans la cavité du four. Pour la viande hachée, touchez la touche numérotée 5. -ou- Touchez Sensor Cook ou +Amount (+Montant) à répétition pour faire défiler les modes Capteur C...
- 3. Touchez Start/Enter.
- Remarque :
- Ouverture de la porte de l’appareil en cours de fonctionnement
- Annuler le fonctionnement
- Capteur réchauffage
- Autres modes
- Réglage de Keep Warm (Garder chaud)
- Réglage du mode Convection Broil (Gril Convection)
- 1. Touchez More Modes (Autres modes) une fois.
- 2. Touchez la touche numérotée 2 ou touchez More Modes deux fois.
- 3. Touchez +Amount (+Montant) pour passer de l’intensité de gril •‚ à –‹.
- 4. Touchez Start/Enter (Démarrer/Entrer).
- Le mode Gril Convection démarre le préchauffage.
- Ouverture de la porte de l’appareil en cours de fonctionnement
- Annuler le fonctionnement
- 1. Touchez More Modes (Autres modes) une fois.
- Réglage du mode Melt Butter (Fondre beurre)
- Réglage du mode Melt Chocolate (Fondre chocolat)
- Réglage du mode Soften Ice Cream (Ramollir crème glacée)
- Réglage du mode Soften Cream Cheese (Ramollir fromage à la crème)
- Minuterie de cuisine
- Réglage de la minuterie de cuisine
- 1. Touchez Kitchen Timer (Minuterie de cuisine) une fois.
- 2. Entrez le temps souhaité à l’aide des touches numérotées. Exemple : Pour régler la minuterie de cuisine à 3 h et 5 min, entrez 3 0 5.
- 3. Touchez Start/Enter ou Kitchen Timer.
- La minuterie de cuisine est lancée. timer (minuterie) s'affiche à l'écran.
- Remarque :
- Une fois que le temps s'est écoulé
- Annuler la minuterie de cuisine
- 1. Touchez Kitchen Timer (Minuterie de cuisine) une fois.
- Réglage de la minuterie de cuisine
- Verrouillage du panneau de commande
- Extinction automatique
- Réglages de base
- Tableaux de cuisson
- Nettoyage et entretien
- Dépannage
- Soutien Bosch®
- ÉNONCÉ DE LA GARANTIE LIMITÉE
- LISEZ TOUTES LES INSTRUCTIONS AVANT D'UTILISER L'APPAREIL
- ContenidoManual de instrucciones
- Produktinfo
- INSTRUCCIONES DE SEGURIDAD IMPORTANTES
- LEER TODAS LAS INSTRUCCIONES ANTES DE UTILIZAR EL APARATO
- 9Precauciones para evitar una posible exposición a una excesiva cantidad de energía de microondas
- ADVERTENCIA
- ADVERTENCIA
- Instrucciones para la conexión a tierra
- Interferencia con la TV/radio
- Uso previsto
- Seguridad de los niños
- Seguridad en la limpieza
- Seguridad al cocinar
- En caso de incendio
- Liquidos
- Artículos de cocina
- Utensilios de cocina
- Charola de metal
- Termómetros
- Marcapasos
- Funcionamiento del motor del ventilador
- Advertencias en virtud de la Proposición 65 del estado de California
- CONSERVE ESTAS INSTRUCCIONES.
- Causas para los daños
- Protección del medio ambiente
- Conozca el equipo
- Antes de usar el horno por primera vez
- Microondas
- Guía de utensilios para microondas
- Niveles de potencia del microondas
- Programación del microondas
- 1. Ingrese el tiempo de cocción deseado con las teclas numéricas. El display del temporizador se llenará de derecha a izquierda. Ejemplo: para programar un tiempo de microondas de 20 minutos y 30 segundos, ingrese los números 2 0 3 0.
- 2. Puede comenzar la operación del microondas con el nivel 10 de potencia predeterminado pulsando Start/ Enter (Comenzar/Intro) o bien puede programar un nivel de potencia distinto. Pulse Power Level (Nivel de potencia). Titilan ‚‹ y start/ ente...
- 3. Ingrese el nivel de potencia deseado utilizando las teclas numéricas.
- 4. Pulse Start/Enter para iniciar el funcionamiento del microondas.
- Comenzará la cuenta atrás del temporizador del microondas.
- Cambio del nivel de potencia
- 1. Pulse Power Level (Nivel de potencia).
- 1. Ingrese el tiempo de cocción deseado con las teclas numéricas. El display del temporizador se llenará de derecha a izquierda. Ejemplo: para programar un tiempo de microondas de 20 minutos y 30 segundos, ingrese los números 2 0 3 0.
- Sugerencias para obtener los mejores resultados
- Convección
- Asar con calor directo
- Programas automáticos
- Cocción rápida
- Nota:
- Ajustar la cocción rápida
- 1. Pulsar Speed Chef.
- 2. Seleccionar el alimento deseado de los que hay en la etiqueta adherida a la cavidad de horno. Para asar carne pulsar la tecla numérica 4. o Pulsar Speed Chef o +Amount repetidas veces para navegar por todos los modos de cocción rápida. Cuando s...
- 3. Introducir el peso de la comida que se quiera cocinar utilizando las teclas numéricas. Por ejemplo, para introducir 3 kg, pulsar 3 0 0. El peso y start/enter parpadean.
- 4. Pulsar Start/Enter.
- Abertura de la puerta del aparato durante el funcionamiento
- Cancelación del funcionamiento
- Programas de cocción rápida
- Notas
- Auto Defrost (Descongelar automáticamente)
- Utensilios para horno para la descongelación
- Tiempo de reposo
- Programación de Auto Defrost (Descongelar automáticamente)
- 1. Retire el alimento del embalaje y péselo; luego, colóquelo en un plato apto y en la bandeja de cerámica.
- 2. Pulse Auto Defrost (Descongelar automáticamente).
- 3. Seleccione el programa deseado de la etiqueta en la cavidad del horno. Para Ground Meat (Carne molida), pulse la tecla numérica 1. o bien Pulse Auto Defrost o +Amount (+Cantidad) repetidas veces para navegar por todos los modos Auto Defrost.
- 4. Ingrese el peso del alimento que desea decongelar usando las teclas numéricas. Por ejemplo, para ingresar 2 lb, pulse 2 0 0. Titlan el peso y start/enter.
- 5. Pulse Start/Enter (Comenzar/Intro).
- Nota:
- Abertura de la puerta del aparato durante el funcionamiento
- Cancelación del funcionamiento
- Programas de Auto Defrost (Descongelar automáticamente)
- Consejos para descongelar
- Frozen Foods (Alimentos congelados)
- Pizza
- Consejos para pizza
- Programación del modo Pizza para pizza fresca o congelada
- 1. Pulse Pizza.
- 2. Pulse Pizza o +Amount (+Cantidad) repetidas veces para desplazarse a través de todos los modos Pizza.
- 3. Pulse Start/Enter (Comenzar/Intro).Para pizza congelada o fresca, el display muestra bake on metal tray (Hornear en bandeja de metal). Se encienden la temperatura predeterminada y ; en el display.
- 4. Puede cambiar la temperatura utilizando las teclas numéricas. Pulse Start/Enter (Comenzar/Intro) para confirmar.
- El aparato comienza a precalentarse.
- Abertura de la puerta del aparato durante el funcionamiento
- Programación del modo Pizza para pizza para microondas
- 1. Pulse Pizza.
- 2. Pulse la tecla numérica 3 o pulse Pizza o +Amount (+Cantidad) repetidas veces hasta que se muestre Microwave pizza (Pizza para microondas).
- 3. Pulse Start/Enter (Comenzar/Intro). Para pizza para microondas, el display muestra use ceramic tray (Utilice la bandeja de cerámica). Titila start/enter.
- 4. Pulse Start/Enter nuevamente. Se encienden en el display sensing y el símbolo de microondas Ý.
- El aparato inicia la función del sensor.
- Nota:
- Abertura de la puerta del aparato durante el funcionamiento
- Popcorn (Palomitas de maíz)
- Beverage (Bebida)
- Cocción rápida
- Cocción por sensor
- Sensor Reheat (Recalentar por sensor)
- Sensor Cook (Cocción por sensor)
- Programas de Sensor Cook (Cocción por sensor)
- Programación de Sensor Cook (Cocción por sensor)
- 1. Pulse Sensor Cook (Cocción por sensor).
- 2. Seleccione el programa deseado de la etiqueta en la cavidad del horno. Para Ground Meat (Carne molida), pulse la tecla numérica 5. o bien Pulse Sensor Cook o +Amount (+Cantidad) repetidas veces para desplazarse por los modos de Sensor Cook.
- 3. Pulse Start/Enter.
- Nota:
- Abertura de la puerta del aparato durante el funcionamiento
- Cancelación del funcionamiento
- More Modes (Más modos)
- Programación de Keep Warm (Mantener caliente)
- Programación de Convection Broil (Asar con calor directo por convección)
- 1. Pulse una vez More Modes (Más modos).
- 2. Pulse la tecla numérica 2 o pulse More Modes dos veces.
- 3. Pulse +Amount (+Cantidad) para cambiar la intensidad de la función Broil (Asar con calor directo) de •‚ (Alto) a –‹ (Bajo).
- 4. Pulse Start/Enter (Comenzar/Intro).
- Convection Broil comienza el precalentamiento.
- Abertura de la puerta del aparato durante el funcionamiento
- Cancelación del funcionamiento
- 1. Pulse una vez More Modes (Más modos).
- Programación Melt Butter (Derretir mantequilla)
- Programación de Melt Chocolate (Derretir chocolate)
- Programación de Soften Ice Cream (Ablandar helado)
- Programación de Soften Cream Cheese (Ablandar queso crema)
- Temporizador de cocina
- Programación del temporizador de la cocina
- 1. Pulse una vez Kitchen Timer (Temporizador de cocina).
- 2. Ingrese el tiempo deseado con las teclas numéricas Ejemplo: Para programar el temporizador de la cocina a 3 horas y 5 minutos, ingrese 3 0 5.
- 3. Pulse Start/Enter o Kitchen Timer.
- El temporizador de la cocina iniciará la cuenta regresiva. timer se ilumina en la pantalla.
- Nota:
- Una vez transcurrido el tiempo
- Cancelación del temporizador de la cocina
- 1. Pulse una vez Kitchen Timer (Temporizador de cocina).
- Programación del temporizador de la cocina
- Bloqueo de panel
- Cierre automático
- Valores básicos
- Cuadros de cocción
- Limpieza y mantenimiento
- Resolución de problemas
- Soporte de Bosch®
- DECLARACIÓN DE GARANTÍA LIMITADA DEL PRODUCTO
- LEER TODAS LAS INSTRUCCIONES ANTES DE UTILIZAR EL APARATO

29
To avoid having to search for each piece of information
when calling, you can enter the four items needed in the
spaces provided below.
Keep your invoice or escrow papers for warranty
validation if service is needed.
Service
We realize that you have made a considerable
investment in your kitchen. We are dedicated to
supporting you and your appliance so that you have
many years of creative cooking.
Please don’t hesitate to contact our Customer Support
Department if you have any questions or in the unlikely
event that your Bosch® appliance needs service. Our
service team is ready to assist you.
USA
800-944-2904
www.bosch-home.com/us/support
Canada
800-944-2904
www.bosch-home.ca/en/support
Parts and Accessories
Parts, filters, descalers, stainless steel cleaners and more
can be purchased in the Bosch
®
eShop or by phone.
USA
www.bosch-home.com/us/store
Canada
Marcone 800-482-6022
or
Reliable Parts 800-941-9217
STATEMENT OF LIMITED PRODUCT WARRANTY
What this Warranty Covers & Who it
Applies to
The limited warranty provided by BSH Home Appliances
Corporation (“BSH“) in this Statement of Limited Product
Warranty applies only to the Bosch appliance (“Product“)
sold to you, the first using purchaser, provided that the
Product was purchased:
▯ For your normal, household (non-commercial) use,
and has in fact at all times only been used for normal
household purposes.
▯ New at retail (not a display, "as is", or previously
returned model), and not for resale, or commercial
use.
▯ Within the United States or Canada, and has at all
times remained within the country of original purchase.
The warranties stated herein apply only to the first
purchaser of the Product and are not transferable.
BSH reserves the right to request proof of purchase at
the time any warranty claim is submitted to confirm that
the Product falls within the scope of this limited product
warranty.
Please make sure to return your registration card; while
not necessary to effectuate warranty coverage, it is the
best way for BSH to notify you in the unlikely event of a
safety notice or product recall.
How Long the Warranty Lasts
BSH warrants that the Product is free from defects in
materials and workmanship for a period of three hundred
sixty-five (365) days from the date of purchase. The
foregoing timeline begins to run upon the date of
purchase, and shall not be stalled, tolled, extended, or
suspended, for any reason whatsoever.
This Product is also warranted to be free from cosmetic
defects in material and workmanship (such as scratches
of stainless steel, paint/porcelain blemishes, chip, dents,
or other damage to the finish of the Product), for a period
of thirty (30) days from the date of purchase or closing
date for new construction. This cosmetic warranty
excludes slight color variations due to inherent
differences in painted and porcelain parts, as well as
differences caused by kitchen lighting, product location,
or other similar factors. This cosmetic warranty
specifically excludes any display, floor, “As Is”, or “B”
stock appliances.
Repair/Replace as Your Exclusive Remedy
During this warranty period, BSH or one of its authorized
service providers will repair your Product without charge
to you (subject to certain limitations stated herein) if your
Product proves to have been manufactured with a defect
in materials or workmanship. If reasonable attempts to
repair the Product have been made without success,
then BSH will replace your Product (upgraded models
may be available to you, in BSH’s sole discretion, for an
additional charge). All removed parts and components
shall become the property of BSH at its sole option. All
replaced and/or repaired parts shall assume the identity
of the original part for purposes of this warranty and this
warranty shall not be extended with respect to such
parts. BSH's sole liability and responsibility hereunder is
to repair manufacturer-defective Product only, using a
BSH-authorized service provider during normal business
hours. For safety and property damage concerns, BSH
highly recommends that you do not attempt to repair the
Product yourself, or use an un-authorized servicer; BSH
will have no responsibility or liability for repairs or work
performed by a non-authorized servicer. If you choose to
have someone other than an authorized service provider
work on your Product, THIS WARRANTY WILL
AUTOMATICALLY BECOME NULL AND VOID. Authorized
service providers are those persons or companies that
have been specially trained on BSH products, and who
Model No.
FD-No.
Date of Purchase
Customer Service O