WTA 3000 en Instructions use for Bosch Info Team: DA Tel. 01 80/5 30 40 50 (DEM 0,24/Min DTAG) Internet: http://www. bosch-hausgeraete.
18129De.
Contents en Before using the appliance for the first time, protecting the environment ....................................................PAGE 2 Safety instructions and warnings .........................................PAGE 3 Brief description of the dryer ..................................................PAGE 4 Preparing the laundry...................................................................PAGE 5 Selecting drying time and option ..........................................
Before using the appliance for the first time, protecting the environment • • • This appliance is designed for domestic use and is only to be used for drying laundry. Keep all packing materials (plastic bags etc.) out of the reach of children - there is a possible risk of danger. Ensure that your appliance has no transport damage. If in doubt, do not connect the appliance. Contact your after-sales service or specialist dealer.
Safety instructions and warnings The appliance conforms to EU Directive 93/68/EEC and is only for domestic use. Note before first use: • Read the enclosed leaflets carefully. They contain important information about the installation, use and safety of the appliance. • Install the appliance as described in the “Installation” instructions. • Do not attach the vent pipe connection to a chimney. Risk of poisoning! • Move the appliance carefully.
Brief description of the dryer 1 2 Work top Control panel See “Programme chart”. 3 Fluff filter See “Fluff filter”. 4 Door (“Door reversibility”) See section “Door reversibility”. To open the door: pull the handle. To close the door: push lightly until it latches home.
Preparing the laundry Preparing the Wash Check that all buttons and zips are closed and that all pockets are empty. To prevent the laundry from creasing, turn it to the left and lay it loosely in the drum. Maximum load • Cotton • Easy-care 2.5 kg • Delicates 1.5 kg 5.
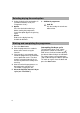
Selecting drying time and option 1. Select the drying time and options in accordance with the chart (see “Programme chart”). 2. Option Press the desired function keys before starting the programme. Cancel the option by pressing the key again. • Gentle Reduces the drying intensity. Suitable for delicates. 3. Additional programme Cold Air Airs the laundry for 30 minutes without heat. Starting and completing the programme 1. Press the Start button. 2.
Installation • • • • Install the dryer in a frost-protected room. The appliance must stand firmly and horizontally on the floor. The two front feet are adjustable. Use them for alignment if necessary. Remove the protective film from the control panel. Do not jam the mains cable between the dryer and the wall. Ensure that there is always easy access to the earthed socket-outlet. Stacking kit The dryer can be placed on top of our frontloading washing machines.
Electrical connection • • • Observe any special regulations of the responsible electricity company. Only connect the appliance to a properly installed socket-outlet with earthing contact. Ensure that the voltage information on the appliance rating plate (on the rear of the appliance) agrees with the mains voltage at the installation site. The connected load and the required fuse or automatic m.c.b. are also given on the rating plate.
Door reversibility 1. Pull out the mains plug. 2. Open the door. 3. Using a screwdriver, turn the contact pin on the inside of the door (top) through 90 degrees and take it out. 4. Remove the two screws from the door hinge and take the door off. 5. Remove the two screws above and below the door lock. 6. To remove the door latch: use a screwdriver to press down on the small rib in the upper opening and pull the door latch out forwards. 7. To change the door stop: • Turn the door.
Maintenance 1. Only use a mild household cleaner for cleaning the dryer cabinet. Do not use abrasive detergents. 2. Clean the fluff filter after each drying cycle (see “Fluff filter”). 3. If the filter strainer becomes clogged, clean it with water and a soft brush. 4. Wipe off any fluff from the door seal and interior with a damp cloth. Fluff filter Clean the fluff filter after each drying cycle. 1. Pull the filter out upwards. 2. Clean the filter with a soft brush or with your finger tips. 3.
Trouble shooting guide This appliance satisfies the relevant safety requirements for electrical appliances. Repairs, alterations and work inside electrical appliances should only be carried out by skilled persons. Inexpert repairs can cause serious injuries to the user. If the following advice is of no assistance, contact the aftersales service! Drying cycle lasts too long / laundry does not dry: • Have you selected the correct drying time or.
Drying active On • The indicated drying times refer to laundry spun. at 1200, 1000 and 800 r.p.m. • The drying time must be extended at low spin speeds. • The drying time should be extended for towels and heavy items. NOTES: Fault indicator light (fluff filter) Gentle dry Power On light Start button Filter Low heat Start Cool Air Easy-care 2.5 kg Cottons + Linens 5 kg Type of Laundry 800 r.p.m 90 800 r.p.m 40 1000 r.p.
18129De.
Printed in Germany 5019 100 18219 (52 8416) ROBERT BOSCH HAUSGERÄTE GMBH