
Manual


Table Of Contents
- Getting Started
- Setting Up the System
- Using the Remote Control
- Setting Up SoundTouch®
- Using the SoundTouch® App
- Personalizing Your Presets
- Bluetooth® Technology
- Advanced Features
- Getting System Information
- Care and Maintenance
- Troubleshooting
- Appendix A: installation reference
- Front console panel
- Back console panel
- Connecting an AC-2 adapter
- Installing the front speakers
- Connecting the front speakers to the console
- Installing the rear speakers
- Identifying switch settings on wireless receivers
- Connecting the rear speakers
- Connecting the rear speakers to power
- Making a wired connection to the rear speakers
- Mounting your speakers
- Appendix B: System Maintenance
ENGLISH - 39
APPENDIX A: INSTALLATION REFERENCE
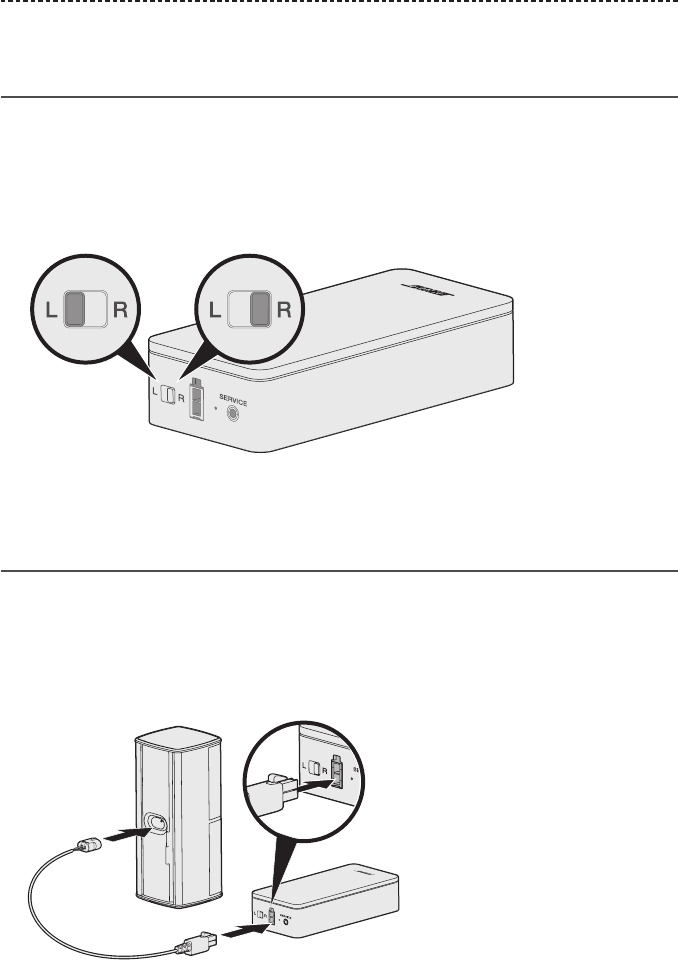
Identifying switch settings on wireless
receivers
Your rear speakers connect to wireless receivers to communicate with the console. The
receivers come preset to a left and right channel out of the box. You can use the switch
on the front of the receiver to adjust the channel settings.
1. Confirm that the switch on one wireless receiver is set to L (left).
2. Confirm that the switch on the other wireless receiver is set to R (right).
Note: Make sure that one wireless receiver is always set to L (left) and the other is set
to R (right).
Connecting the rear speakers
1. Connect the AC-2 adapters to the bare ends of the speaker wire. See “Connecting an
AC-2 adapter” on page 35.
2. Insert the adapter into the back of your speaker.
3. Insert the other end of the two-pin cable into your wireless receiver.
You hear or feel a click.
4. Repeat steps 1 – 3 to connect your other speaker.