
Operation Manual


Table Of Contents
- Introduction
- Welcome
- Product overview
- Controls and indicators
- Connection panel
- System Setup
- Unpacking
- Removing/attaching the cover
- Mounting options
- Connecting the T1 to an L1TM model II power stand
- Connecting the T1 to an L1 model I power stand
- Connecting the T1 ToneMatchTM audio engine power supply (optional)
- Connecting the T1 to your computer
- Operating Instructions
- Optimizing input gain and output volume
- Using the Master volume control
- Muting a channel
- Muting channel effects
- Reading the T1 display
- Using the T1 rotary selector
- Editing the sound of a channel
- Selecting a ToneMatch™ preset
- Adjusting zEQ
- Adjusting Para EQ
- Using compressor/gate functions
- Using the KickGate
- Using modulation effects
- Adding delays
- Adding reverb
- Routing input signals to the Aux output
- Using the tuner
- Using global functions
- Selecting a type of reverb
- Using the Prefs utilities
- Loading and saving scenes
- Sharing a scene
- Bose scenes
- Factory Settings
- Singer/Songwriter
- DJ/Playback
- Drums and Bass
- The Works scene
- Factory Settings
- Care & Maintenance
- Cleaning
- Limited Warranty and Registration
- Accessories
- Troubleshooting
- Technical information
ii
EnglishDeutschEspañolFrançaisItalianoNederlandsSvenska Dansk
QUICK PATH TO MAKING MUSIC
To get sound right away
1. Remove your new T1 ToneMatch
TM
audio engine from the carrying bag and
remove its protective cover (page 6).
2. Refer to the Quick Setup Guide and
connect your T1 to your L1
TM
system.
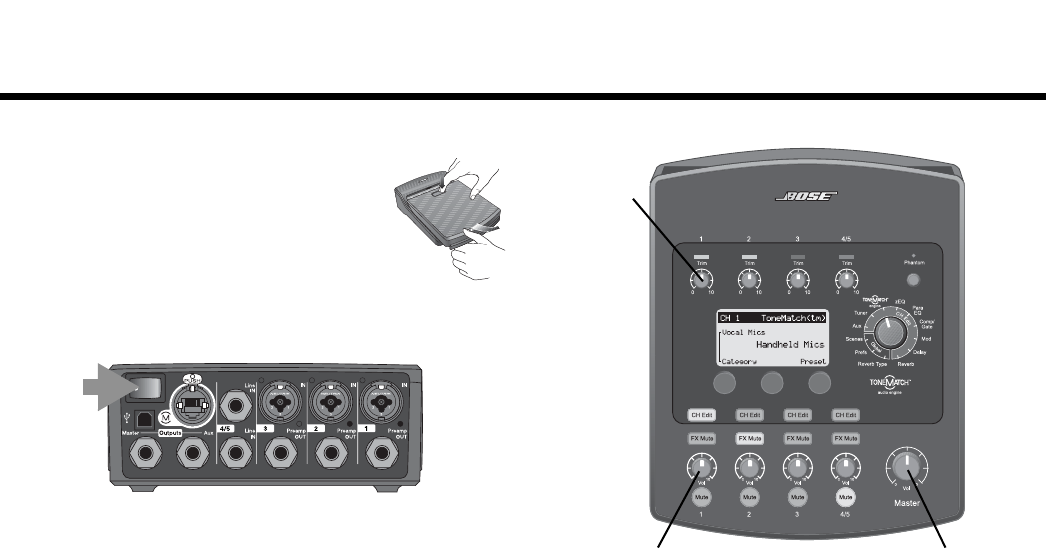
3. Make sure the T1 Master volume
control is set to 0 (page 16).
4. Turn on the T1 and then turn on your L1 model II system.
5. Plug your instrument or microphone into the Channel 1
input on the back of the T1 (page 4).
6. Play your instrument or sing into the microphone.
Turn the CH 1 Trim control clockwise until the input
signal indicator glows green (page 16).
7. Slowly turn the T1 Master volume control up until it is
approximately in the 12 o’clock position (page 16).
8. Slowly turn the CH 1 Vol control up until you hear your
instrument or microphone (page 16).
IMPORTANT!
Please make sure you read “Optimizing input gain and
output volume” on page 16. This explains how to prop-
erly adjust the input trim, channel volume, and master
volume controls for the best possible sound.
ON
Master
Trim
(CH 1)
Vol (CH 1)