
Use and Care Manual


136
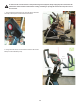
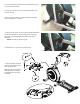
8.UsingasmallStandardscrewdriver,removetheindicatedCap(byar-
row)fromtheFrameAssembly.
9.Usinga6mmhexwrench,removetheindicatedhardwarefromthe
Crank Arm and Leg.
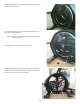
10. Remove the Interior Pivot Cover while noting how the Handlebar
Cable runs through it for re-assembly.
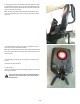
11.Usinga6mmhexwrench,loosenandremovetheindicatedhardware
from the Crank Arm and Leg, and set it safely aside for reassembly.
Remove the Leg and Pedal together and set them safely aside for
reassembly.
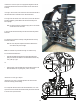
NOT ICE: This step may require two people.
12. Repeat steps 2-11 on the other side of the machine.
X4
F
X2
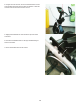
13.Usinga#2Phillipsscrewdriver,
remove the screws that secure the
Upper Shrouds and Tray.
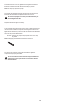
Note: Be sure to observe how the
Handlebar Cables route through
the Upper Shrouds to assist with
re-assembly.