
Service manual

22
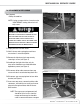
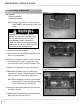
MECHANICAL SERVICE GUIDE
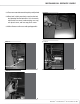
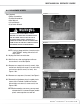
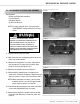
10-6 Ease poly-v belt off of the rear roller pulley.
Tensioning screw may need to be loosened (see
Section 9.0 Replacing Motor Belt). See Figure 6.
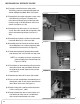
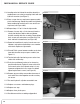
10-7 Remove the 4 front roller adjustment screws using
a 3/16 Allen Key (see Figure 7). Remove the 2
front rollers by loosening the 2 inside front roller
brackets using a 3/16 Allen Wrench and 1/2 inch
wrench (see Figures 8, 9, 10).
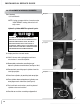
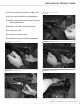
10-8 Remove the rear roller with a 1/2 inch wrench (1
screw). Rear roller should slide out from belts after
release from mounting location (see Figure 11
&12).
10-9 Remove lower hydraulic cylinder from the treadle
frame with Allen key (1 screw each side).
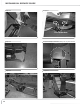
10-10 Standing on the left side of the machine detach
the treadle/teeter cross tube by removing 2 bolts
with two 9/16 inch wrenches (see Figure 13).
10-11 Rotate left treadle back (pivoting about treadle
pivot bracket) until it rests on the rear step frame.
NOTE: Lay a rag down on the rear step frame to
protect treadle plastic from damage (see
Figure 14, 15 & 16).
10-12 The old belt can be removed by pulling it over the
front roller bracket and cam follower bracket on
the inside of the treadle. Replace with new belt
(see Figure 17).
10-13 Repeat Steps 10-9 to 10-11 on the right treadle.
10-14 Run rear roller through belts (remembering to run
through poly-v belt as well) and re-mount the rear
roller. Attach with screw (see Figure 11).
10-15 Replace front rollers and front roller adjustment
screws (see Figures 7, 8 & 9).
10-16 Rotate treadles back one at a time (making sure
cam follower bracket seats on cam followers)
and re-attach teeter/treadle cross tubes.
Figure 4:
Figure 5:
Figure 6: