BOWFLEX POWER PRO ® ® FOR ALL POWER PRO MODELS Owner’s Manual & Fitness Guide Written By: Tom Purvis, Registered Physical Therapist, Certified Strength Conditioning Specialist, and Head Trainer for the National Academy of Sports Medicine. Special Edition Includes: Dr. Ellington Darden’s 6 Week Fast Fat Loss Body Leanness Program.
Table Of Contents Getting To Know Your Machine Using Your Machine Optional Equipment Warning Defining Your Goals Working Out 2 3 6 7 8 10 The Workouts: The 20 Minute Better Body Workout Advanced General Conditioning 20 Minute Upper / Lower Body Body Building Circuit Training Anaerobic / Cardiovascular True Aerobic Circuit Training Strength Training 11 11 12 13 14 15 16 Chest Exercises: Incline Bench Press Chest Fly Bench Press One Arm Seated Fly Resisted Punch Bench Press w/Purvis Pec Bar Decline Bench
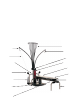
Getting To Know Your Machine CONGRATULATIONS on your commitment to fitness! By choosing Bowflex to be your partner, you’ve chosen a machine that can deliver on it’s promises! The resistance and aerobic training that can be performed on the Bowflex is unmatched by any other single piece of home fitness equipment available.
Using Your Machine 2 Power Rod® Resistance Power Rods are made from a special composite material. Your rods are sheathed with a protective black rubber coating. Each rod is marked with it’s weight rating on the “Rod Cap”. Adjusting And Understanding The Resistance The standard Bowflex comes with 210 pounds of resistance (one pair of 5 pound rods, two pair of 10 pound rods, one pair of 30 pound rods, and one pair of 50 pound rods).
Using Your Machine The Workout Bench Your Bowflex has four different bench positions. To adjust the bench, simply locate the spring lock pin on the side of the seat portion of the bench . Pull out pin to release seat, then slide it to the desired position. Pull out pin , give it half a turn, and release to place it in a “free sliding” position for exercises such as rowing. Quick Release Bench: The long portion of your bench attaches and releases from the seat portion very easily.
Using Your Machine 4 Using the Bowflex Hand grips The Bowflex hand grips can be used as regular grips, hand cuffs or ankle cuffs, depending on how they are configured. Regular Grip: Grasp the main portion of the grip without inserting your hand through the cuff portion. Most of the exercises you perform utilize this grip. Hand Cuff Grip: Slip your hand through the cuff portion of the grip so that the foam pad rests on the back of your hand.
Using Your Machine Folding & Moving Bowflex: Folding and moving your Bowflex is easy. Follow the simple steps below to fold your Bowflex. Once it’s folded, simply tilt the machine back on it’s transport wheels to roll the machine to any location •Bind the Power Rods® with the rod binding strap. •Remove the threaded knob on the platform. •Tilt the bench up to the Power Rods®. •Link the two hooks on the end of the cables together, over the top of the incline support bracket on the bench.
6 Optional Equipment Bowflex, Inc. is constantly working to provide you with the latest innovation and information to help you reach your goals. The Bowflex Leg Extension / Leg Curl Attachment This attachment is designed to add more effectiveness to all exercise routines where “leg work” is required. Safety •Before using the attachment make sure that all fasteners are in place and tightened. •Make sure that the attachment’s cables are securely fastened to the regular Bowflex cables.
WARNING! Before beginning any exercise program consult your physician or health care professional. Only he or she can determine the exercise program that is appropriate for your particular age and condition. If you experience any lightheadedness, dizziness, or shortness of breath while exercising, stop the exercise and consult your physician. For Your Safety Please Follow These Instructions Before exercising, make sure that the spring lock seat pin is securely fastened and the bench is firmly in place.
8 Defining Your Goals Your body will do what you train it to do. That’s why it’s important to define your goals and focus on those goals. Here are some fitness components that will help you define your goals and choose your fitness program. Muscle Strength is the maximum force that you can exert against resistance at one time. Your muscle strength comes into play when you pick up a heavy bag of groceries or lift a small child.
Cardiovascular Endurance is the ability of the heart and lungs to supply oxygen and nutrients to exercising muscles over an extended period of time. It comes into play when you jog a mile or ride a bike. It is a critical component of overall fitness and health. Any exercise program must be supplemented with cardiovascular training, such as rowing on the Bowflex.
10 Working Out A workout begins in your minds eye. With concentration and visualization you can approach your workout with a positive, constructive attitude. A good pre-workout mental routine is to sit and relax, so you can focus on what you are about to do and think about achieving your end goal. Warming Up Breathing The most important part of breathing during exercise is, quite simply, that you do it.
The Workouts 11 20 MINUTE BETTER BODY WORKOUT FREQUENCY: 3 DAYS PER WEEK (M-W-F) TIME: ABOUT 20 MINUTES Start by performing one set of each exercise. Warm up with a light resistance that you can perform easily for 5 -10 reps without fatiguing. Focus on practicing and learning your technique before increasing the resistance. Then move to a more challenging resistance that you can perform no less than 10 reps and no more than 15 reps without your form deteriorating.
The Workouts 12 20 MINUTE UPPER/LOWER BODY FREQUENCY: 4 DAYS PER WEEK (M-T-Th-F) TIME: ABOUT 20 MINUTES This program provides you with a quick and effective workout that combines muscle conditioning with some cardiovascular benefits. Do this routine when you are limited in time or just want a variation to your normal routine. Perform this program training 2 days, resting 1 to 2. Perform all exercises to near failure, stopping at the point that your technique starts to deteriorate.
The Workouts 13 BODY BUILDING FREQUENCY: 3 DAYS ON, 1 DAY OFF TIME: ABOUT 45-60 MINUTES Body building requires focused concentration and dedication to training, as well as proper eating habits. Train each muscle group to failure before moving on to the next exercise. Do not neglect any muscle group. If needed, include an aerobic activity to increase your caloric expenditure and help to reduce your body fat levels to achieve a defined muscular look. Rest 30-60 seconds between each set and exercise.
The Workouts 14 CIRCUIT TRAINING - ANAEROBIC/CARDIOVASCULAR FREQUENCY: 2-3 TIMES PER WEEK TIME: ABOUT 20-45 MINUTES Circuit training is a great way to achieve the benefits of strength training and cardiovascular training in one quick, challenging routine. The idea is to move quickly from exercise to exercise, taking only as much rest between sets as it takes to set up the next exercise (less than 20 seconds). One circuit equals one set of each exercise.
The Workouts 15 TRUE AEROBIC CIRCUIT TRAINING FREQUENCY: 2-3 TIMES PER WEEK TIME: ABOUT 20-60 MINUTES Circuit training is a great way to achieve the benefits of strength training and cardiovascular training in one quick, challenging routine. By returning to the aerobic rowing exercise between each set you are increasing your aerobic capacity, endurance and burning fat as energy.
The Workouts 16 STRENGTH TRAINING FREQUENCY: 3 DAYS PER WEEK (M-W-F) TIME: ABOUT 45-60 MINUTES This program is designed to emphasize overall strength development. This is an advanced routine to be used only after you have progressed from the advanced general conditioning routine and only after you have perfected your exercise techniques. Work each set to near exhaustion. If you can perform more than 5 to 8 reps, you should increase your resistance 5 lbs and decrease your reps to 5.
Chest Exercises 17 INCLINE BENCH PRESS - Shoulder Horizontal Adduction (and elbow extension) Muscles worked: This exercise emphasizes the chest muscles (pectoralis major), especially the upper portion. It also involves the front shoulder muscles (anterior deltoid, a portion of the middle deltoid) and the triceps, which are located on the back of the upper arm. NOTE: This motion can be further emphasized by using the Purvis Pec Bar attachment.
Chest Exercises 18 BENCH PRESS - Shoulder Horizontal Adduction (and elbow extension) Muscles worked: This exercise emphasizes the chest muscles (pectoralis major), also involving the front shoulder muscles (anterior deltoid, a portion of the middle deltoid) and the triceps, which are located on the back of the upper arm. NOTE: This motion can be further emphasized by using the Purvis Pec Bar attachment.
Chest Exercises 19 RESISTED PUNCH - Shoulder Flexion, Elbow Extension, and Scapular Protraction Muscles worked: This exercise involves the entire chest muscle, the front shoulder muscles (anterior deltoid, a portion of the middle deltoid) and the triceps, which are located on the back of the upper arm. The goal however, is not any specific muscle group. It is to be used with very light resistance for an endurance activity.
Chest Exercises 20 DECLINE BENCH PRESS - Shoulder Horizontal Adduction (and elbow extension) Muscles worked: This exercise emphasizes the chest muscles (pectoralis major), especially the lower portion. It also involves the front shoulder muscles (anterior deltoid, a portion of the middle deltoid) and the triceps, which are located on the back of the upper arm. NOTE: This motion can be further emphasized by using the Purvis Pec Bar attachment.
Shoulder Exercises 21 SEATED SHOULDER PRESS - Shoulder Adduction (and elbow extension) Muscles worked: This exercise emphasizes the front portion of the shoulder muscles (front deltoids as well as the front part of the middle deltoids), the upper back muscles (upper trapezius), and the triceps muscles located on the backs of the upper arms. NOTE: This motion can be further emphasized by using the Purvis Pec Bar attachment.
Shoulder Exercises 22 REAR DELTOID ROWS - Shoulder Horizontal Abduction (and elbow flexion) Muscles worked: This exercise emphasizes the back portion of the shoulder muscles ( the rear deltoids, as well as the rear portion of the middle deltoids). Starting position: START •Sit on the bench facing the power rods, knees bent and your feet on the platform. •Cross the handles and grasp with your palms facing down and arms straight (right hand on left handle and vice versa).
Shoulder Exercises 23 SCAPULAR PROTRACTION (elbow stabilized) Muscles worked: This exercise emphasizes the serratus anterior muscles, the muscles that can be seen on the side of the rib cage, and are involved in pushing movements when the arms are kept straight and the scapula are allowed to move forward.
Shoulder Exercises 24 SHOULDER ROTATOR CUFF - Internal Rotation Muscles worked: This exercise emphasizes the front rotator cuff muscle (subscapularis). Starting position: •Sit on the bench with one side towards the power rods. Maintain good spinal alignment. •Grasp the handle nearest you and draw the upper arm into your side, keeping your elbow bent. •Distance yourself on the bench to eliminate slack in the cable. •Use a very light resistance. This is not a powerful movement.
Shoulder Exercises 25 SHOULDER EXTENSION - (elbows stabilized) Muscles worked: This exercise emphasizes your upper back (the latissimus dorsi, teres major and rear deltoid muscles), as well as the muscles between your shoulder blades (middle trapezius and rhomboid muscles). The triceps muscles, located on the back of the upper arms, are worked throughout the entire motion as they try to prevent the elbows from bending.
Shoulder Exercises 26 LYING FRONT SHOULDER RAISE - Shoulder Flexion (elbow stabilized) Muscles worked: This exercise emphasizes the front portion of the shoulder muscles (front deltoids as well as the front part of the middle deltoids). Starting position: •Sit on the bench facing the power rods, knees bent and feet flat on the platform. •Grasp the handles, with your arms straight and your palms facing down. Lie back completely so that your head is supported by the bench.
Shoulder Exercises 27 REVERSE FLY - Shoulder Horizontal Abduction (elbows stabilized) Muscles worked: This exercise emphasizes the back portion of the shoulder muscles (the rear deltoids, as well as the rear portion of the middle deltoids.) Starting position: •With the bench flat, sit facing the power rods, knees bent, and feet flat on the floor. •Grasp the handles with your palms facing towards the floor and arms nearly straight.
Back Exercises 28 WIDE PULLDOWNS with the Lat Tower - Shoulder Adduction (with elbow flexion) Muscles worked: This exercise emphasizes the latissimus dorsi, teres major and rear deltoid which make up the large pulling muscles of your upper back. It also involves the muscles on the front of your upper arms (the biceps group) which are responsible for bending your elbows. Starting position: START •To determine the appropriate grip width for you, hold you arms straight out to the sides at shoulder height.
Back Exercises 29 LYING LAT PULLDOWNS - Modified Muscles worked: This exercise emphasizes the latissimus dorsi, teres major and rear deltoid which make up the large pulling muscles of your upper back and eliminates the biceps from the movement. Starting position: •Lie on your back on the bench, head toward the power rods. Your buttocks will eventually be off the end of the bench. •Slip your arms through the handles and slide the cuff just past your elbows and tighten cuffs.
Back Exercises 30 SEATED LAT ROWS - Shoulder Extension (and elbow flexion) Muscles worked: This exercise emphasizes the latissimus dorsi, teres major and rear deltoid muscles which make up the large pulling muscles of your upper back. The biceps muscles on the front of the upper arm are also involved in this movement. Starting position: •Sit on the bench facing the power rods. •Grab handles with palms facing each other. •Place heels on the end of the platform, bend the knees comfortably.
Back Exercises 31 LYING LAT FLY - Shoulder Adduction Muscles worked: This exercise emphasizes the latissimus dorsi, teres major and rear deltoid which make up the large pulling muscles of your upper back, as well as involving your biceps which are located on the front of your upper arms. Note: This motion can be further emphasized using the purvis pec bar attachment. Starting position: •Lie on your back, head toward the power rods.
Back Exercises 32 ONE ARM SEATED LAT ROWS - Shoulder Extension (with elbow flexion) Muscles worked: This exercise emphasizes the latissimus dorsi, teres major and rear deltoid muscles which make up the large pulling muscles of your upper back. The biceps muscles on the front of the upper arm are also involved in this movement. Starting position: START •Sit on the bench facing the power rods and grasp one handle.
Back Exercises 33 STIFF-ARM PULLDOWN with Lat Tower - Shoulder Extension (elbow stabilized) Muscles worked: This exercise emphasizes your upper back (the latissimus dorsi, teres major and rear deltoid muscles), as well as the muscles between the lower part of your shoulder blades (lower trapezius muscles). The triceps muscles, located on the back of the upper arms, will also be involved. Starting position: •Remove (or straddle) the bench and stand facing the power rods.
Arm Exercises 34 TRICEPS PUSHDOWN with Lat Tower - Elbow Extension Muscles worked: This exercise emphasizes the triceps muscles located on the backs of the upper arms. These muscles are responsible for straightening your arm and assist in any upper body pushing or pressing motion. Starting position: START •Remove (or straddle) the bench and stand facing the power rods. •Grasp the lat bar at shoulder width, with your palms down.
Arm Exercises 35 FRENCH PRESS - Elbow Extension Overhead Muscles worked: This exercise emphasizes the triceps muscles located on the backs of the upper arms. Starting position: •Sit on the bench facing away from the power rods. Bend the knees and place your feet flat on the floor. •Reach behind and grasp one or both of the handles, palms facing each other. •Draw your arms up until your elbows are comfortably overhead (different for everyone) and your hands are pointed to the ceiling.
Arm Exercises 36 CROSS TRICEPS EXTENSION Muscles worked: This exercise develops the triceps muscle located on the back of the upper arm. Starting position: •Seated in the 45 degree position, reach straight behind your body, grasp a handle, and bend your elbow until your hand is near your chest and your palms are facing towards the floor. •Keeping knees bent and feet flat on the floor, lay your head back against the bench and straighten your arm to the front.
Arm Exercises 37 SEATED TRICEPS EXTENSION - Elbow Extension Muscles worked: This exercise emphasizes the triceps muscles located on the backs of the upper arms. Starting position: •Seated in the 45 degree position, reach straight behind your body, grasp the handles, and bend your elbows until your hands are near your chest and your palms are facing towards the floor. •Keeping knees bent and feet flat on the floor, lay your head back against the bench and straighten your arms to the front.
Arm Exercises 38 SEATED BICEPS CURL - Flexion (in supination) Muscles worked: This exercise emphasizes the biceps muscles which are located on the front of your upper arms and are primarily responsible for bending your elbows. Seated position: •Sit facing the Power Rods, knees bent with one foot on the bench and one on the floor. •Grasp the handle and rest the back of your upper arm, not your elbow, on the elevated knee. •Maintain correct spinal alignment.
Arm Exercises 39 SEATED WRIST EXTENSION Muscles works: This exercise develops the back and top parts of your forearms and is critical in helping to prevent injuries like tennis elbow. Starting position: •Sit facing the power rods with your knees bent and feet flat on the bench. •Grasp the handles with your palms facing down and rest your mid-forearms on your upper legs with the elbows flared out to the sides. •Be sure to sit far enough backwards on the bench to maintain tension throughout the exercise.
Arm Exercises 40 REVERSE CURL - Elbow Flexion (in pronation) Muscles worked: This exercise emphasizes the deep arm muscle (brachialis) while involving the front forearm muscle (brachioradialis) and the biceps as well. Starting position: •Remove the bench and stand on the platform facing the power rods. •Bend down and grasp the handles with your palms facing backward. •Stand with your arms by your sides. •Lift your chest, tighten your abdominals and maintain a very slight arch in your lower back.
Arm Exercises 41 STANDING WRIST EXTENSION Muscles worked: This exercise emphasizes the back and top parts of your forearms. It also isometrically challenges your deep biceps muscles (brachialis), located on the front part of your upper arms. Starting position: •Remove the bench and stand on the platform facing the power rods. •Bend down and grasp the handles with your palms facing backwards. •Stand with your upper arms by your sides.
Abdominal Exercises 42 REVERSE CRUNCH - Spinal Flexion Muscles worked: This exercise works your entire abdominal area including your upper and lower front abs (rectus abdominus) and your side abs (obliques). Starting position: START •With the bench in the flat position, lie on your back with your head towards the power rods. •Bend your knees fully. •Bend at the hips based upon desired difficulty. Beginners should be fully bent, bringing the legs near the abs.
Abdominal Exercises 43 SEATED (RESISTED) ABDOMINAL CRUNCH - Spinal Flexion Muscles worked: This exercise emphasizes the abdominal area including the upper and lower front abs (rectus abdominus) and the side abs (obliques). Starting position: •While seated in the 45 degree position, grasp both handles drawing them over the shoulders and resting the handles on the chest/shoulders with your palms facing upward.
Abdominal Exercises 44 TRUNK ROTATION Muscles worked: This exercise involves most of the trunk muscles. It does not “spot reduce” or eliminate “love handles”. It should be noted that rotation is more limited in the spine than most people realize and should be performed with minimal resistance, and always in proper alignment. Starting position: START •Sitting sideways on the bench with one side facing the Power Rods, grasp the handle closest to you with both hands.
Leg Exercises 45 LEG EXTENSION with attachment Muscles worked: This exercise emphasizes the muscles on the front of the upper thigh (quadriceps muscle group) which are responsible for straightening your leg against resistance. This powerful muscle group helps to provide stability for the knee joint and is essential for producing power in running, jumping and lifting activities.
Leg Exercises 46 LEG PRESS - Hip and Knee Extension Muscles worked: This exercise develops overall lower body pushing strength, primarily emphasizing your knee extensors on the front of your thighs (quadriceps), your hip extensors muscles on your rear (gluteus maximus), as well as on your inner thighs (adductor muscle groups). Starting position: START •Remove the bench and unlock the rowing seat.
Leg Exercises 47 STANDING HIP EXTENSION (Knee flexed) Muscles worked: This exercise strengthens and develops the muscles of your buttocks area (gluteus maximus). Remember, there is no such thing as “spot reduction”. Do not do this exercise if you believe it will remove fat from this area. Do it to strengthen and build these muscles. Starting position: •Remove the bench. •Facing the power rods, stand on the platform to one side of the rail. •Secure the cuff around the ankle furthest from the rail.
Leg Exercises 48 SEATED LEG CURL - Knee Flexion Muscles worked: This exercise emphasizes the hamstring muscle group (biceps femoris, semimembranosus, semitenonosus) on the back of the thigh. Starting position: •Remove the bench, unlock the seat. •Attach one end of the belt to a pulley, sit on the seat facing away from the Power Rods, position the belt around your midsection and then attach the free end of the belt to the other pulley.
Leg Exercises 49 SEATED (STRAIGHT LEG) CALF RAISE - Ankle Plantarflexion (knee stabilized) Muscles worked: This exercise is great for emphasizing the muscles of your lower leg or calf (gastrocnemius and soleus), that are responsible for raising and lowering your heels at the ankle joint. Strength and power in these muscles are essential for all sports and daily activities. Starting position: •Remove the bench and unlock the rowing seat.
Leg Exercises 50 LYING LEG EXTENSION Muscles worked: This exercise allows you to strengthen and develop the front part of your upper thighs (quadriceps muscle groups), helping to increase your muscular stability at the knee joints. Starting position: START •Sit on the bench facing the power rods and attach the handle to the corresponding ankle. •Lie back on the bench so that your head is supported by the bench.
Leg Exercises 51 SEATED HIP ADDUCTION Muscles worked: This exercise will not burn off fat from your inner thighs or make them smaller! There is no exercise that will burn fat from a specific area. This exercise will, however, strengthen the muscles on the insides of your thighs (adductor muscle groups). It also works the muscles on the outside of your hip (gluteus medius) on the side that you are standing on. Use very light resistance and small range of motion on this exercise.
Leg Exercises 52 ANKLE EVERSION Muscles worked: This exercise strengthens and develops the muscles on the outside of your lower legs (peroneals). These muscles are essential for standing balance and lateral agility of the ankle. Starting position: •Sit on the bench with one side of your body facing the power rods. •Attach the handle around the ball of the foot furthest from the pulley. •Straighten the attached leg and sit up straight. •Allow the foot to rotate inward towards the Power Rods.
53 Fast Fat Loss Now! The Bowflex Body Leanness Program By Ellington Darden, Ph.D.
Fast Fat Loss Now 54 The following program was created by Dr. Ellington Darden. It contains a rigorous fitness and dietary program. Please consult your physician before beginning any fitness or dietary program. Some of the names of the exercises listed in this program have been changed in order to match the names of the exercises in this manual. The exercises themselves have NOT been changed, in order to preserve the integrity of Dr. Darden’s Study. The Upright Row exercise shown below was used in Dr.
A Personal Guarantee From Dr. Ellington Darden 55 Dear Bowflex Enthusiast, I’m excited, really excited! I’m elated because I’ve developed an exercising and eating program that produces fat loss faster than any plan I’ve ever tested. The men involved in my research, for example, had an average fat loss of 27.95 pounds per man. Women on the same program averaged a reduction of 16.96 pounds. Best of all, these dramatic results were achieved -- not in six months -but in only six weeks! That’s right.
56 Introduction The Bowflex Body Leanness Program This program is scientifically designed for maximal fat loss over six weeks. It is important that you practice every aspect of the plan to achieve optimum results. The program separates into three two-week stages. During each stage you will exercise, control the number and quality of calories you consume, and drink plenty of ice-cold water. Before starting the exercise routine you must be familiar with your Bowflex.
Measurements If you would like to measure your personal before-and-after results, there are several steps you need to take. It is important that you accurately perform each task, then at the end of the six-week program, repeat the process in the same manner. Body Weight: Remove clothing and shoes and record your weight to the nearest quarter pound. Be sure to use the same scale when weighing yourself at the end of the six-week program. For the most accurate recordings, weigh yourself nude in the morning.
Measurements 58 Skinfold Measurements To accurately track your progress through this six-week program, it is necessary to take skinfold measurements. By measuring yourself in this way, you will be able to determine your lean-body mass and your body-fat percentage. The goal of this program is to increase your lean-body mass and decrease your body-fat percentage. Please read this section carefully. Proper measuring techniques are essential to track your success. It is best to have someone measure you.
Measurements 59 Using Calipers When Measuring Skinfolds The procedure for measuring skinfold thickness is to grasp firmly with the thumb and forefinger a fold of skin and surface fat and pull it away from the underlying muscle. Take the caliper in your other hand and open the jaws. Clamp the jaws over the pinched skin and fat. The jaws exert constant tension at the point of contact with the skin.
Determining Your Body-Fat 60 To Use The Nomogram: 1) Locate the sum of your three skinfolds in the right column and mark it. 2) Locate your age in years on the far left column and mark it. 3) Connect the two marks with a straightedge. Where the straightedge intersects the line in the middle column appropriate to you, you will find your body-fat percentage. Baun, W.D, Baun, M.R., and Raven, P.B. A nomogram for the estimate of percent body fat from generalized equations.
Calculating Lean Body Mass 61 Now that you know your body-fat percentage, you can calculate your lean-body percentage. This will eventually show you how many pounds of muscle were added to your body, after completing the program. For Example: Before the program, Joe weighs 200 pounds and measures 30% fat, which amounts to 60 pounds. Thus, his lean-body mass is 70% or 140 pounds. After the program, Joe weighs 180 pounds and is 20% fat, which equals 36 pounds. His lean body mass is 80%, or 144 pounds.
62 Optional Picture Taking Pictures can be the most exciting evaluation you can do. The numbers and the tape measurements are great, but actually seeing differences from comparison photographs of yourself is quite satisfying. Taking full-length photographs is not difficult, but to see the maximum difference between before and after, you should follow these guidelines. 1) Keep everything the same.
Your Results 63 Your Results Summary Sheet Name Age Height Weight Loss Weight Before Muscle Gain Weight After Fat Loss Please follow the instructions on page 57 for measuring the circumferences. Measurements Before After Difference Right Arm Left Arm 2” Above Navel Navel 2” Below Navel Hips Right Thigh Left Thigh Total Percent Body Fat If you wish to send in your results to Bowflex, please send to: Bowflex Results, 2200 N.E. 65th Ave., Vancouver, WA. 98661.
64 The Workouts GUIDELINES Week 1&2 All exercises should be practiced with one set of 8 to 12 repetitions. The style of performance is very important. The movement for each repetition should be 4 seconds in the positive phase and 4 seconds in the negative. Keep the motion slow and smooth. When 12 repetitions are accomplished, increase the resistance by approximately 5 percent. Keep the time between exercises to a minimum, no longer than 60 seconds. No workout should take more than 30 minutes to complete.
The Workouts 65 GUIDELINES Week 5&6 All exercises should be practiced with one set of 8 to 12 repetitions. The style of performance is very important. The movement for each repetition should be 4 seconds in the positive phase and 4 seconds in the negative. Keep the motion slow and smooth. When 12 repetitions are accomplished, increase the resistance by approximately 5 percent. Keep the time between exercises to a minimum, no longer than 30 seconds. No workout should take more than 30 minutes to complete.
66 Eating Guidelines You will be following a reduced-calorie nutrition program, which is divided into three two-week segments. The program is a proven method for achieving maximal fat loss over a six-week period. It consists of a carbohydrate-rich, descending-calorie eating plan, and a superhydration routine. Follow a Carbohydrate-Rich, Descending-Calorie Eating Plan: Approximately 60 percent of the daily calories should be from carbohydrates.
Superhydrate Your System Drinking plenty of water is essential to the success of this program. Drinking the recommended amount of water can seem like a challenge at first. Stick with it. Carry a large sports bottle or similar item with you throughout the day. After several weeks, you will find that you actually thirst for more and more water, and the amounts recommended are easily reached. Superhydration aids fat loss in a number of ways. First, the kidneys are unable to function without adequate water.
68 The Eating Plan The menus in the Bowflex eating plan are designed for maximum fat-loss effectiveness and nutritional value. For best results, follow them exactly. Every attempt has been made to utilize current popular brand names and accurate calorie counts, which are listed in the menus. But as you probably realize the products are sometimes changed or discontinued. If a listed item is not available in your area, you’ll need to substitute a similar product.
The Eating Plan 69 Breakfast = 300 calories. Choice Lunch = 300 calories. Choice of of bagel, cereal or shake. one of three meals: Bagel Sandwich 1 plain bagel, Sarah Lee (frozen) (210) 3/4 ounce light cream cheese (45) 1/2 cup orange juice, fresh or frozen (55) Any beverage without calories, caffeine, or sodium, such as decaffeinated coffee or tea.
70 The Eating Plan Dinner = 500 or 300 calories.
Shopping List Quantities needed for listed items will depend on your specific selections. Review your choices and adjust the shopping list accordingly. It may be helpful for you to photocopy this list each week before doing your shopping. Staples Orange juice, skim milk, whole-wheat bread, Promise Ultra Vegetable Oil Spread, Italian Fatfree dressing, Dijon mustard, safflower oil, noncaloric beverages (tea, decaffeinated coffee, diet soft drinks, water) Grains Bagels, Sarah Lee (frozen) Cereals -- 1.
72 Q&A Q. I often get headaches when I Q. Is it possible to drink too eat only 1000 calories a day. much water? What should I do? A. Certainly. To do so, however, you’d probably A. Your headaches may be caused by going longer than three hours between meals or snacks. Try spacing your meals and snacks where there are fewer hours between them. have to drink four or five times as much per day as I’m recommending. There are a few ailments that can be negatively affected by large amounts of fluid.
Q&A Q. I’m a 40-year-old woman with a teenage son and daughter. My husband and I both want to lose 10 pounds and the children would also like to lose some weight. Can I put the whole family on the program? A. It would be great if you could, but you cannot. The number of calories per day is the problem. Teenagers require significantly more calories each day than 1500, which is the highest level. Check with a registered dietician (RD) for appropriate recommendations.
74 Q&A Most people are more motivated and make better progress if they go through the program with a friend. In selecting a training partner, here are several things to keep in mind: •Your partner should be similar to you in age and condition. •Your partner should be serious about getting into shape and making a commitment. That commitment means you’ll be exercising together one hour, three times per week.
Q&A Q. I’m pleased that I lost the fat I wanted to lose. What do I do to maintain my new body weight? A. Once you’ve lost your excessive fat, your next task is to maintain that status. Here are the adjustments you need to make to your current practices. Adhere to a carbohydrate-rich, moderate--calorie eating plan. Instead of eating from 1000 to 1500 calories a day, you’ll be consuming from 1600 to 2400 calories per day. Maybe you can eat even more after your new body weight has stabilized.
Exercise Log 76 Please feel free to make copies of this chart to continue your exercise log.
Muscle Chart 77 Sternocleidomastoid Pectoralis Major Trapezious Anterior Deltoid Medial Deltoid Biceps Brachialis External Obliques Posterior Deltoid Serratus Anterior Rectus Abdominus Flexor Digitorum Superficials Infraspinatus Teres Major Triceps Latissimus Dorsi Brachioradialis Pronator Teres Flexor Carpi Radialis Gluteus Medius Tensor Fasciae Latae Gluteus Maximus Iliopsoas Adductor Magnus Pectineus Rectus Femoris Adductor Longus Vastus Lateralis Iliotibial Tract Vastus Medialis Gracil
This manual is written and designed by industry professionals. If you have any questions regarding your Bowflex or any instructions found in this manual please call 1-800-269-3539 for assistance. ©1997 Bowflex Inc. 2200 NE 65th Ave. Vancouver, WA. 98661. U.S. Patent numbers 4620704, 4725057, and 4756527. Other foreign and domestic patentes pending. Bowflex and the Bowflex logo are registered trademarks of Bowflex, Inc.