
User guide

Working With Objects - LabelMark Plus
Working With Objects - LabelMark Plus 71
Inserting Images
To import an image into a LabelMark Plus label:
1. Select the Images icon
on the Draw
2. Click the desired location on the label for the image’s top-left corner.
3. Browse to the location of the image (bitmaps only), select it and click Open. LabelMark Plus
sizes the image to fit in the available space if it is too large.
Note: LabelMark Plus includes a library of commonly used symbol images (see Symbol Library).
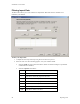
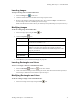
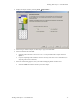
Modifying Images
To edit an existing image in LabelMark Plus:
1. Select the image object using the Select
tool.
2. Click the Properties
icon.
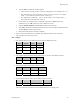
Property Field Description
Position
The location of the image from the top-left corner of the label (the
top-left corner of a label is 0, 0)
Size
The height and width of the image
Notes: You can also resize an image by dragging its selection
handles. LabelMark Plus maintains the width to height ratio of the
image as you resize it.
Rotation
Rotates the image in 90 degree increments
Image file name
The path and name of the displayed image – click Browse to modify
3. Click OK when you are finished modifying the properties.
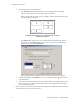
Inserting Rectangles and Lines
To insert a rectangle or line into a LabelMark Plus label:
1. Select the Rectangle
or Line icon on the Draw toolbar.
2. Click on the desired starting location and drag the mouse (with the left mouse button pressed) to
draw the object. Release the mouse button to place the object.
Modifying Rectangles and Lines
To edit an existing rectangle or line in LabelMark Plus:
1. Select the rectangle or line object using the Select
tool.