Print Date: 11.04.2003 Product Manual BL-521 RS232 Bluetooth Converter Version: 3.2 Brainboxes Limited, Unit 3C, Wavertree Boulevard South, Wavertree Technology Park, Liverpool, L7 9PF, UK Tel: +44 (0)151 220 2500 Fax: +44 (0)151 252 0446 Web: www.brainboxes.com Email: sales@brainboxes.
Table of Contents 1. Introduction ...................................................................................................................................................3 2. Changing Settings ..........................................................................................................................................3 2.1. Configuration features at a glance.............................................................................................................3 2.2.
1. Introduction Brainboxes BL-521 RS232 Bluetooth Adapter is a fully embedded, stand-alone Bluetooth solution, which will Bluetooth enable any device with an RS232 port. Unlike many of Brain Boxes wide range of Bluetooth products, BL521 does not require any additional Bluetooth software. For many applications BL-521, when used in combination with another Bluetooth product (e.g.
The example given below to connect to the configuration menus is performed in Windows using HyperTerminal, a terminal application that ships with Windows. If you are using a different operating system, you will need a similar “terminal” or “tty” type application (e.g. minicom), which talks directly to a serial port in that operating system. First, connect BL-521, along with the supplied gender changer, to an available serial port on your computer. In this example, we use COM1.
Select the Port that you have connected the BL-521 to. All other fields will then be “greyed out” Click OK Select the communications parameters that your device is configured to. In this example we have used the factory defaults normally applied. If you have previously reconfigured these values, then you will need to make sure the settings here match those you have configured to device to be. Click OK BL-521 manual Release Rev5.
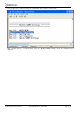
HyperTerminal should now be running. Now hit the “Enter” key once. This should activate the main configuration menu as shown in Main Menu below. You should be able to now interact with the menus as described in the following sections. As a general principle, from any menu screen hitting the “Enter” key refreshes the current menu and hitting 0 returns the user to the previous menu. Reminder: The configuration menu is not available whilst a radio (Bluetooth) connection is established. 3. Configuration Menu.
3.2. Communications Parameters Selecting menu. option 1 from the “Main Menu” menu displays the following Communications settings It is from this menu that all available serial port settings can be changed. The available options are detailed below. 3.2.1. Baud Rate The factory set communications parameters for your BL-521 are as follows… Baud Rate: Data Bits: Parity: Stop Bits: Handshaking: 115,200 8 (non-configurable) None 1 None (non-configurable) BL-521 manual Release Rev5.
You can alter these settings by using the configuration menu options shown below. After selecting option 1 “Set Baud Rate” from the “Modify COMM Settings” menu, the following menu is displayed. BL-521 manual Release Rev5.
Selecting 0 immediately returns you to the previous menu. Any changes made in this menu will be remembered when leaving, and will be applied by selecting option 4 “Apply COMM Settings” from the previous “Modify COMM Settings” menu. Selecting any other option will store the appropriate configuration selection. A range of popular pre-set baud rates is offered in this menu along with an option for you to set your own.
Enter the baud rate value you want, followed by “ENTER” The value you enter must be between 244 and 1382400 otherwise an error will be shown. You will be given a further opportunity to enter a valid value. BL-521 manual Release Rev5.
Entering a valid number here such as shown below results in your selection being accepted and your baud rate selection being displayed at the bottom of the menu. Selecting 0 immediately returns you to the previous menu storing any changes you have made; selecting any other option will store the appropriate configuration selection. As shown below, your configuration selection will not actually be applied at this point. BL-521 manual Release Rev5.
The Menu identifies this new selection as being unapplied. To apply this selection, select the “Apply COMM Settings” from the previous menu. This can be reached by selecting option “0”. Unapplied settings are discarded during a re-boot of BL-521. 3.2.2. Data bits. Unfortunately this setting cannot be changed. BL-521 only supports the 8 data bit format. Thus there is not a configuration menu option for this setting. BL-521 manual Release Rev5.
3.2.3. Parity After selecting option 2 from the “Modify COMM Settings” menu, the following menu is displayed. Selecting 0 immediately returns you to the previous menu storing any changes you have made; selecting any other option will store the appropriate configuration selection. As shown below, your configuration selection will not actually be applied at this point. BL-521 manual Release Rev5.
Configuration changes are only applied when option 4 (Apply COMM settings) is selected from the previous “Modify COMM Settings” Menu. Unapplied settings are discarded during a re-boot of BL-521. 3.2.4. Stop Bits After selecting option 3 from the “Modify COMM Settings” menu, the following menu is displayed. BL-521 manual Release Rev5.
Selecting 0 immediately returns you to the previous menu storing any changes you have made; selecting any other option will store the appropriate configuration selection. As shown below, your configuration selection will not actually be applied at this point. Configuration changes are only applied when option 4 (Apply COMM settings) is selected from the previous “Modify COMM Settings” Menu. Unapplied settings are discarded during a re-boot of BL-521. BL-521 manual Release Rev5.
3.2.5. Applying Communications Settings After selecting option 3 from the “Modify COMM Settings” menu, the following menu is displayed. Obviously the values displayed are dependant on your own individual configuration. Selecting 0 immediately returns you to the previous menu storing any changes you have made. Selecting “1” will immediately apply any new communications parameters you have selected from the other COMM menu’s. BL-521 manual Release Rev5.
If you have changed any communications parameters, and wish to continue to interact with the configuration menu, you will need to modify the communications parameters of the terminal application you are using to communicate to BL-521. The easiest method of performing this in HyperTerminal is to close the application down and re-start it, setting the alternative parameters during the initial application configuration. 3.3.
It is from this menu that all available Bluetooth settings can be changed. The available options are detailed below. 3.3.1. Discoverability After selecting option 1 from the “Modify Bluetooth Settings” menu, the following menu is displayed. BL-521 manual Release Rev5.
Selecting 0 immediately returns you to the previous menu storing any changes you have made. Selecting option “1” will immediately render BL-521 “Discoverable”. This means that any other Bluetooth device can see BL-521 when it performs a device discovery. Selecting option “2” immediately renders BL-521 “non-discoverable”. No other Bluetooth devices will be able to see BL-521 when they perform a device discovery. However, in this mode, your BL-521 is still “connectable”.
After selecting option 2 from the “Modify Bluetooth Settings” menu, the following menu is displayed. The factory set security mode is 3 (Highest) Selecting 0 immediately returns you to the previous menu storing any changes you have made. Selecting option “1” will immediately place your BL-521 into security mode 1. This is the lowest security mode that the BL-521 can be configured to. Connections, including service discovery, can take place without the need for “pairing” or “bonding”.
3.3.3. Encryption After selecting option 3 from the “Modify Bluetooth Settings” menu, the following menu is displayed. The factory set Encryption mode is “Disabled”. This can be changed to enable “Point to Point” or “Point to Point & Broadcast”. Unlike the communications settings, this Bluetooth setting is applied with immediate effect. 3.3.4. PIN .
After selecting option 4 from the “Modify Bluetooth Settings” menu, the following menu is displayed. The PIN can be any combination of printable characters. The PIN is only used when BL-521 is configured to be in security mode 3 (High security) The factory set PIN is “1234”. This can be changed to a range of pre-selected values, or you may enter you own combination up to a maximum of 8 characters. Selecting 0 immediately returns you to the previous menu storing any changes you have made.
Selecting option 4 from the “Set PIN” menu will display the following. In this field, you can enter your desired PIN code. This can be any printable alphanumeric character or symbol, but you should take care to choose a PIN appropriately remembering that some Bluetooth devices (e.g. cell phones) only have limited input mechanisms and may not have a full range of characters available. BL-521 manual Release Rev5.
Due to memory considerations the length of the PIN code is restricted to 8 characters. If you try to create a PIN code that is larger than this, an error message is generated (as above) and you will be given another opportunity to enter your own PIN Once you have entered the PIN you want, you should complete your request by hitting the “ENTER” key, whereupon the original menu is displayed, showing your new PIN selection.
Once a remote device has successfully partnered with BL-521, no other Bluetooth device will be able to connect until the pairing has been cleared. The pairing can be expired either by interacting with this menu option, or by invoking a “short” reset by pressing the reset button. After selecting option 5 from the “Modify Bluetooth Settings” menu, the following menu is displayed. Selecting 0 immediately returns you to the previous menu storing any changes you have made. BL-521 manual Release Rev5.
Selecting option “1” brings up the following menu. You should enter here the Bluetooth Address (BD_ADDR) of the remote device you wish to pair to followed by ENTER. This should be in the same format as indicated on the products label (NAP-UAP-LAP, for those of you who know) This will now refresh the menu with the address just entered and changes the option to allow removal of the entered device BL-521 manual Release Rev5.
The option to remove this newly entered device exists at this point should you have made a mistake. Once BL-521 has successfully paired with the remote device (or vice-versa) the menu will update to give the user the option to expire the pairing. This can also be achieved by performing a “short” reset using the reset button.
Selecting the option to remove the partner device as below will remove both the link key created during the pair, and it will remove the partner device itself from the memory of BL-521. BL-521 manual Release Rev5.
All the settings in this section are applied with immediate effect. 3.3.6. Client Server After selecting option 6 from the “Modify Bluetooth Settings” menu, the following menu is displayed. BL-521 manual Release Rev5.
Selecting 0 immediately returns you to the previous menu storing any changes; selecting any other option will store the appropriate configuration selection. The default configuration of your BL-521 is set to “Server” operation. This means that the BL-521 will wait for devices to connect to it. Changing this setting to “Client ” will put the BL-521 into a state where it will attempt to connect to the device contained in its internal database.
After selecting option 7 from the “Modify Bluetooth Settings” menu, the following menu is displayed. The Factory setting for the local device name is “BL-521 BB RS232 Converter”. Selecting 0 immediately returns you to the previous menu storing any changes; selecting any other option will store the appropriate configuration selection. BL-521 manual Release Rev5.
Selecting options 1-4 configure the BL-521 to use one of the pre-configured name options. Our example chooses option 1 BL-521 manual Release Rev5.
If you wish to use a different name, you’ll need to select option 5 Enter the name you’d like your BL-521 to display BL-521 manual Release Rev5.
Memory constraints mean that you must ensure that your desired name is less than 31 characters. You cannot use the “delete” key as this will be interpreted as part of the name. Press Enter when Happy with your choice The menu will now update with your chosen name selection. 3.3.8. Device Class Some remote device applications will only communicate to devices of a certain type. This menu option allows you to reconfigure your BL-521 to appear as a number of different device types.
After selecting option 8 from the “Modify Bluetooth Settings” menu, the following menu is displayed. The Factory setting for the Class of device is “Peripheral”. BL-521 manual Release Rev5.
Selecting 0 immediately returns you to the previous menu storing any changes; selecting any other option will store the appropriate configuration selection. This menu option allows the selection of a number of different device types as defined by the Bluetooth specification. BL-521 manual Release Rev5.
This option does not take effect until BL-521 is re-booted. 3.4. Display Factory Settings Selecting option 3 from the “Main Menu” menu displays the following Current settings menu. BL-521 manual Release Rev5.
BL-521 manual Release Rev5.
3.4.1. Updating Factory Settings Selecting option 1 from this Current settings menu allows any user settings to be used to update the “factory” settings, providing some level of protection from losing application configuration settings during a device reset when the reset button is activated. This is not something you really want to do unless you’re sure you have the settings as you want them and are sure you can remember them, as there is no way back from here… BL-521 manual Release Rev5.
Entering any character other than that required will abort the update. The PROCEED command is case sensitive and must be followed by . All the settings in this section are applied with immediate effect. BL-521 manual Release Rev5.
3.5. Restoring Factory Settings Selecting option 4 from the main menu displays the following restore factory settings menu. BL-521 manual Release Rev5.
Be sure to take a note of these settings as you will need to ensure that the next time you attempt to communicate with your BL-521 that you use these new settings. Remember that the original factory settings may have been updated using the previous menu. All the settings in this section are applied with immediate effect. 3.6. Disabling Interactive Menu Selecting option 5 from the main menu displays the following Disable Interactive menu menu.
3.7. Resetting BL-521 The BL-521 has a “reset button” located on the side of the case. This button performs 2 different functions. a) Resets Paired Devices. A short press (less than 3 seconds) of the reset button causes any paired device information to be deleted.
Your device may need an additional cable, such as a “cross-over” or “null-modem” cable. Please refer to your device’s documentation for further details. When the enclosed “gender changer” is connected, the Pin-Outs are… The Female to Male “Gender Changer” allows maximum cabling flexibility where existing cabling is already attached. The female connector is designed so that it can be plugged directly into a PC’s motherboard COM port.
For our example here, we will use a BL-521 with a BD_ADDR of 000A -4F-00082D, which we’ll call the Server, and a second, with a BD_ADDR of 000A-4F-0013BB, which we’ll call the Client. We’ll leave all other settings for this example as factory defaults. As explained above we only need to change the settings of the Client device… From the main menu select option 2 “modify Bluetooth settngs”. The following menu is displayed Select option 5 “set partner device”.
You’ll need to add the Server BL-521 into this menu option. Select option “1” which brings up the following menu. You should enter here the Bluetooth Address (BD_ADDR) of the remote device you wish to pair (in our case this is 000A-4F-00082D) followed by ENTER. This should be in the same format as indicated on the products label (NAP-UAP-LAP, for those of you who know) This will now refresh the menu with the address just entered. BL-521 manual Release Rev5.
Select 0 to return to the previous menu and select option 6 “Set Client/Server” After selecting option 6 from the “Modify Bluetooth Settings” menu, the following menu is displayed. BL-521 manual Release Rev5.
Select the client option. This setting is stored immediately and is not discarded upon a reboot. In fact it requires a re-boot in order to activate it. Re-boot. When the Client B L-521 is switched on, it will connect to the Server device you have entered in the menu above, assuming of course that the server device is also powered up. That’s it - it really is that simple. 5.2. Server : Connecting TO BL-521 from a remote Bluetooth device.
Broadly, this process requires the following steps that are detailed below. a) b) c) d) Discover the device Secure the relationship (unless you’ve set BL-521 to a low security setting) Connect to the Serial Port Profile Connect your application to the COM port. 5.2.1. Discover the device This is performed in Brain Boxes Windows software by first opening the “My Bluetooth Devices” window and clicking the discovery button. This sets the software to display all the Bluetooth devices it can find “in range”.
You will then be prompted to enter a PIN number. Enter the Pin number (which is 1234, unless you have used the configuration menu to change it). Click OK The Icon of your BL-521 in the main window should now change to indicate a “bonded” status as shown below. 5.2.3. Connect to the profile In order to actually connect to the appropriate function on the BL-521 you will need to discover it’s services. Double-Click the device selected. BL-521 manual Release Rev5.
This will display a serial port service called “Serial 01” Double clicking this service (or right clicking and selecting the “connect” option), will create a COM port style connection to the BL-521. The screen shot below shows that the port in our example here is listed as COM25, although yours will most likely be a much lower number than this. This “COM” port is now available for any application to use to communicate with your device, or in our case, the oscilloscope. 5.2.4.
6. Upgrading This product is not field-upgradeable. Please contact your sales representative for further details on obtaining future product upgrades. 7. Regulatory Information Bluetooth product operating in 2.4GHz band for Home and Office use. 1.
8.
Version History Version Date Author Checked By Comments 1.0 dd/mm/yyyy Name Name Initial version 2.0 10/01/2003 Gav Added info for configuration menu options, changes in pinouts, and other features along with minor formatting changes. 2.1 14/01/2003 Gav Minor formatting changes 3.0 03/04/2003 Gav ETW;SE;DR; MW;OS;NPJ; PG Updated to reflect changes on Rev7 Product PCB and updates to product firmware (V2.10) 3.