
Specifications

Designing Labels Chapter 3-11
of the 2D bar code. The default ECC level setting is Auto.
If an Auto ECC level is used then an ECC percent may also
be chosen for fine adjustment of the Error Control.
Dot Width/Height: The Dot Width and Height settings
determine the width and height of the 2D bar code (simi-
lar to the Bar Width Ratio setting in a linear bar code). The
unit of measurement is mils, where 1mil=1/1000”. Typi-
cally, the Dot Width and Height settings are dependent
upon the type of printer used and the labeling specifica-
tions to be met, if any.
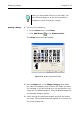
4 Click the Data Source drop-down list and select the
source from which the 2D bar code will get its value. The
default data source is Fixed (never changing). See the
Data Sources chapter for more information.
5 If using a Fixed data source, click the File Name drop-
down list and select the name of the text file that contains
the data to be encoded into the bar code. (Note: The text
file must reside in the directory specified for text files in
the Options > Directories dialog box.)
This file can also be created using Windows Notepad,
available from the Tools menu.
6 Click the Options tab to access additional settings.
7 Click OK and then click on the label in the position where
you want to place the 2D bar code.
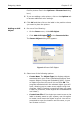
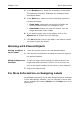
Adding a Picture 1 Do one of the following:
•On the Draw menu, click Picture.
•Click Add Picture on the Drawtools Bar.
The Picture properties tabs appear.