
Specifications

Chapter 5-6 Quick Start Guide
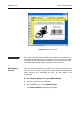
7 Use the mouse to position the text field near the top edge
of the label and click once to place the text (you do not
need to worry about precise field positioning at this time).
8 On the File menu, click Save As and save the label file to
the program’s Samples folder as basic.lbl.
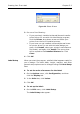
Adding a Line 1 Do one of the following:
•On the Draw menu, click Line.
•Click Add Line on the Drawtools Bar.
Your cursor appears as a crosshair in the design window.
2 Click below the Central Perk Gourmet Coffees text and
draw a horizontal line.
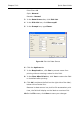
3 Right-click the line, and click Edit.
The Line dialog box appears.
4 In the Width box, enter 3.80.
5 In the Height (thickness) box, enter .05.
6 Click OK.
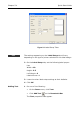
Positioning
Objects on the
Label
We will now use the Float Bar tool buttons to precisely
position the text and line fields on the label.
1 Click the View menu and ensure that a checkmark
appears next to the Float Bar toolbar option.
2 On the label design, hold down the SHIFT key while click-
ing on the Central Perk Gourmet Coffees text and on
the horizontal line, and then click the Center Horizon-
tally button on the Float Bar.
3 On the File menu, click Save to save your changes.
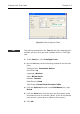
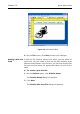
Adding a Picture 1 Do one of the following:
•On the Draw menu, click Picture.
•Click Add Picture on the Drawtools Bar.
The Picture properties tabs appear.