
User guide


User Guide
24
• Enter 1234 in the Data box.
6. Click OK.
Creating a shape object Example: Drawing a line
Your software comes complete with a range of tools to help you design perfect labels.
You can draw a line, a circle, a rectangle, etc. using the same process described below.
To draw a line:
1. Click the Line drawing
tool.
- or -
Choose Object > Shape > Line.
2. Click inside the workspace.
3. Move the mouse while holding the left button down.
Demonstration: Creating a CD sleeve: drawing a circle
1. Click the Circle or ellipse drawing tool.
2. Click inside the workspace.
3. Holding the left mouse button down and pressing the SHIFT key, move the mouse horizontally to
create the required shape.
4. Select the circle and choose Properties in the context menu.
5. Click on Position/Size and enter the following values:
• Width and Height: 20.
• Click OK.
6. Go to Object > Layout > Horizontally centered in document then Vertically Centered in
Document to align the circle with the center of the sleeve.
7. Select the circle then click on the Lock button.
To import an image
Your software allows you to insert images and company logos to help you perfect your label.
A number of formats can be imported: bmp, dib, dxf, emf, fmf, eps, fpx, img, gif, jpg, pcd, pcx, dcx, png, rle,
tga, tif, wmf and wpg.
1. In the Creation toolbar, click the Import Image
tool.
- or -
Choose Object > Image.
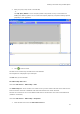
2. Click inside the workspace.
The Image selection dialog box is displayed.
3. In the Browse for a file tab, select the image to be imported.