
User guide


Creating a document using variable objects
35
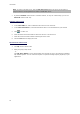
1. Select the tab for your form.
2. Drag everything to the right of your workspace. Both views are now visible.
Any changes to the label or form will automatically update the data in the other.
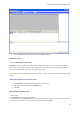
Customizing the Form
You can customize the appearance of your form by changing the color, font, etc. in the Form customization
dialog box.
To access the Form customization dialog box:
• Choose View > Form customization.
- or -
• Select the form with the mouse, right-click, and select Customize form.
- or -
• Double-click the background of the window represented in the form view.
Modify the order in which data is entered into the form
You can change the order in which data is entered into the form.
Proceed as follows:
1. Select the form using the mouse.
2. Right-click.
3. Select Start tab ordering. The default numbering appears.
4. Click the number of the field you want to appear first in the form. The number changes to green when
validated.
5. Repeat step 4 to continue ordering.
6. To confirm your selection, right-click and select Validate tab ordering. The order of the fields will be
automatically validated when the first field is validated. The numbering then disappears from the form.
Note: You can also cancel any changes. Right-click the form and select Abort tab ordering.
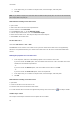
Defining the properties of a Form data source
1. Click the Form tab.
2. Enter the prompt you want to display in the form.
3. If you wish, you can define an input format and a minimum length.
4. You can create values that will be proposed in the Form by selecting <Local> from the Pick list. Next
click on
to access the Pick list dialog box.