R (W) Q (E) B20 / B40 M C N A P B L D S T U V N P L M B5 / B10 W X E B D A R Q (W) (E) L P N M B20 / B40 F N L P G S T H E B (W) (E) E B5 / B10 F E O M D G H I J K L M N T (E) F Y Z (W) S H G C A P Q R
L D R (W) Q P B B20 / B40 M (E) N P L M B5 / B10 B D A R Q (W) (E) L P N M B20 / B40 N E P B5 / B10 G S T H M E B (W) (E) F D L T (E) E (W) F S H G C A N A
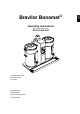
Operating instructions Round−filter coffee brewer B5, B10, B20, B40 700.403.
GB All rights reserved. No part of this document may be copied and/or published by means of printing, photocopying, microfilming or by any other means whatsoever without the prior written consent of the manufacturer. This applies equally to the included drawings and/or diagrams.
GB PREFACE Using this document This document is intended to provide instructions for authorized users to safely install, use and maintain the machine. In this document, such users are divided into three categories: − random users: those who operate the machine in practice. − Users with limited authority: those who operate the machine in practice and must therefore perform daily maintenance and solve any (minor) problems that may occur. For them particularly chapters 1., 2., 4., 5., 6., 7.1, 7.2 and 8.
GB Service and technical support Please contact your dealer for information concerning the specific setting, maintenance or service activities that fall outside the scope of this document. Your dealer will always be happy to help you. When doing this, always ensure that you have the following details at hand: − Model code − Type number − Serial number These data can be found on the identification plate. Write down the data of the identification plate in the intended fields (fig.1 ).
Table of contents I Using this document . . . . . . . . . . . . . . . . . . . . . . . . . . . . . . . . . . . . . . . . . . . . . . . . . . . . I Icons and symbols . . . . . . . . . . . . . . . . . . . . . . . . . . . . . . . . . . . . . . . . . . . . . . . . . . . . . . . . . . . Related documents . . . . . . . . . . . . . . . . . . . . . . . . . . . . . . . . . . . . . . . . . . . . . . . . . . . . . . . . . . . Document code . . . . . . . . . . . . . . . . . . . . . . . . . . . . . . . . . . . . . . .
Table of contents 1. Introduction . . . . . . . . . . . . . . . . . . . . . . . . . . . . . . . . . . . . . . . . . . . . . . . . . . . . . GB 1.1 1 A quick look at the machine . . . . . . . . . . . . . . . . . . . . . . . . . . . . . . . . . . . . . . . 1 Brief description of operation . . . . . . . . . . . . . . . . . . . . . . . . . . . . . . . . . . . . . . 2 2. Technical data . . . . . . . . . . . . . . . . . . . . . . . . . . . . . . . . . . . . . . . . . . . . . . . . . . . 4 1.2 2.1 2.
Table of contents 7. Programming . . . . . . . . . . . . . . . . . . . . . . . . . . . . . . . . . . . . . . . . . . . . . . . . . . . The users’ menu . . . . . . . . . . . . . . . . . . . . . . . . . . . . . . . . . . . . . . . . . . . . . . . . . . 14 The limited programming menu . . . . . . . . . . . . . . . . . . . . . . . . . . . . . . . . . . . . 17 The extended programming menu . . . . . . . . . . . . . . . . . . . . . . . . . . . . . . . . . 21 8. Correcting malfunctions . . . . . . . . . . .
Table of figures GB Fig. 1 Identification plate . . . . . . . . . . . . . . . . . . . . . . . . . . . . . . . . . . . . . . . . . . . . . . . . . . . . . . . . . . . . . . Fig. 2 Water connecting hose . . . . . . . . . . . . . . . . . . . . . . . . . . . . . . . . . . . . . . . . . . . . . . . . . . . . . . . . . . Fig. 3 Operating panel coffee−making system . . . . . . . . . . . . . . . . . . . . . . . . . . . . . . . . . . . . . . . . . . . . Fig. 4 Display with descaling signal coffee−making system . .
Table index ECopyright Bravilor Bonamat B.V. version 1.0 4 4 21 22 23 24 25 26 26 29 30 31 VII GB Table 1 Dimensions . . . . . . . . . . . . . . . . . . . . . . . . . . . . . . . . . . . . . . . . . . . . . . . . . . . . . . . . . . . . . . . . . . . Table 2 Electrical values . . . . . . . . . . . . . . . . . . . . . . . . . . . . . . . . . . . . . . . . . . . . . . . . . . . . . . . . . . . . . . . Table 3 Adjusting total amount of water . . . . . . . . . . . . . . . . . . . . . . . . . . . . . . .
GB Safety instructions and danger warnings General The manufacturer accepts no liability whatsoever for damage or injury resulting from a failure to (strictly) observe the safety instructions contained in this document or resulting from negligence during the installation, use or maintenance of the machine specified on the front cover of this document or of any related accessories. Additional safety instructions may be required, depending on the specific working conditions required for the accessories used.
D The maximum acceptable ambient temperature with which a good operation can be guaranteed is 40°C. D Consider damage caused by freezing. Never place the machine in rooms in which the temperature can drop below 0°C. After all, with normal use there will always be water in the machine. D Do not turn over the machine, move it upright. D Never install the machine in places where water is sprayed or sprinkled.
GB Safety devices present The machine is default provided with the following safety devices: − ON/OFF switch (E.) With the ON/OFF switch the supply of the electrical current is switched on and off. The supply voltage − also in the OFF position − is never switched off. In practice this switch functions as the main switch for switching the machine on and off. − SELECTION keys (G. − J.) With the SELECTION keys the coffee−making process is started. − STOP key (K.
INTRODUCTION 1.1 A quick look at the machine 1.1.1 General description The B5−40 is a coffee−making machine developed for the professional user which delivers coffee. All functions of the machine are fully computer−controlled. For this the machine is standard provided with a programming unit on the hot water column with which properly trained, authorized users can change various settings after having entered a safety code (rate of flow, saving temperature, etc.
GB 1.1.3 Use of the keys In the users’ menu the keys (G.−J.) are used as selection keys for selecting the required amount of coffee. In the programming menu these keys are used for selecting a certain setting option. Key (K.) is the stop key. With this a selected function can be stopped and/or interrupted. In the programming menu the stop key is also used for returning to a appears in higher menu. When the symbol the display, the stop key may be used.
Coffee−making system The machine is provided with a coffee−making system operated through the operating panel (fig.3 ). After the filter unit fitted with filter cone (if available), paper filter and ground coffee (P.) has been placed on the container, the coffee−making system is switched on with one of the selection keys (G.−J.). The value belonging to the selected selection key is indicated on the display (O.). The coffee making has started.
GB 2. TECHNICAL DATA 2.1 Dimensions D See the fold out and table 1 .
Water system Water hardness Min. water pressure (supply) Max. water pressure (supply) Flow−rate Conductivity 2.4 GB 2.3 : min. 5 _dH (0,9 mmol/l) : 50 kPa (0,5 bar) : 1000 kPa (10 bar) : 5,5 l/min : q100 μ Siemens/cm Environmental conditions In view of danger of freezing the machine may never be placed in rooms where the temperature can fall below 0_C. With a maximum allowed environmental temperature of 40_C a good operation of the machine is guaranteed. 2.
GB 3. INSTALLATION 3.1 Unpacking TIP − The operations described in these instructions for use are illustrated with the help of the B10 with the default factory settings. D Check whether the machine is complete. The standard machine consists of a column with spray head, two containers with filter unit and a plateau or wall support. All kinds of variations on this are possible.
Installation CAUTION! − Do not overlook the risk of freezing. Never place the machine in rooms in which the temperature can drop below 0°C. − Never install the machine in front of entrances, exits or passageways intended for emergency services. D Place the machine on a flat, sufficiently solid surface close to a water connection and an earthed electrical power outlet. Leave sufficient space at the back and front of the machine for maintenance and repair purposes. 3.2.
GB 4. DAILY USE While the machine is in use, the factory default settings may appear to be incorrect or insufficient for the circumstances under which the machine is used. These settings can be changed − by properly trained and authorized users − in conformity with the instructions in § 7.3. The present chapter (4.) only describes therefore the normal, daily use of the machine by users with limited authority: making and tapping coffee. Maintenance activities for the daily user are described in § 5.1.
4.1.2 Tapping the coffee D Place a cup or jug under the coffee tap (X.) and pull the handle forward. TIP − The tap can be locked in the open position by pushing it fully backwards against the spring pressure. 4.1.3 G Pre−programmed settings H D Making coffee at pre−programmed times is possible (§ 7.1.1 and § 7.3.7). I 4.1.4 J K L Fig. 7 Dripping−on time M N GB − A signal sounds for confirmation.
GB 5. MAINTENANCE This chapter describes the following maintenance activities: − maintenance activities that may be carried out by the daily user (§ 5.1) − maintenance activities reserved to users with limited and extended authority (§ 5.2) 5.1 Maintenance activities that may be carried out by the daily user 5.1.1 General cleaning D Clean the outside of the machine with a damp cloth (if necessary, use a non−aggressive cleaning material). The taps and the drip tray require extra attention.
5.1.3.1 AA. AB. P. AC. AD. AE. U. AF. Fig. 8 Placing the sight glass cover AA. AB. AH. AG. Fig. 9 Placing and removing the gauge glass cover AA. cover AB. container edge AC. the sight glass holder AD. notch AE. gauge glass AF. o−ring AG. tab AH. spring ECopyright Bravilor Bonamat B.V. n If the coffee container (U.) is not completely empty, during removal of the gauge glass (AE.) hot water or coffee can flow over the hands. D Clean the gauge glass (fig.8 ): D Make sure that the coffee container (U.
GB 5.2 Maintenance activities for users with limited and extended authority 5.2.1 Descaling the coffee−making system D Users with limited authority can, after having entered the operator PIN code, start the descaling programme. D Also users with extended authority can start the descaling programme after having entered the principal user PIN code. WARNING n Wear appropriate facial protection and protective gloves when using the descaling agent.
PROGRAMMING CAROUSEL CAUTION! − By pressing the down arrow key (M.)⇓, you can counter−clockwise browse through the programming carousel. − Some display texts include numerical values; these refer to the factory default settings or to arbitrary quantities that may differ from the values displayed on your machine. − The programming keys are particularly operated by properly trained authorized users. TIP − All settings can be read from the display. − By pressing the up arrow key (N.
GB 7. PROGRAMMING This chapter describes the different programming options and reading of the counter device. The programming can be divided into three parts, being: − the users’ menu § 7.1; here any user can retrieve default pre−programmed settings and change these once−only if necessary. After the coffee has been made the setting returns to the default setting. − the limited programming menu § 7.
TIP − When in the extended programming menu, § 7.3.7, no time settings have been programmed, the current day and time remain visible on the display. D Press key (M.)⇓ and (N.)⇑ to select another pre−programmed setting if necessary. D The default setting is OFF. If the set values are good, then press key (H.), OFF is changed into ON. − An enter symbol appears ↵ on the display. The clock in the display starts flashing and the system will make coffee at the set time.
GB 7.1.2 Once−only time settings for making coffee These pre−programmed ”time settings” can be changed for once−only use. This is done as follows: D Press selection keys (M.)⇓ and (N.)⇑ simultaneously and hold them down for about 2 seconds. − The current day and time appear for a moment on the display (fig.11 ). − After this the next time setting appears on the display (fig.12 ). D Press programming key (G.). − The position to be changed flashes beside the programming key on the display.
The limited programming menu Below a description is given of how operators with limited authority, after having entered the operators’ PIN code, can read day and total counters, put these to zero and start the descaling programme. TIP − For the limited programming menu a operators’ PIN code is required, see the fold out sheet at the back of these operating instructions. − Enter the operators’ PIN code. The programme starts in the carousel (fig. 10 ) of the operators’ menu at § 7.2.
GB 7.2.1 Day counter coffee−making system G H G I H J I D J K K L M N Fig. 14 Day counter coffee−making system After entering the operators’ PIN code fig. 14 appears in the display. The total number of litres that have been made that day can be read from the display. D Press the selection keys (M.) and (N.) simultaneously to set the day counter to zero. D Press selection key (M.) to go the next setting or stop key (K.) to leave the programming menu. 7.2.
G H I J K L M N Fig. 16 Coffee−making system asks for descaling solution D Remove the plug of the filling hole for descaler solution (B.). − The filling hole of the coffee−making system is found behind the spray head (C.). D Place the special funnel in the filling hole and carefully pour the descaler solution into the filling hole. D After pouring in the descaler solution, press the confirmation key (L.). − The resevoir is boiled empty to let the descaler solution run through the flow element.
GB 7.2.3 Descaling counter coffee−making system 7.2.4 G G H H I I J J K L M N Fig. 18 Descaling counter coffee−making system D Press, after having entered the operators’ PIN code, 2 times the selection key (M.)⇓. − The descaling counter appears on the display (fig. 18 ). − On the display beside the programming key (G.) is shown after how many litres of coffee descaling is needed. − Beside programming key (J.) it is shown how many litres already have been made. D Press 1 on selection key (N.
The extended programming menu Below a description is given of how users with extended authority (principal), after having entered the PIN code, can view and adjust all settings. First read this section to see which settings can be made. TIP − The extended programming menu needs a principal user PIN code. − Enter the principal user PIN code to access the programming menu. The programme starts in the carousel (fig.10 ) of the extended users’ menu with § 7.3.1, ”Setting total amount of water”.
GB 7.3.2 Selected units: litres, cups, jugs or US gallon The machine is default set to the unit L (= litres). This unit can be changed. (This unit is default on the display with the preference keys (fig.23 )). − A selection can be made from the following units: Litre = L, Gallon = GL (3.7853 L), Jug, or Cup (fig.21 ). − The selected is also used for further settings, except with the total counters. D Selected unit: litre , go to § 7.3.2.1 tap, go to § 7.3.3 jug, go to § 7.3.4 US gallon, go to § 7.3.5.
Cup contents The contents of a cup can be set, as not all cups are of the same size. − The setting range is between 50 and 200ml and can be adjusted by steps of 5ml. − The default setting for a cup is 125ml. 7.3.3.1 The machine calculates itself the number of cups of the default pre−selectionkeys, in relation to the preferred settings of litres divided by the content of the cup. These default pre−selectionkeys can be adjusted as desired. G G H H I I J J K L M N Fig.
GB 7.3.4 Jug contents The contents of a jug can be set, as not all jugs have the same size. − The setting rage is between 50 and 3000ml and can be adjusted by steps of 10ml . − The default setting for a jug is 250ml. 7.3.4.1 The machine itself calculates the number of jugs for the default pre−selectionkeys, in relation to the preferred setting of litres divided by the contents of the jug. These default pre−selectionkeys can be adjusted as desired. G G H H I I J J K L M N Fig.
US gallon 7.3.5.1 The unit US gallon is a set value that cannot be adjusted (fig.28 ). 1 Us gallon = 3.7853 litres G G H H I I J Adjusting pre−programmed selection keys G−J (Gallon) J K K L M N Fig. 28 Pre−programmed selection key for gallons L M N Fig. 29 Adjusting pre−programmed selection keys for gallons D Press selection key (N.)⇑ until fig.29 appears on the display. − The default pre−selectionof keys (G.−J.) can now be adjusted. D Press the pre−selectionkey to be changed (G., H., I.
GB 7.3.6 Various settings, such as language, system clock, and container preheating TIP − The settings of this chapter can all be set sequentially. Do not press the confirmation key (L.) until all settings are satisfactory (after § 7.3.6.3.). 7.3.6.1 Language setting 7.3.6.2 Setting the current day and time G H I J G K H I J K L M N Fig. 30 Language setting D Press selection key (N.)⇑ until fig.31 (Current day and time) appears on the display. D Press programming key (H.
7.3.6.3 Setting container preheating − It is possible to preheat the coffee container five minutes before the coffee−making process. This can be done as follows: G H I J K L M N Fig. 32 Container preheating ECopyright Bravilor Bonamat B.V. version 1.0 27 GB TIP D Press programming key (I.) and hold it down for 10 seconds. − OFF appears on the display beside the programming key (I.) (fig.32 ). D Press selection key (M.)⇓ or (N.)⇑ to activate the preheating.
GB 7.3.7 Timer There are fourteen pre−programmed ”time settings” for all days of the week. As soon as these are activated through the procedure below, they will only be active and visible in the user mode. All settings can be set as desired. The fourteen settings are default (fig. 33 ): − Settings 1−14 on MO (English) − OFF, inactive − the maximum amount − 7.00 hours G H I J K L M N Fig. 33 Pre−programmed settings (inactive) The time settings are changed as follows: D Press selection key (N.
Lengthening water delivery time by setting pauses The default time required for making a full container of coffee can be lengthened by setting pauses. This is, for example, necessary when very finely ground coffee or very soft water is used. Then some more time is needed for the water to go through the coffee filter, otherwise it will overflow. The capacity is reduced. This is indicated in %. − Default setting to 100%, so no pauses. − The setting range is between 100% and 50%, to be set in 5% steps.
GB 7.3.10 Setting number of grams of coffee per litre (coffee calculator) In the user mode by simultaneously pressing the stop key (K.) and one of the pre−selection keys (G.−J.) it can be read how many grams of coffee must be used for the selected number of litres of coffee. For this first the amount of ground coffee per litre must be set. The programme calculates itself how much ground coffee must be used for an x number of litres.
TIP − The descaling signal for the coffee brewing system is for all types set to 1000 litres, see the position beside the selection key (G.). − The setting range can be set as desired between 100 and 9900 litres in steps of 100 litres. − The position beside the selection key (J.) gives the number of litres already made. In this way it can be checked whether the system soon needs descaling.
GB 8. CORRECTING MALFUNCTIONS In case of malfunctions first consult the malfunctions tables. If the problem cannot be solved, consult your Bravilor Bonamat dealer, your service mechanic or one of the service desks. 8.1 WARNING n Check first to determine if the malfunction has a mechanical or electrical origin. Work and repairs on the electrical system may only be carried out by a trained and authorized service technician.
Coffee−making system GB 8.2 LIST OF MALFUNCTIONS Symptom: 1. After pressing the ’amount key’ the machine beeps every other second. Possible cause: Actions: Spray head outlet is not positioned properly in relation to the filter unit (see display). Position the spray head outlet correct above the filter unit. Container is not positioned properly (see display). Place the container in the correct position. Call in service. 2. Filter unit runs over. 3. Coffee is too cold. 4.
GB LIST OF MALFUNCTIONS Symptom: Possible cause: Actions: 8. The machine gives the signal that it is ready (3 beeps), but the container is not full yet. Drip time too short. Set the drip time again, see § 7.3.9. 9. The machine steams while making coffee and the coffee making takes too much time. The machine is calcified. Descale the machine earlier, see § 7.2.2 and lower the descaling indicator value, see § 7.3.12. 34 version 1.0 ECopyright Bravilor Bonamat B.V.
Display messages and their meanings During normal use (e.g. in the case of malfunctions or errors) or during the setting procedure messages can appear on the display. The table below gives an overview of these messages, as well as the possible causes and the actions to be taken (by the system or the user) to return the system to normal functioning. DISPLAY MESSAGES Possible cause: The overflow safety device of the coffee−making system has been activated. Switch the ON/OFF switch (E.) off and on again.
GB 9. CONSUMABLE ITEMS AND ACCESSORIES The consumer goods and accessories available for the machine are given in the following list. D Order the desired items from your dealer always mentioning the following data: − model code, type and sequence number of the machine (see the identification plate) − The description of the item concerned − The ordering number − quantity 9.1 Recommended consumable items Description Ordering number Quantity Filter cups (for filter cone ) B5 7.150.102.
Gebruikerscode: Benutzer Geheimzahl: Stoptoets (K) indrukken en loslaten, daarna ⇑⇑⇑⇓⇑ indrukken. Stoptaste (K) eindrücken und wieder entlassen, danach ⇑⇑⇑⇓⇑ eindrucken. Code de l’opérateur Operator code: Appuyez la touche d’arrêt (K) et libérez–la, ensuite poussée ⇑⇑⇑⇓⇑. Push the stop key (K) and release it, thereafter push ⇑⇑⇑⇓⇑. Chef code: Chef Geheimzahl: Stoptoets (K) ingedrukt houden en tegelijkertijd de volgende toetsen ⇑⇑⇑⇓⇑ indrukken.