the Smart Oven® Pro Instruction Book – BOV850
Contents 2 Breville Recommends Safety First 6 Components 8 Quick Start Guide 10 Operating Your Breville Product 11 12 13 14 15 16 17 18 19 19 - GRILL Function - TOAST Function - CRUMPET Function - BAKE Function - ROAST Function - PIZZA Function - COOKIES Function - REHEAT Function - WARM Function - SLOW COOK Function 21 Care, Cleaning & Storage 24 Troubleshooting BREVILLE RECOMMENDS SAFETY FIRST At Breville we are very safety conscious.
• Do not let the power cord hang over the edge of a table or counter, or touch hot surfaces. • To avoid electric shock, do not immerse the cord or plug in water (or other liquids). • The oven is not suitable to be used in a small appliance enclosure. Ensure to leave adequate space all around the oven. Minimum space of 10cm is recommended. • The temperature of accessible surfaces may be high when the appliance is operating. Do not touch hot surfaces.
• If the appliance is to be: left unattended, cleaned, moved, assembled or stored, always switch the unit off and unplug the cord from the power outlet and allow to cool completely. • Do not clean with metal scouring pads. Pieces can break off the pad and touch electrical parts, creating a risk of electric shock.
the control panel. The oven is off when the button back-lights turn off. • Regularly clean the crumb tray. To clean the crumb tray: −Turn OFF the oven, −Allow the oven to cool completely and then remove the power cord from the power outlet. −Remove the crumb tray and clean with warm soapy water. −Dry the tray completely before inserting it securely back in place.
Components D D A F G B E I H C L J A. B. C. D. E. F. Baking rack 28 x 33.5cm enamel baking pan 30cm non-stick pizza pan Door handle Oven light Top rack height position: GRILL function G. Middle rack height position: TOAST, Crumpet, PIZZA and COOKIES functions 6 K H. Bottom rack height position: BAKE, ROAST, REHEAT, WARM and SLOW COOK functions I. Wire rack J. Crumb tray K. Ventilation slots L. Breville Assist® Plug M. LCD screen N.
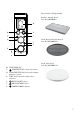
Accessories sold separately: Bamboo Cutting Board Part No: BOV800CB M L O N P S Q T U 33cm Non-Stick Pizza Crisper Part No. BOV800PC13 R 33cm Pizza Stone Part No. BOV800PS13 O. FUNCTION dial P. TEMPERATURE conversion button Q. TEMPERATURE dial/toast and crumpet darkness control R. TIME dial/toast and crumpet slice selection S. OVEN LIGHT button T. CONVECTION button U.
Quick Start Guide This Quick Start Guide is designed for first time use. For safety and more information, refer to rest of the Instruction Booklet. 8. Turn the FUNCTION dial to the right until the indicator reaches the PIZZA function. PREPARING THE OVEN In order to remove any protective substances on the heating elements, it is necessary to run the oven empty for 15 minutes. Ensure the area is well ventilated as the oven may emit vapours.
OVEN FUNCTIONS OVERVIEW FUNCTION RACK POSITION OPTIONAL SETTINGS PRESETS PREHEAT RANGE GRILL Top TEMPERATURE CONVERSION HI 10 MINS No HI, MED, LO Up to 20 MINS TOAST Middle FROZEN FOODS Darkness 4 Slices 4 No Darkness 1–7 Slices 1–6 CRUMPET Middle FROZEN FOODS Darkness 4 Slices 4 No Darkness 1–7 Slices 1–6 BAKE Bottom CONVECTION 160°C CONVECTION 30 MINS Yes 50°C–230°C 175°C CONVECTION 1:00 HRS Yes 50°C–230°C Up to 10:00 HRS 210°C CONVECTION FROZEN FOODS 20 MINS Yes 50°C–23
Functions OPERATING YOUR BREVILLE OVEN 4. The bottom figure on the LCD screen indicates the preset cooking time for the selected setting. For the TOAST and CRUMPET settings it indicates the number of slices. Turn the TIME dial to the left to reduce the cooking time or to the right to increase the cooking time. 1. Position the wire rack so the spokes face upward and insert it into the desired rack position. The rack positions are conveniently printed on the right-hand side of the oven door window.
a) When the oven is ready for use, the blinking ‘PREHEATING’ will go out, the oven alert will sound and the timer will start counting down. Place the food in the oven, either directly on the wire rack or on the included pizza pan, grilling rack and/or baking pan. Ensure the food is centred in the oven for the most even cooking. b) Close the oven door. c) The timer will continue to count down. The cooking temperature and time can be adjusted during the cooking cycle. 7.
7. The timer will be displayed and automatically begin to count down. The temperature and time can be adjusted during the grilling cycle by turning the corresponding TEMPERATURE and TIME dial. The cycle can be stopped at any time by pressing the START/CANCEL button. 8. At the end of the GRILL cycle, the oven alert will sound. The START/CANCEL button backlight will go out and the LCD screen will illuminate blue.
CRUMPET FUNCTION The CRUMPET function crisps the top of your crumpet while only lightly toasting the base. This function is also ideal for toasting bagels or thick sliced speciality breads which require one side to be toasted more than the other. 1. Insert the wire rack, with the spokes facing upward, into the middle rack height position. 2. If toasting 1–3 crumpets, centre on the wire rack.
BAKE FUNCTION The BAKE function cooks food evenly throughout. This function is ideal for baking cakes, muffins, brownies and pastries. The BAKE function is also ideal for cooking prepackaged frozen meals such as lasagna and pot pies. 1. Insert the wire rack, with the spokes facing upward, into the bottom rack height position. Note that some baked goods, such as brownies or pastries, may be more suited to the middle rack height position. 2. Close the oven door. 3.
ROAST FUNCTION The ROAST function is ideal for cooking a variety of meats and poultry. Food will be tender and juicy on the inside and roasted to perfection on the outside. 1. Insert the wire rack, with the spokes facing upward, into the bottom rack height position. 2. Close the oven door. 3. Turn the FUNCTION dial until the indicator on the LCD screen reaches the ROAST function.
PIZZA FUNCTION The PIZZA function melts and browns cheese and toppings, while crisping up the pizza crust. 1. Insert the wire rack, with the spokes facing upward, into the middle rack height position. 2. Close the oven door. 3. Turn the FUNCTION dial until the indicator on the LCD screen reaches the PIZZA function. The top figure on the LCD screen indicates the preset PIZZA temperature of ‘210°C’, while the bottom figure indicates the preset time of ‘:20 MINS’.
A note on pizza stones When using a pizza stone, it is necessary to first heat the stone (without a pizza) for optimum results. 1. Insert the wire rack, with the spokes facing upward, into the middle rack height position. 2. Place pizza stone on the centre of the wire rack so air will flow around all sides of the stone. 3. Close the door. 4. Turn the TIME dial to the left to reduce the time to ‘:15 MINS’. The time is displayed as the bottom figure on the LCD screen.
5. Press the START/CANCEL button to activate the COOKIES function. The button backlight will illuminate red, the oven alert will sound and the LCD screen will illuminate orange. The LCD screen will indicate a blinking ‘PREHEATING’. 6. Once the oven has reached the set temperature, the temperature alert will sound. 7. Place food, positioned on the included baking pan, pizza pan or other oven-proof dish, on the centre of the wire rack so air will flow around all sides of the food. 8.
WARM FUNCTION The WARM function maintains hot foods at the recommended temperature to prevent bacterial growth (70°C/160°F or above). 1. Insert the wire rack, with the spokes facing upward, into the bottom rack height position. 2. Place food, positioned on the included baking pan, pizza pan or other oven-proof dish, on the centre of the wire rack so air will flow around all sides of the food. 3. Close the oven door. 4. Turn the FUNCTION dial until the indicator on the LCD screen reaches the WARM function.
4. The slow cook setting and time can be adjusted: a) The slow cook setting is displayed as the top figure on the LCD screen. Turn the TEMPERATURE dial to adjust slow cooking to one of two preset temperatures: ‘LO’ or ‘HI’. b) The time is displayed as the bottom figure on the LCD screen. Turn the TIME dial to adjust the time between 8 and 10 hours for ‘LO’ and between 4 and 6 hours for ‘HI’. 5. Press the START/CANCEL button to activate the SLOW COOK function.
Care & Cleaning 2. Remove the used bulb by pulling it directly out of its holder. REPLACING THE OVEN LIGHT WARNING Always unplug oven and let cool before replacing bulb. Only use a 25-Watt, 220–240V, G9 type oven bulb. Remove the wire rack from the oven before replacing the light. 1. The light is positioned on the left-hand side of the oven cavity. Position your fingers on the outside of the light housing and gently pull the glass cover away from the oven wall to remove it.
CLEANING THE OUTER BODY AND DOOR Before cleaning, ensure the oven is turned off by pressing the START/CANCEL button on the control panel. The oven is off when the button backlight is no longer illuminated. Remove the power plug from the power outlet. Allow the oven and all accessories to cool completely before disassembling and cleaning. 1. Wipe the outer body with a soft, damp sponge. A non-abrasive liquid cleanser or mild spray solution may be used to avoid build-up of stains.
STORAGE 1. Ensure the oven is turned off by pressing the START/CANCEL button on the control panel. The oven is off when the button backlight is no longer illuminated. 2. Remove the power plug from the power outlet. Allow the oven and all accessories to cool completely before disassembling and cleaning 3. Ensure the oven and all accessories are clean and dry. 4.
Troubleshooting POSSIBLE PROBLEM EASY SOLUTION Oven will not switch “ON” • • • • I would like to have the oven LCD default settings back • The oven will remember the last setting used for each function unless you remove the plug from the power outlet. • To restore the oven’s default settings for each function, remove the plug from the power outlet. Wait 5 seconds, then plug back in. The LCD display light has gone out • The oven goes into standby mode if not used for 10 minutes.
POSSIBLE PROBLEM EASY SOLUTION • The ‘preheat’ alert sounds at 75% of the target temperature. This provides the fastest, combined preheating and cooking time. The ‘preheat’ alert sounds at a lower temperature than what is displayed on the LCD screen. • This is because when the ‘preheating’ alert sounds, signalling the user to open the oven door and insert food, there is dramatic temperature loss inside the oven.
Notes 26
Notes 27
Breville Customer Service Centre Australian Customers New Zealand Customers Phone: 1300 139 798 Phone: 0800 273 845 Web: Web: www.breville.com www.breville.com Breville, the Breville logo, Master Every Moment, Smart Oven and Element IQ are trademarks of Breville Pty. Ltd. A.B.N. 98 000 092 928. Copyright Breville Pty. Ltd. 2019. Due to continued product improvement, the products illustrated/photographed in this brochure may vary slightly from the actual product.