Breville Customer Service Center US Customers Canada Customers Mail: Mail: Breville USA 19400 S. Western Ave Torrance CA 90501-1119 Breville Canada 2555, Avenue de l’Aviation Pointe-Claire (Montreal) Quebec H9P 2Z2 Phone: Customer Service 1 (866) BREVILLE Phone: Customer Service 1 (866) BREVILLE Email: Customer Service: askus@brevilleusa.com Email: Customer Service: askus@breville.ca www.breville.com Breville is a registered trademark of Breville Pty. Ltd. A.B.N. 98 000 092 928.
the Compact Smart Oven™ Instruction Book - Livret d’instructions BOV650XL /B
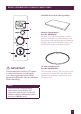
CONGRATULATIONS On the purchase of your new Breville Compact Smart Oven™
Contents 4 Breville recommends safety first 7 Know your Breville Compact Smart Oven™ 10 Quick Start Guide 14 Before first use - Preparing the oven for use - A note on cooking times - A note on rack height positions - A note on STANDBY mode - A note on optional settings 20 Operating your Breville Compact Smart Oven™ 21 23 25 28 31 34 38 40 - TOAST function - BAGEL function - BAKE function - ROAST function - BROIL function - PIZZA function - COOKIE function - REHEAT function 44 Using the plate war
Breville recommends safety first We at Breville are very safety conscious. We design and manufacture consumer products with the safety of you, our valued customer, foremost in mind. In addition, we ask that you exercise a degree of care when using any electrical appliance and adhere to the following precautions: Important safeguards Read all instructions • Remove and safely discard any packing materials and promotional labels before using the oven for the first time.
Breville recommends safety first • • Caution should be exercised when cooking foods with high oil content such as pine nuts and walnuts. Broiling these foods; cooking them for extended periods of time or at high temperatures may create a fire risk. In the event that any foods catch fire in the oven, keep the oven door closed. Turn the oven off and unplug from the power outlet. Wait until the fire goes out before opening the oven door.
Breville recommends safety first • Do not store any materials other than the supplied accessories in the oven when not in use. • This appliance is equipped with a power cord having a grounding wire with a grounding plug. The appliance must be grounded using a 3-hole properly grounded outlet. In the event of an electrical short circuit, grounding reduces the risk of electrical shock.
KNOW your Breville Compact Smart Oven™
KNOW YOUR BREVILLE COMPACT SMART OVEN™ D C A J E F G B K J H I A. B. C. D. 10” x 10” enamel broil rack 10” x 10” enamel baking pan Door handle Ribbed plate warming tray IMPORTANT The outer surface of the oven, including the oven door, is hot during and after operation. Always use protective hot pads or insulated oven mitts when inserting, removing or handling items from the oven. NOTE Only place items in the ribbed section on top of the oven as described on Page 44. 8 E.
KNOW YOUR BREVILLE COMPACT SMART OVEN™ Available accessories sold separately: L M N Bamboo Cutting Board Part No: BOV650CB Bamboo is the ideal material for a cutting board, as it absorbs very little moisture and has natural antibacterial properties. Bamboo is harder than most hardwoods, leaving less visible knife marks on the board surface. O Q P IMPORTANT Do not touch hot surfaces. The outer surface of the oven, including the oven door, is hot during and after operation.
Quick Start Guide This Quick Start Guide is designed for first time use. For safety and more information, refer to rest of the Instruction Booklet. PREPARING THE OVEN (A ONE-TIME PROCESS) In order to remove any protective substances on the heating elements, it is necessary to run the oven empty for 15 minutes. Ensure the area is well ventilated as the oven may emit vapors. These are safe and not detrimental to the performance of the oven. 1. Place the oven on a flat, dry surface.
QUICK START GUIDE OPERATING YOUR BREVILLE COMPACT SMART OVEN™ The Breville Compact Smart Oven™ features Element IQ™ - a cooking technology that adjusts the power of the heating elements to cook food more evenly and quickly. Each of the oven’s functions are preset with our recommended settings, however we suggest experimenting with these depending on the recipe, amount of food and your personal taste.
QUICK START GUIDE OVEN FUNCTIONS TOAST FUNCTION: Evenly toasts bread so it’s crisp and crunchy on the outside, while soft and moist on the inside. Rack Position: Middle Optional Settings: FROZEN FOODS button. NOTE During the toasting cycle, condensation may form on the oven door and steam may be emitted. This is normal - caused by the moisture content of the bread. Freshly baked and frozen breads generally produce more condensation and steam.
QUICK START GUIDE PIZZA FUNCTION: Melts and browns cheese and toppings, while crisping the pizza crust. Rack Position: Middle Optional Settings: TEMPERATURE CONVERSION button FROZEN FOODS button. NOTE If cooking a frozen pizza, ensure to remove all packaging (including the metal foil pizza pan that may be provided) before placing the pizza in the oven. If cooking a fresh pizza or using a pizza stone, see Page 37 of the Instruction Book.
BEFORE FIRST USE of your Breville Compact Smart Oven™
Before first use Preparing the oven for use 1. Remove and safely discard any packing material, promotional labels and tape from the oven. 2. Remove the crumb tray, wire rack, broil rack, and baking pan from the polyfoam packaging. Wash them in warm soapy water with a soft sponge, rinse and dry thoroughly. Insert the crumb tray into the oven. 3. Wipe the interior of the oven with a soft damp sponge. Dry thoroughly. Press the center of the TEMP/TIME dial.
Before first use 11. At the end of the cooking cycle, the oven alert will sound three times. The START/CANCEL button surround will no longer illuminate red and LCD screen will illuminate blue. Toast Searing top and bottom heat: seals and crisps. 12. The oven is now ready to use. 1800 W NOTE The cooking cycle can be stopped at any time by pressing the START/CANCEL button. The START/CANCEL button surround will no longer illuminate red and the LCD screen will illuminate blue.
Before first use We recommend experimenting with the temperature and time settings to produce the desired results. The cooking temperature and time can be adjusted before or during the cooking cycle. Pressing the center of the TEMP/TIME dial changes the display on the LCD screen from TEMPERATURE to TIME and vice versa; while rotating the dial increases or decreases the TEMPERATURE or TIME. NOTE The TEMP/TIME dial also functions as the Darkness and Slice selection control on the TOAST and BAGEL functions.
Before first use Top rack height position: BROIL and BAGEL functions. Middle rack height position: TOAST, PIZZA and COOKIE functions. Bottom rack height position: BAKE, ROAST, and REHEAT functions. NOTE When using metal foil to cover accessories, pans, and dishes, it is recommended that the wire rack be in the middle or bottom rack height position. This is to minimize the risk of the metal foil coming into contact with the top heating elements.
Before first use NOTE NOTE If you have changed the default Celsius temperature reading to Fahrenheit, the setting will remain in the memory of the oven until the TEMPERATURE CONVERSION button is pressed a second time or the oven is unplugged from the power outlet. When the oven is plugged back into the power outlet, the temperature reading will automatically return to the preset Celsius setting.
OPERATING your Breville Compact Smart Oven™
OPERATING YOUR BREVILLE COMPACT SMART OVEN™ – TOAST TOAST FUNCTION Elements Top and bottom heating elements cycle on and off to regulate the correct temperature. Rack Position Middle rack height position. Optional Settings FROZEN FOODS button. The TOAST function browns and crisps the outside of your bread while keeping the inside soft and moist. This function is also ideal for English muffins and frozen waffles. 1. Insert the wire rack into the middle rack height position.
OPERATING YOUR BREVILLE COMPACT SMART OVEN™ – TOAST b) To change the number of slices, press the center of the TEMP/TIME (Darkness/Slices) dial until the LCD screen displays a flashing ‘SLICES’. Turn the dial to the left to reduce the number of slices, or to the right to increase the number of slices. The number of slices range from ‘1’ to ‘4’.
OPERATING YOUR BREVILLE COMPACT SMART OVEN™ – BAGEL BAGEL FUNCTION NOTE Elements Top and bottom heating elements cycle on and off to regulate the correct temperature. For bagels, change the rack to the middle rack height position, cut the bagel in half, lengthways. The upside(cutside) of the bagel must always face upwards towards the top heating elements - so the topside(cutside) becomes crisp while the crust is only lightly toasted. Rack Position Middle rack height position.
OPERATING YOUR BREVILLE COMPACT SMART OVEN™ – BAGEL a) To change the browning setting, press the center of the TEMP/TIME (Darkness/Slices) dial until the LCD screen displays a flashing ‘DARKNESS’. Turn the dial to the left to reduce the browning setting, or to the right to increase the browning setting. NOTE The browning settings range from ‘1’ (lightest) to ‘7’ (darkest).
OPERATING YOUR BREVILLE COMPACT SMART OVEN™ – BAKE NOTE BAKE FUNCTION Element IQ™ will automatically adjust the toasting time depending on the heat already present inside the oven. For example, if the oven is already warm after one cycle of toasting, the toasting time for the second cycle will be less. Elements Top and bottom heating elements cycle on and off to regulate the correct temperature. 9. At the end of the cooking cycle, the oven alert will sound three times.
OPERATING YOUR BREVILLE COMPACT SMART OVEN™ – BAKE 5. Press the START/CANCEL button to activate this setting. The button surround will illuminate red, the oven alert will sound and the LCD screen will illuminate orange. 6. The LCD screen will indicate a blinking ‘PREHEATING’. Once the oven has reached the set temperature, the temperature alert will sound. 4. The baking temperature and time can be adjusted before or during the baking cycle.
OPERATING YOUR BREVILLE COMPACT SMART OVEN™ – BAKE NOTE The following bakeware will fit into the oven: - 7 ½” x 11” baking pan no handles - 9” square baking pan - 6 cup muffin tin - 9” loaf pan - Up to 11” pie plate NOTE For questions regarding the use of oven safe and specialty bakeware in compact ovens, please contact the bakeware manufacturer directly. NOTE Citric acid, found in foods such a orange, lemon and lime juice, may damage the porcelain enamel finish of the baking pan and broiling rack.
OPERATING YOUR BREVILLE COMPACT SMART OVEN™ – ROAST ROAST FUNCTION Elements Top and bottom heating elements cycle on and off to regulate the correct temperature. b) To select the roasting time, press the center of the TEMP/TIME dial until the LCD screen displays the preset roasting time of ‘1:00 HRS’. Rack Position Bottom rack height position. Optional Settings TEMPERATURE CONVERSION button.
OPERATING YOUR BREVILLE COMPACT SMART OVEN™ – ROAST NOTE Your customized ROAST temperature and time settings will remain in the memory of the oven until you change them or unplug the oven from the power outlet. When the oven is plugged back into the power outlet, the ROAST function will automatically return to the preset temperature of ‘350˚F’ and preset time of ‘1:00 HRS’. 5. Press the START/CANCEL button to activate this setting.
OPERATING YOUR BREVILLE COMPACT SMART OVEN™ – ROAST NOTE NOTE Caution should be exercised when using pans and dishes constructed of materials other than metal. If using ceramic or glass pans or dishes it is important that they are oven safe to prevent cracking. Check doneness with a reliable meat thermometer. Use an independent timer to remind you to check the meat temperature.
OPERATING YOUR BREVILLE COMPACT SMART OVEN™ – Broil Broil FUNCTION Elements Top heating elements cycle on and off to provide intense top heat. Bottom heating elements remain on low. 2. Insert the Breville enamel broil rack into the enamel baking pan. Place food on the assembled broil rack or in an oven-proof dish, then place on the center of the wire rack so air flows around the sides of the food. Rack Position Top rack height position. Optional Settings TEMPERATURE CONVERSION button.
OPERATING YOUR BREVILLE COMPACT SMART OVEN™ – Broil NOTE When using metal foil to cover accessories, pans, and dishes, it is recommended that the wire rack be in the middle or bottom location. NOTE Caution should be exercised when using pans and dishes constructed of materials other than metal. If using ceramic or glass pans or dishes it is important that they are oven safe to prevent cracking.
OPERATING YOUR BREVILLE COMPACT SMART OVEN™ – Broil Type/Cut Weight/ THICKNESS Broiling time Beef Sirloin Hamburger 1” (2.5cm) 1” (2.5cm) 12-15 mins 10-15 mins Pork Chops Ribs Bacon 1” (2.5cm) 1 rack 3 rashers 15 mins 20 mins 10 mins Lamb Neck chops Cutlets 4 pieces 8 pieces 15 mins 10-12 mins Sausages Thin Thick 8 pieces 6 pieces 8 mins 12 mins 1lb (500g) 12-15 mins 0.5lbs (250g) 20 mins 0.
OPERATING YOUR BREVILLE COMPACT SMART OVEN™ – PIZZA PIZZA FUNCTION NOTE Elements Top and bottom heating elements cycle on and off to regulate the correct temperature. If cooking a frozen pizza, ensure to remove all packaging, including cardboard, plastic, paper, or other flammable materials before placing the pizza in the oven. Breville recommends using a dark colored, non-stick pizza pan when cooking a pizza. Light colored pans reflect heat and may not effectively crisp the pizza crust.
OPERATING YOUR BREVILLE COMPACT SMART OVEN™ – PIZZA a) The preset cooking temperature of 425°F is displayed as the default on the LCD screen. Turn the TEMP/TIME dial to adjust the cooking temperature in 10°F increments, from 120°F to a maximum of 450°F (or in the Celsius mode, 5°C increments, from 50°C to a maximum 230°C). b) To select the cooking time, press the center of the TEMP/TIME dial until the LCD screen displays the preset cooking time of ‘:15 MINS’.
OPERATING YOUR BREVILLE COMPACT SMART OVEN™ – PIZZA 7. Place the pizza pan or pizza on the wire rack so air flows around the sides of the food. NOTE Pizza pan color, size, and thickness can affect browning/crispiness of the pizza base. 8. After the PREHEATING alert has sounded, the timer will automatically begin to count down in one minute increments. The temperature and time can be adjusted during the cooking cycle by turning the TEMP/TIME dial.
OPERATING YOUR BREVILLE COMPACT SMART OVEN™ – PIZZA 7. At the end of the pizza stone heating cycle, the oven alert will sound three times, the START/CANCEL button will cease to illuminate and the LCD back light will illuminate blue. 8. Now carefully place the frozen pizza on the heated pizza stone. NOTE If cooking a fresh pizza, we recommend using protective hot pads or insulated oven mitts to remove the entire wire rack with pizza stone, and place on the open oven door or bench.
OPERATING YOUR BREVILLE COMPACT SMART OVEN™ – COOKIE COOKIE FUNCTION Elements Top and bottom heating elements cycle on and off to regulate the correct temperature. Rack Position Middle rack height position. Optional Settings FROZEN FOODS button. a) The preset baking temperature of 350˚F is displayed as the default on the LCD screen.
OPERATING YOUR BREVILLE COMPACT SMART OVEN™ – COOKIE 5. Press the START/CANCEL button to activate this setting. The button surround will illuminate red, the oven alert will sound, and the LCD screen will illuminate orange. 6. The LCD screen will indicate a blinking ‘PREHEATING’. Once the oven has reached the set temperature, the temperature alert will sound. WHEN AT TEMP. 7.
OPERATING YOUR BREVILLE COMPACT SMART OVEN™ – COOKIE 8. After the PREHEATING alert has sounded, the timer will automatically begin to count down in one minute increments. The temperature and time can be adjusted during the baking cycle by turning the TEMP/TIME dial. Toggle between Temperature and Time by pressing the TEMP/TIME button. REHEAT FUNCTION Elements Top and bottom heating elements cycle on and off to regulate the correct temperature. Rack Position Bottom rack height position.
OPERATING YOUR BREVILLE COMPACT SMART OVEN™ – REHEAT NOTE When using metal foil to cover accessories, pans, and dishes, it is recommended that the wire rack be in the middle or bottom location. NOTE dial to adjust the cooking temperature in 10°F increments, from 120°F to a maximum of 450°F (or in the Celsius mode, 5°C increments, from 50°C to a maximum 230°C). b) To select the reheating time, press the center of the TEMP/TIME dial until the LCD screen displays the preset reheating time of ‘:15 MINS’.
OPERATING YOUR BREVILLE COMPACT SMART OVEN™ – REHEAT 8. At the end of the reheating cycle, the oven alert will sound three times, the START/CANCEL button will cease to illuminate and the LCD back light will illuminate blue. IMPORTANT The outer surface of the oven, including the oven door, is hot during and after operation. Always use protective hot pads or insulated oven mitts when inserting, removing or handling items from the oven. 9.
43
USING THE PLATE WARMING TRAY of your Breville Compact Smart Oven™
USING THE PLATE WARMING TRAY The top of the oven is very hot during and after operation. Do not store any item on top of the oven when in operation. The only exceptions are: • One layer of ceramic plates for warming. • The (optional) Bamboo Cutting Board accessory provided by Breville for use in the ribbed section on top of the oven. Visit breville.com.au for more information and refer to the Accessories Card enclosed.
CARE & CLEANING your Breville Compact Smart Oven™
CARE & CLEANING YOUR BREVILLE COMPACT SMART OVEN™ Ensure the oven is turned OFF by pressing the START/CANCEL button on the control panel. The oven is OFF when the button surround illumination is no longer red. Remove the power plug from the power outlet. Allow the oven and all accessories to cool completely before disassembling and cleaning. NOTE Do not use abrasive cleansers, metal scouring pads or metal utensils on any of the interior or exterior surfaces of the oven, including the crumb tray.
CARE & CLEANING YOUR BREVILLE COMPACT SMART OVEN™ Cleaning the wire rack, broil rack and baking pan. 1. Wash all accessories in warm soapy water with a soft sponge or soft plastic scouring pad. Rinse and dry thoroughly. 2. To extend the life of your accessories, we do not recommend that these be placed in the dishwasher. Storage 1. Ensure the oven is turned OFF by pressing the START/CANCEL button on the control panel. The oven is OFF when the button surround illumination is no longer red.
49
TROUBLESHOOTING
TROUBLESHOOTING Problem Easy Solution Oven will not switch “ON” • Check that the power plug is securely inserted into the power outlet • Insert the power plug into an independent power outlet • Insert the power plug into a different outlet • Reset the circuit breaker if necessary I would like to have the oven LCD default settings back • The oven will remember the last setting used for each function unless you remove the power plug from the power outlet.
TROUBLESHOOTING Problem Easy Solution Water is dripping onto benchtop from under door • This is normal. The condensation created from high moisture content foods such as frozen breads will run down the inside of the door and can drip onto the bench. The heating elements appear to be pulsing • Element IQ™ accurately controls the heat inside the oven by pulsing the power in the heating elements in short bursts. This is normal.
TROUBLESHOOTING The LCD screen displays ‘E01’ • The LCD screen will display ‘E01’ when there is a non-resettable issue with the appliance. Should this occur, immediately remove the power cord from the wall outlet and call the Breville Customer Service Center (1-866-BREVILLE). The LCD screen Displays ‘E02’ • The LCD screen will display ‘E02’ when there is a non-resettable issue with the appliance.
RECIPES
RECIPES PARMESAN CRISPS PITA CHIPS Function: BAKE Temperature: 400˚F (205˚C) Cooking Time: Approximately 6 minutes Yield: 8 two-inch disks Function: TOAST Darkness: 5 Slices: 4 Yield: 32 Chips INGREDIENTS INGREDIENTS ½ cup (120 ml) freshly grated Parmesan cheese 4 whole wheat pita pockets ¼ cup (60ml) olive oil 1 teaspoon (5 ml) salt pinch cayenne pepper (optional) 2 tablespoons (30 ml) dried basil ½ teaspoon (2.5 ml) garlic powder ¼ teaspoon (1 ml) paprika METHOD 1.
RECIPES ROASTED RED BELL PEPPER, SPINACH AND BROCCOLI DIP Function: BROIL AND BAKE Yield: 4 cups INGREDIENTS ¼ cup (60 ml) cooked spinach, excess water removed 1 cup (250 ml) cooked bite-sized broccoli florets 1 red bell pepper 1 garlic clove, crushed ¼ cup (60 ml) freshly grated Parmesan cheese ¾ cup (180 ml) mayonnaise ¾ cup (180 ml) shredded mozzarella The Dip 1. In a medium sized bowl, fold together all the ingredients. 2.
RECIPES VEGETABLE STRATA Function: BROIL, BAKE Yield: 6 INGREDIENTS 30 g (1 oz) asparagus, chopped 1 tablespoon (15 ml) olive oil pinch salt 1 red bell pepper 1 yellow bell pepper 1 medium onion, diced 4 eggs 1 cup (250 ml) milk 5 cups (1.2 liters) French stick cut into ½ inch (1.25 cm) cubes 1 cup (250 ml) shredded white cheddar 2 tablespoons (30 ml) freshly chopped basil METHOD Roasting the Red and Yellow Peppers 1. Slice the red and yellow peppers in 4 pieces each. Remove the seeds and the stem.
RECIPES CODDLED EGGS WITH SAUTEED MUSHROOMS AND SPINACH Function: BAKE Temperature: 325˚F (162˚C) Cooking Time: 18-20 minutes Yield: 4 servings INGREDIENTS 1 Shallot, finely diced 4 eggs 2 tablespoons (30 ml) unsalted butter 1 cup (250 ml) finely sliced mushrooms (crimini, button, or Portobello) 1 cup (250 ml) loosely packed baby spinach ¼ cup (60 ml) heavy cream 1 oz (30 g) gorgonzola cheese pinch grated nutmeg salt and pepper to taste 2 tablespoons (30 ml) chopped chives 4 x ½ cup capacity (4 x 125 ml) ra
RECIPES TOASTED CHICKEN SANDWICH WITH BALSAMIC CARAMELIZED ONIONs AND CAMEMBERT Function: ROAST, TOAST Temperature/Slices 375˚F (192˚C); darkness #4, 2 slices Yield: 4 generous servings Ingredients for Sandwich 1 fresh French baguette ¼ cup (60 ml) fig jam 2 tablespoons (30 ml) unsalted butter, softened 2 roasted chicken breasts (see recipe below) 3 cups (750 ml) loosely packed baby arugula leaves 6 oz (170g) Camembert cheese, sliced Balsamic caramelized onions (see recipe below) Ingredients for Balsamic C
RECIPES TWICE BAKED POTATOES Function: BAKE Yield: 4 servings INGREDIENTS 4 baking potatoes 1 tablespoon (15 ml) butter ¼ teaspoon (1 ml) salt 3 tablespoons (45 ml) sour cream 2 tablespoons (30 ml) buttermilk or milk 2 tablespoons (30 ml) snipped chives 1 cup (250 ml) shredded cheddar cheese 5 rashers of bacon Bake the potatoes 1. Set the wire rack at the bottom rack height position. Place the potatoes on the wire rack. 2. Turn the FUNCTION dial to BAKE.
RECIPES GRATIN DAUPHINOISE (SCALLOPED POTATOES) ROASTED CORN ON THE COB Function: BAKE Temperature: 350˚F (175˚C) Cooking Time: Approximately 1 hour Yield: 6- 8 servings Function: ROAST Temperature: 425˚F (218˚C) Cooking Time: Approximately 15-18 minutes Yield: 5 Roasted Corn on the Cob INGREDIENTS INGREDIENTS 3 pounds (1.
RECIPES RIBS WITH ASIAN BARBECUE SAUCE Function: BAKE Temperature: 350˚F (175˚C) Cooking Time: 25 minutes Yield: 1 rack of ribs INGREDIENTS ¹⁄³ cup (80 ml) plum sauce ½ cup (125 ml) hoisin sauce ¼ cup (60ml) low sodium soy sauce ¼ cup (60 ml) oyster sauce ¼ cup (60 ml) honey 2 tablespoons (30 ml) minced ginger 2 cloves of garlic, minced 2 tablespoons (30 ml) sesame oil 2 tablespoons (30 ml) cider vinegar 1 tablespoon (15 ml) orange rind 1 teaspoon (5 ml) hot pepper sauce (optional) 1 rack of pork back ribs
RECIPES SAVORY WHOLE WHEAT TART WITH ROASTED CHERRY TOMATO HALVES, CARAMELIZED ONIONS AND GOAT CHEESE Function: ROAST, BAKE Yield: One 9-inch square tart Whole Wheat Pastry Crust INGREDIENTS ¾ cup (180 ml) all purpose flour ¾ cup (180 ml) whole wheat flour ½ teaspoon (2.
RECIPES MAPLE SALMON STUFFED TURKEY BREAST Function: BAKE Temperature: 400˚F (205˚C) Cooking Time: Approximately 15 to 20 minutes Yield: 4 servings Function: ROAST Temperature: 375˚F (192˚C) Cooking Time: 45 minutes to 1 hour (approximately) Yield: 6 Servings INGREDIENTS INGREDIENTS 2 lb fresh salmon fillet (900 g), skinned & boned 3 tablespoons (45 ml) pure maple syrup 2 teaspoons (10 ml) Dijon mustard 1 tablespoon (15 ml) lemon juice 1 tablespoon (15 ml) light soy sauce ¼ leek stalk, washed, thinly
RECIPES Prepare the Turkey 1. Butterfly the turkey breast and cover with plastic wrap. Pound the turkey breast until about ½ inch (1.25 cm) thick. Remove plastic wrap and lightly season with salt and pepper. Spread the filling leaving a 1 inch border (2.50 cm). Starting at the long end, roll up the turkey breast. Tie roll with butcher’s twine every 1 inch (2.50 cm) to secure the roll. 2. Place the turkey breast roast onto the Breville broil rack with the baking tray underneath.
RECIPES LAMB GYROS Tzatziki Sauce Function: ROAST Temperature: 375˚F (192˚C) Cooking Time: Approximately 1 hour to 1 hour and 15 minutes (depending on desired doneness) Yield: 8 Servings 1. Empty the contents of the yogurt into a fine mesh sieve set over a bowl to catch the liquid. Keep refrigerated. Strain for 3 to 8 hours. Discard liquid. 2. Shred the cucumber and sprinkle salt over it. Let sit for 20 minutes. Squeeze the excess water out of the cucumber. 3.
RECIPES Building the Gyros NOTE 1. Warm the pitas or naan in the toaster oven by enclosing them in foil. Set the wire rack at the bottom rack height position. Turn the FUNCTION dial to REHEAT and set the TIME to 5 minutes. 2. Carve the rested lamb into thin slices and pile on a serving platter. 3. Arrange the sliced onion, chopped tomato and shredded lettuce on another serving platter. 4.
RECIPES PIZZA DOUGH Yield: two 11-inch pizzas INGREDIENTS ¾ cup + 2 tablespoons (210 ml) warm water 1 ¾ teaspoons (9 ml) dry yeast 1 teaspoon (5 ml) granulated sugar 2 cups (500 ml) all purpose flour 1 teaspoon (5 ml) salt Make the Dough 1. In a small bowl, dissolve the sugar in water. Sprinkle the yeast on top of the water and let stand for 3 minutes. 2. In a medium bowl, mix together the flour and salt. Pour the water/yeast mixture into the flour and mix to form a ball. 3.
RECIPES Troppo Picante Prepare dough as described on page 68. Cut the dough in half and stretch to fit an 11-inch pizza pan. Spread ¾ cup tomato sauce, 5 slices hot soppresatta salami, sliced green olives, hot peppers, and smoked mozzarella cheese. Set the wire rack at the middle rack height position. Turn the FUNCTION dial to PIZZA and deselect the FROZEN setting. Bake for the default TEMPERATURE and TIME. Tre-Funghi Prepare dough as described on page 68.
RECIPES BUFFALO STYLE CHICKEN WINGS (CRISPY WINGS TOSSED IN HOT SAUCE) Function: ROAST Temperature: 450˚F (230˚C) Cooking Time: 40 minutes (20 minutes + 20 minutes) Yield: 1 dozen wings INGREDIENTS 6 drumettes 6 wings (tips removed) Spicy Sauce 3 tablespoons (45 ml) vinegar based hot sauce or Thai garlic chili sauce 2 tablespoons (30 ml) melted butter 1 tablespoons (15 ml) ketchup METHOD 1. Arrange the wings in a single layer onto the Breville broil rack with the baking pan underneath. 2.
RECIPES 5. Set the wire rack in the bottom rack height position. Turn the FUNCTION dial to BAKE. Set the TEMPERATURE to 400˚F (205˚C) and set the TIME to 25 minutes. Press the START/CANCEL button to activate. 6. Remove from the oven and allow the scones to cool on a wire rack. TIP Use dried currants or dry blueberries in place of the cranberries, and add lemon zest in place of orange zest.
RECIPES 3. Shape into a disk, wrap in plastic wrap and chill for at least one hour. Streusel Crumble (optional) 1. In a small bowl, mix together the flour, sugar, cinnamon, and salt. Cut in the butter by hand or use a pastry cutter. Ensure this mixture is crumbly. 2. Cover with plastic wrap and keep refrigerated until ready to use. Prepare the apples 1. Peel and core the apples. Slice them in half and then into ¼ inch slices. Toss them in a bowl with sugar, cinnamon, corn starch and salt.
RECIPES DOUBLE CHOCOLATE CHIP COOKIES Function: COOKIE Temperature: 350˚F (175˚C) Cooking Time: 11 minutes Yield: 36 cookies INGREDIENTS L cup (80 ml) granulated sugar ¾ cup (180 ml) brown sugar ¾ cup (180 ml) unsalted butter, softened 1 egg 1 teaspoon (5 ml) pure vanilla extract 2 oz (60g) bittersweet chocolate, melted 1¾ cups (420 ml) all purpose flour ¾ teaspoon (7 ml) baking soda 2 teaspoons (10 ml) cornstarch ¾ teaspoon (7 ml) salt 1 cup (250 ml) milk chocolate chips NOTE For crispier cookies, bake an
RECIPES LEMON BARS WITH A HAZELNUT CRUST Function: BAKE Temperature: 350˚F (175˚C) Yield: 6 servings INGREDIENTS 1 cup (250 ml) flour 2 tablespoons (30 ml) powdered sugar ½ cup (175 ml) cold unsalted butter ¼ teaspoon (1 ml) salt ¼ cup (60 ml) hazelnuts 2 eggs ¾ cup (180 ml) granulated sugar ¼ cup (180 ml) fresh lemon juice ¼ teaspoon (1 ml) baking powder 2 tablespoons (30 ml) all purpose flour 6 tablespoons (90 ml) seedless raspberry jam Prepare the Crust 1.
RECIPES VANILLA CHEESECAKE Function: BAKE Temperature: 350˚F (175˚C) for crumb crust; 325˚F (162˚C) for cheesecake Cooking Time: 7 minutes for crumb crust; 55 minutes for the cheesecake Yield: One 9 inch round cheesecake INGREDIENTS 1½ cups (375 ml) graham wafer crumbs 3 tablespoons (45 ml) melted butter 24 oz (750 g) cream cheese, room temperature 1 cup (250 ml) sour cream ¾ cup (180 ml) granulated sugar 2 teaspoons (10 ml) pure vanilla extract 3 eggs, separated METHOD 1.
one year limited warranty Subject to the conditions below, HWI Breville warrants for one year from the date of purchase that this Breville appliance is free of defects in material and workmanship.
77
FÉLICITATIONS pour l’achat de votre nouveau Smart Oven Compact de Breville MC
TABLE DES MATIÈRES 80 Breville vous recommande la sécurité avant tout 83 Faites la connaissance de votre Smart Oven Compact de Breville MC 86 Guide de démarrage rapide 90 Avant la première utilisation - Préparation initiale du four - Une note sur le temps de cuisson - Une note sur la position de la grille - Une note sur le mode veille - Une note sur les réglages optionnels 96 Fonctionnement de votre Smart Oven Compact de Breville - Fonction TOAST (GRILLER) - Fonction BAGEL - Fonction BAKE (CUIRE) -
BREVILLE VOUS RECOMMANDE LA SÉCURITÉ AVANT TOUT Chez Breville, la sécurité occupe une place de choix. Nous concevons et fabriquons des produits destinés aux consommateurs sans jamais perdre de vue la sécurité de notre précieuse clientèle.
BREVILLE VOUS RECOMMANDE LA SÉCURITÉ AVANT TOUT utilisez cette section, servez-vous de poignées isolantes ou de gants de cuisine pour manipuler les plats chauds. Ou laissez refroidir le four au préalable. • Ne déposez aucun objet en carton, en plastique ou en papier, ou autre matériel inflammable sur le four. • Soyez extrêmement prudent lorsque vous faites cuire des aliments à forte teneur en huile.
BREVILLE VOUS RECOMMANDE LA SÉCURITÉ AVANT TOUT • Suivez attentivement les consignes d’entretien et de nettoyage décrites à la page 121. Ne nettoyez pas l’appareil avec des tampons à récurer métalliques qui, en se brisant, pourraient laisser tomber des particules sur les éléments chauffants et causer des risques de chocs électriques. • Nettoyez régulièrement le plateau ramasse-miettes. Pour ce faire, éteignez le four, débranchez-le et laissez-le refroidir avant de retirer le plateau.
FAITES LA CONNAISSANCE de votre Smart Oven Compact de Breville MC
FAITES LA CONNAISSANCE DE VOTRE SMART OVEN COMPACT DE BREVILLE MC D C A J E F G B K J H I A. B. C. D. Grilloir en émail de 10” x 10” Plateau de cuisson en émail 10” x 10” Poignée de la porte Réchaud à nervures IMPORTANT Le boîtier du four, incluant la porte, est très chaud durant et après l’utilisation. Servez-vous toujours de poignées isolantes ou de gants de cuisine pour déposer des aliments dans le four, les retirer ou les manipuler.
FAITES LA CONNAISSANCE DE VOTRE SMART OVEN COMPACT DE BREVILLE MC Accessoires disponibles vendus séparément: L M N O Q Place à découper en bambou Pièce no BOV650CB Le bambou est le matériau idéal pour une planche à découper, car il absorbe très peu d’humidité et possède des propriétés antibactériennes naturelles. Le bambou est plus dur que la plupart des bois francs et laisse moins de marques de couteaux sur la surface de la planche. P IMPORTANT Ne touchez pas aux surfaces chaudes de l’appareil.
Guide de démarrage rapide Ce guide de démarrage rapide est conçu pour la première utilisation de l’appareil. Pour des informations additionnelles, veuillez consulter l’ensemble du livret d’instructions. PROCÉDURE D’AMORÇAGE (À PHASE UNIQUE) Afin d’éliminer les substances recouvrant les éléments chauffants, il est essentiel de faire fonctionner le four à vide durant 15 minutes. Assurez-vous qu’il y a une bonne circulation d’air autour du four, car de la vapeur pourrait s’en émaner.
GUIDE DE DÉMARRAGE RAPIDE FONCTIONNEMENT DE VOTRE SMART OVEN COMPACT DE BREVILLE MC Le Smart Oven Compact de Breville est muni d’un Élément IQ - technologie de cuisson exclusive qui ajuste la puissance des éléments chauffants afin d’obtenir une cuisson uniforme et plus rapide. Chaque fonction est préréglée selon nos recommandations. Cependant, nous vous suggérons d’en faire l’essai selon la recette utilisée, la quantité d’ingrédients et vos goûts personnels.
GUIDE DE DÉMARRAGE RAPIDE FONCTIONS DU FOUR FONCTION TOAST (Griller): Pour des rôties croustillantes à l’extérieur et tendres à l’intérieur. Position de la grille: Centrale Réglages optionnels: Bouton FROZEN FOODS (aliments congelés) NOTE Durant le cycle de grillage, de la condensation peut apparaître sur la porte du four et de la vapeur peut s’en émaner. Ceci est normal et est causé par l’humidité contenue dans le pain.
GUIDE DE DÉMARRAGE RAPIDE FONCTION PIZZA: Pour fondre le fromage, colorer la garniture à pizza et garder la croûte croustillante. Position de la grille: Centrale Réglages optionnels: Bouton de CONVERSION DE TEMPÉRATURE et Bouton FROZEN FOODS (aliments congelés). NOTE Pour cuire la pizza congelée, retirez au préalable l’emballage (incluant la plaque métallisée fournie) avant de la mettre au four.
AVANT LA PREMIÈRE UTILISATION de votre Smart Oven Compact de Breville MC
AVANT LA PREMIÈRE UTILISATION PRÉPARATION INITIALE DU FOUR 1. Retirez et disposez de tout matériel d’emballage, étiquettes promotionnelles ou collants. 2. Retirez le plateau ramasse-miettes, la grille, le grilloir et le plateau de cuisson de l’emlallage en mousse polyuréthane. Lavez-les à l’eau chaude savonneuse avec une éponge douce, rincez et asséchez bien. Réinsérez le plateau ramasse-miettes. 3. Essuyez l’intérieur du four avec une éponge humide et asséchez correctement. 8.
AVANT LA PREMIÈRE UTILISATION NOTE Le cycle de cuisson peut être interrompu en tout temps en pressant le bouton START/CANCEL. Le contour du bouton ne sera plus illuminé en rouge et l’écran ACL s’illuminera en bleu. UNE NOTE SUR LE TEMPS DE CUISSON Le Smart Oven Compact de Breville est muni d’un Élément IQ - une technologie de cuisson exclusive qui ajuste la puissance des éléments chauffants pour obtenir des résultats optimaux.
AVANT LA PREMIÈRE UTILISATION En pressant le centre du cadran TEMP/ TIME, l’écran ACL affichera la température ou le temps de cuisson, et vice versa. En le tournant, vous augmenterez ou réduirez la TEMPÉRATURE ou le TEMPS de cuisson. NOTE Le cadran TEMP/TIME sert aussi à contrôler la coloration et le nombre de tranches pour les fonctions TOAST et BAGEL. a) Pour modifier la température de cuisson, pressez le centre du cadran TEMPS/ TIME jusqu’à ce que la température apparaisse à l’écran ACL.
AVANT LA PREMIÈRE UTILISATION Position supérieure: fonction BROIL (Gratiner). Position centrale: fonctions TOAST (Griller), BAGEL, PIZZA et COOKIE (Biscuits). Position inferieure: fonctions BAKE (Cuire), ROAST (Rôtir) et REHEAT (Réchauffer). NOTE Si vous couvrez de papier aluminium les accessoires, plats et casseroles, il est conseillé de placer la grille à la position centrale ou inférieure. Cela empêchera le papier aluminium de toucher aux éléments chauffants supérieurs.
AVANT LA PREMIÈRE UTILISATION NOTE NOTE Si vous avez changé le réglage par défaut des degrés Fahrenheit en Celsius, le four le mémorisera jusqu’à ce que vous changiez à nouveau le réglage en enfonçant le bouton de CONVERSION DE TEMPÉRATURE ou si vous débranchez le four. Quand vous le rebrancherez, le four se réglera automatiquement en degrés Fahrenheit.
FONCTIONNEMENT de votre Smart Oven Compact de Breville MC
FONCTIONNEMENT DE VOTRE SMART OVEN COMPACT DE BREVILLE - GRILLER MC FONCTION TOAST (Griller) Éléments chauffants Les éléments supérieurs et inférieurs s’allument et s’éteignent par intermittence afin de garder une température constante. Position de la grille Position centrale. Réglage optionnel Bouton FROZEN FOODS (Aliments congelés). La fonction TOAST permet de griller le pain et le rendre croustillant à l’extérieur et tendre à l’intérieur.
FONCTIONNEMENT DE VOTRE SMART OVEN COMPACT DE BREVILLE - GRILLER MC b) Pour modifier le nombre de tranches, pressez le centre du cadran TEMP/ TIME jusqu’à ce que l’écran ACL affiche en clignotant ‘SLICES’ (Tranches). Tournez le cadran vers la gauche pour réduire le nombre de tranches, ou vers la droite pour l’augmenter. Le nombre de tranches varie de ‘1’ à ‘4’. NOTE Le four mémorisera votre sélection de coloration et le nombre de tranches jusqu’à ce que vous la changiez ou que vous débranchiez le four.
FONCTIONNEMENT DE VOTRE SMART OVEN COMPACT DE BREVILLE - BAGEL MC FONCTION BAGEL Elements Top and bottom heating elements cycle on and off to regulate the correct temperature. Rack Position Top rack height position. Réglage optionnel Bouton FROZEN FOODS (Aliments congelés). Avec la fonction BAGEL, vous obtiendrez un bagel coupé croustillant à l’intérieur et légèrement grillé à l’extérieur.
FONCTIONNEMENT DE VOTRE SMART OVEN COMPACT DE BREVILLE - BAGEL MC 6. Le degré de coloration et le nombre de tranches de bagel peuvent être ajustés avant ou durant le cycle de cuisson. a) Pour modifier le degré de coloration, pressez le centre du cadran TEMP/TIME jusqu’à ce que l’écran ACL affiche en clignotant ‘DARKNESS’ (Coloration). Tournez le cadran vers la gauche pour réduire le degré de coloration ou vers la droite pour l’augmenter.
FONCTIONNEMENT DE VOTRE SMART OVEN COMPACT DE BREVILLE - CUIRE MC FONCTION BAKE (Cuire) NOTE L’Élément IQ ajuste automatiquement le temps de grillage en fonction de la chaleur ambiante du four. Par exemple, si le four est déjà chaud après un cycle de grillage, le temps requis pour le second cycle de grillage sera moins long. MC 9. À la fin du cycle de cuisson, le signal sonore se fera entendre trois fois, le contour du bouton START/CANCEL s’éteindra et l’écran ACL s’illuminera en bleu.
FONCTIONNEMENT DE VOTRE SMART OVEN COMPACT DE BREVILLE - CUIRE MC 5. Pressez le bouton START/CANCEL pour activer ce réglage. Le contour du bouton s’illuminera en rouge, le signal sonore se fera entendre et l’écran ACL s’illuminera en orange. 4. La température et le temps de cuisson peuvent être ajustés avant ou durant la cuisson: a) La temperature de cuisson préréglée de ‘325°F’ (‘160°C’) est affichée comme la température par défaut sur l’écran ACL.
FONCTIONNEMENT DE VOTRE SMART OVEN COMPACT DE BREVILLE - CUIRE MC NOTE NOTE Les plats suivants conviennent à la cuisson dans le four: Soyez extrêmement prudent lorsque vous utilisez des casseroles ou des plats non métallisés, comme la céramique ou le verre. Assurez-vous qu’ils sont à l’épreuve de la chaleur pour éviter qu’ils ne craquellent.
FONCTIONNEMENT DE VOTRE SMART OVEN COMPACT DE BREVILLE - RÔTIR MC FONCTION ROAST (Rôtir) Éléments Les éléments supérieurs et inférieurs s’allument et s’éteignent par intermittence afin de garder une température constante. b) Pour sélectionner le temps de rôtissage, pressez le centre du bouton TEMP/TIME jusqu’à ce que l’écran ACL affiche le temps de rôtissage préréglé de ‘1:00 HRS’. Position de la grille Position inférieure.
FONCTIONNEMENT DE VOTRE SMART OVEN COMPACT DE BREVILLE - RÔTIR MC NOTE IMPORTANT Le four mémorisera votre sélection de température et de temps de rôtissage jusqu’à ce que vous la changiez ou que vous débranchiez le four. Lorsque le four sera rebranché, la fonction ROAST (Rôtir) retournera automatiquement à la température préréglée de ‘350˚F’ et au temps de rôtissage préréglé ‘1:00 HRS’. Le boîtier du four, incluant la porte, est très chaud durant et après usage.
FONCTIONNEMENT DE VOTRE SMART OVEN COMPACT DE BREVILLE - RÔTIR MC NOTE Soyez extrêmement prudent lorsque vous utilisez des casseroles ou des plats non métallisés, comme la céramique ou le verre. Assurez-vous qu’ils sont à l’épreuve de la chaleur pour éviter qu’ils ne craquellent. NOTE Soyez prudent lorsque vous recouvrez un plat ou une casserole dans le four, car la pression accumulée sous le couvercle peut faire jaillir les ingrédients ou craqueler le plat. 8.
FONCTIONNEMENT DE VOTRE SMART OVEN COMPACT DE BREVILLE - DORER MC FONCTION BROIL (DORER) Éléments Les éléments supérieurs et inférieurs s’allument et s’éteignent par intermittence afin de garder une température constante. 2. Placez le grilloir en émail de Breville dans le plateau de cuisson en émail de Breville. Déposez les aliments sur le grilloir ou dans un plat à l’épreuve de la chaleur, et placez-le au centre de la grille afin de laisser circuler l’air autour des aliments.
FONCTIONNEMENT DE VOTRE SMART OVEN COMPACT DE BREVILLE - DORER MC NOTE Lorsque vous recouvrez les accessoires, casseroles ou plats de papier aluminium, il est recommandé de placer la grille à la position centrale ou inférieure. NOTE Soyez extrêmement prudent lorsque vous utilisez des casseroles ou des plats non métallisés, comme la céramique ou le verre. Assurez-vous qu’ils sont àl ‘épreuve de la chaleur pour éviter qu’ils ne craquellent. 5.
FONCTIONNEMENT DE VOTRE SMART OVEN COMPACT DE BREVILLE - DORER MC NOTE Tournez le cadran pour ajuster le temps de gratinage par tranches d’une minute jusqu’à un maximum de 20 minutes. Le four mémorisera votre sélection de température et de temps de gratinage jusqu’à ce que vous la changiez ou que vous débranchiez le four. Lorsque le four sera rebranché, la fonction BROIL retournera automatiquement aux préréglages de température ‘HI’et de temps ‘:10MINS’. 6.
FONCTIONNEMENT DE VOTRE SMART OVEN COMPACT DE BREVILLE - PIZZA MC IMPORTANT Le boîtier du four, incluant la porte, est très chaud durant et après usage. Utilisez toujours des poignées isolantes ou des gants de cuisine pour déposer les aliments dans le four, les retirer ou les manipuler. 9. Le cycle pour dorer les aliments peut être interrompu en tout temps en pressant le bouton START/CANCEL. Cela cancellera le cycle. Le contour du bouton ne sera plus illuminé et l’écran ACL s’illuminera en bleu.
FONCTIONNEMENT DE VOTRE SMART OVEN COMPACT DE BREVILLE - PIZZA MC 3. Tournez le cadran de FONCTIONS à PIZZA. L’écran ACL affichera la température préréglée de ‘425°F’. Le temps préréglé de ‘:15 MINS’ sera affiché ainsi que la fonction préréglée FROZEN FOODS (Aliments congelés) (voir à la page 113 pour la cuisson d’une pizza fraîche). 4. La température et le temps de cuisson de la pizza peuvent être ajustés avant ou durant le cycle de cuisson.
FONCTIONNEMENT DE VOTRE SMART OVEN COMPACT DE BREVILLE - PIZZA MC 5. Pressez le centre du bouton START/CANCEL pour activer ce réglage. Le contour du bouton s’illuminera en rouge, le signal sonore se fera entendre et l’écran ACL s’illuminera en orange. 6. L’écran ACL affichera en clignotant ‘PREHEATING’ (Préchauffage). Une fois que la température requise sera atteinte, le signal sonore se fera entendre. NOTE Des pizzas plus larges peuvent griller de façon irrégulière dans un four compact.
FONCTIONNEMENT DE VOTRE SMART OVEN COMPACT DE BREVILLE - BISCUITS MC 5. L’indication PREHEATING (préchauffage) clignotera sur l’écran ACL. Une fois que la température requise sera atteinte, le signal sonore se fera entendre. 6. Le temps s’affichera et le compte à rebours débutera par tranches d’une minute. 7. Une fois que la pierre à pizza sera réchauffée, le signal sonore se fera entendre trois fois, le contour du bouton START/CANCEL ne sera plus illuminé et l’écran ACL s’illuminera en bleu. 8.
FONCTIONNEMENT DE VOTRE SMART OVEN COMPACT DE BREVILLE - BISCUITS MC a) La température de cuisson préréglée de 350˚F (175°c) est affichée comme la température par défaut sur l’écran ACL. Tournez le cadran TEMP/TIME pour ajuster la température par tranches de 10°F, de 120°F à un maximum de 450°F (ou en degrés Celsius, par tranches de 5°C, de 50°C à un maximum de 230°C).
FONCTIONNEMENT DE VOTRE SMART OVEN COMPACT DE BREVILLE - BISCUITS MC NOTE Soyez prudent lorsque vous recouvrez un plat ou une casserole dans le four, car la pression accumulée sous le couvercle peut faire jaillir les ingrédients ou faire craqueler le plat. NOTE Il peut être nécessaire de graisser légèrement le plateau de cuisson en émail ou de la tapisser de papier parchemin afin d’empêcher les biscuits de coller. 8.
FONCTIONNEMENT DE VOTRE SMART OVEN COMPACT DE BREVILLE - RÉCHAUFFER MC FONCTION REHEAT (Réchauffer) NOTE Éléments Les éléments supérieurs et inférieurs s’allument et s’éteignent par intermittence pour garder une température constante. Soyez prudent lorsque vous recouvrez les accessoires, casseroles ou plats de papier aluminium.
FONCTIONNEMENT DE VOTRE SMART OVEN COMPACT DE BREVILLE - RÉCHAUFFER MC 6. Pressez le bouton START/CANCEL pour activer ce réglage. Le contour du bouton s’illuminera en rouge, le signal sonore se fera entendre et l’écran ACL s’illuminera en orange. 5. La température et le temps peuvent être ajustés avant ou durant le cycle de réchauffage. a) La température de réchauffage préréglée de 325°F est affichée comme la température par défaut sur l’écran ACL.
UTILISATION DU RÉCHAUD de votre Smart Oven Compact de Breville MC
UTILISATION DU RÉCHAUD Le dessus du four devient extrêmement chaud durant et après usage. N’y déposez aucun objet lorsqu’il est en marche. Les seules exceptions sont: • Des plats en céramique disposés en une seule rangée pour être réchauffés. • L’accessoire de Planche à découper/ Plateau de service en bambou de Breville qui va sur la partie nervurée au dessus du four. Pour plus d’information, visitez breville.com ou consultez la Carte d’accessoires ci incluse.
ENTRETIEN & NETTOYAGE de votre Smart Oven Compact de Breville MC
ENTRETIEN ET NETTOYAGE Éteignez le four en pressant le bouton START/CANCEL. Le four est éteint quand le contour du bouton d’est plus illuminé en rouge. Débranchez l’appareil et laissez-le refroidir complètement, de même que tous les accessoires, avant de le démonter et de le nettoyer. IMPORTANT N’immergez pas le boîtier, le cordon d’alimentation ou la fiche dans l’eau ou tout autre liquide, car cela pourrait causer un risque d’électrocution.
ENTRETIEN ET NETTOYAGE DE VOTRE SMART OVEN COMPACT DE BREVILLE MC Nettoyage du ramasse-miettes 1. Après chaque utilisation, retirez le plateau ramasse-miettes et jetez les miettes. Essuyez le plateau avec une éponge douce et humide. Un nettoyant liquide sans-abrasif peut être utilisé pour éviter l’accumulation de taches. Appliquez le nettoyant sur l’éponge, et non sur le plateau, avant le nettoyage. Bien assécher. 2.
123
GUIDE DE DÉPANNAGE
GUIDE DE DÉPANNAGE PROBLÈME POSSIBLE SOLUTION FACILE Le four ne s’allume pas • Vérifiez si la fiche est bien insérée dans la prise murale. • Branchez l’appareil dans une prise murale indépendante. • Branchez l’appareil dans une autre prise murale. • Remettez le disjoncteur en position initiale, si nécessaire. J’aimerais restaurer les réglages par défaut sur l’écran ACL • Le four mémorise le dernier réglage utilisé pour chaque fonction, à moins que vous n'ayez débranché le four.
GUIDE DE DÉPANNAGE PROBLÈME POSSIBLE SOLUTION FACILE De l'eau s'égoutte sous la porte et coule sur le comptoir • Ceci est normal. La condensation formée par les aliments à haute teneur en humidité, comme le pain congelé, laissera de l'eau couler à l'intérieur de la porte et peut-être dégoutter sur le comptoir. Les éléments chauffants semblent clignoter • L’Élément IQ contrôle parfaitement la chaleur du four en propulsant de façon séquentielle l’énergie dans les éléments chauffants. Ceci est normal.
GUIDE DE DÉPANNAGE PROBLÈME POSSIBLE SOLUTION FACILE L'écran ACL affiche 'E02' • L'écran ACL affiche 'E02' lorsque l'appareil ne peut être réinitialisé. Dans un tel cas, contactez le Service à la clientèle de Breville (1-866-BREVILLE). L'écran ACL affiche 'E03' • L'écran ACL affichera 'E03' si la température du four excède la limite maximale. Débranchez le four, laissez-le refroidir 15 minutes, puis rebranchez-le.
RECETTES
RECETTES CROUSTILLES de PARMESAN CHIPS de PAIN PITA Fonction: BAKE Température: 400˚F (205˚C) Cuisson: Environ 6 minutes Portions: 8 rondelles de 2 po Fonction: TOAST Coloration: 5 Tranches: 4 Portions: 32 INGRÉDIENTS INGRÉDIENTS ½ tasse (120 ml) de fromage Parmesan fraîchement râpé 4 pains pita au blé entier ¼ tasse (60ml) d’huile d’olive 1 c. à thé (5 ml) de sel Une pincée de poivre de cayenne (optionnel) 2 c. à soupe (30 ml) de basilic séché ½ c. à thé (2.5 ml) de poudre d’ail ¼ c.
RECETTES TREMPETTE de POIVRON ROUGE GRILLÉ, ÉPINARDS et BROCOLI Fonctions: BROIL et BAKE Portions: 4 tasses INGRÉDIENTS ¼ tasse (60 ml) d’épinards cuits et essorés 1 tasse (250 ml) de petits fleurets de brocoli 1 petit poivron rouge 1 gousse d’ail écrasée ¼ tasse (60 ml) de fromage Parmesan fraîchement râpé ¾ tasse (180 ml) de mayonnaise ¾ tasse (180 ml) Mozzarella râpé La trempette 1. Dans un bol moyen, mélanger tous les ingrédients. 2.
RECETTES STRATA aux LÉGUMES Fonctions: BROIL, BAKE Portions: 6 INGRÉDIENTS 30 g (1 oz) d’asperges hachées 1 c. à soupe (15 ml) d’huile d’olive Une pincée de sel 1 petit piment rouge 1 petit piment jaune 1 oignon moyen haché 4 œufs 1 tasse (250 ml) de lait 5 tasses (1.2 litres) de pain baguette coupé en cubes de ½ po (1,25 cm) 2 c. à soupe (30 ml) de basilic frais haché MARCHE À SUIVRE Griller les poivrons rouge et jaune 1. Couper chaque poivron en 4 morceaux. Retirer les graines et la queue.
RECETTES ŒUFS MI-CUITS aux CHAMPIGNONS et aux ÉPINARDS Fonction: BAKE Température: 325˚F (162˚C) Cuisson: 18-20 minutes Portions: 4 INGRÉDIENTS 1 échalote hachée finement 4 œufs 2 c. à soupe (30 ml) de beurre non salé 1 tasse (250 ml) de champignons tranchés (crimini, de Paris ou Portobello) 1 tasse (250 ml) de jeunes pousses d’épinard légèrement tassées ¼ tasse (60 ml) de crème épaisse 1 oz (30 g) de fromage Gorgonzola Une pincée de muscade râpée Sel et poivre au goût 2 c.
RECETTES SANDWICH GRILLÉ au POULET avec OIGNONS CARAMÉLISÉS au BALSAMIQUE et CAMEMBERT Fonctions: ROAST, TOAST Température/Tranches 375˚F (192˚C); coloration #4, 2 tranches 4 généreuses portions Ingrédients pour le sandwich 1 baguette française ¼ tasse (60 ml) de confiture de figues 2 c.
RECETTES POMMES DE TERRE au FOUR – 2 FOIS CUITES Préparer les pommes de terre cuites deux fois Fonction: BAKE Portions: 4 Placer les pommes de terre à l’horizontale et couper une calotte de ¼ po. Retirer la chair à l’aide d’une cuillère à thé et réserver dans un bol moyen. Réserver les pommes de terre évidées pour les farcir ultérieurement. 1. Ajouter le beurre, la crème sûre, le lait de beurre, le sel, la ciboulette et tout le bacon émietté, sauf 1 c. à soupe (15 ml).
RECETTES GRATIN DAUPHINOIS ÉPIS de MAÏS RÔTIS Fonction: BAKE Température: 350˚F (175˚C) Cuisson: Environ 1 heure Portions: 6-8 Fonction: ROAST Température: 425˚F (218˚C) Cuisson: Environ 15-18 minutes Portions: 5 INGRÉDIENTS INGRÉDIENTS 3 livres (1,4 kg) de pommes de terre Yukon 1 ½ tasse (375 ml) de crème ½ tasse (125 ml) de bouillon de poulet Sel et poivre 1 c. à soupe (15 ml) de beurre en petits dés ½ tasse (120 ml) de fromage Fontina râpé 5 épis de maïs 2 ½ c.
RECETTES CÔTES LEVÉES à la SAUCE BBQ ASIATIQUE Fonction: BAKE Température: 350˚F (175˚C) Cuisson: 25 minutes Portions: 1 carré de côtes levées INGRÉDIENTS L tasse (80 ml) de sauce aux prunes ½ tasse (125 ml) de sauce hoisin ¼ tasse (60ml) de sauce soya faible en sel ¼ tasse (60 ml) de sauce aux huîtres ¼ tasse (60 ml) de miel 2 c. à soupe (30 ml) de gingembre émincé 2 gousses d’ail émincées 2 c. à soupe (30 ml) d’huile de sésame 2 c. à soupe (30 ml) de vinaigre de cidre 1 c.
RECETTES TARTE au BLÉ ENTIER et SARIETTE avec TOMATES CERISE RÔTIES, OIGNONS CARAMÉLISÉS et FROMAGE DE CHÈVRE Fonctions: ROAST, BAKE Portion: 1 tarte carrée de 9 po Pâte à tarte au blé entier ¾ tasse (180 ml) de farine tout usage ¾ tasse (180 ml) de farine de blé entier ½ c. à thé (2.5 ml) de sel ¼ tasse (60 ml) de beurre non salé, coupé en dés 3 c. à soupe (45 ml) de graisse végétale 3 c. à soupe(45 ml) d’eau glacée Tomates cerise rôties 1 chopine de tomates cerise 2 c.
RECETTES SAUMON à L’ÉRABLE Fonction: BAKE Température: 400˚F (205˚C) Cuisson: Environ 15 à 20 minutes Portions: 4 INGRÉDIENTS sans la peau 3 c. à soupe (45 ml) de sirop d’érable 2 c. à thé (10 ml) de moutarde de Dijon 1 c. à soupe (15 ml) de jus de citron 1 c. à soupe (15 ml)de sauce soya légère ¼ de poireau lavé et tranché finement 1 c. à thé (5 ml) de beurre non salé, coupé en dés Sel et poivre au goût MARCHE À SUIVRE 1.
RECETTES POITRINE de DINDE FARCIE Fonction: ROAST Température: 375˚F (192˚C) Cuisson: 45 minutes à 1 heure (environ) Portions: 6 INGRÉDIENTS 1 poitrine de dinde de 2,2 lb (1 kg) (environ), désossée et sans la peau 1 ¾ tasse (420 ml) de bouillon de poulet ¼ tasse (60 ml) de beurre non salé 2 c. à soupe (30 ml) de farine L tasse (90 ml) de vin blanc sec Filling 1 tasse (250 ml) d’eau bouillante 4oz (110 g) de champignons porcini séchés 6 on (170 g) de pancetta tranchée finement 3 c.
RECETTES CUISSES DE POULET RÔTIES GLACÉES à L’ABRICOT et au BALSAMIQUE Fonction: ROAST Température: 425˚F (218˚C); 375˚F (192˚F) Cuisson: 10 minutes; 25 minutes (environ) Portions: 4 INGRÉDIENTS 4 cuisses de poulet 2 c. à soupe (30 ml) de beurre non salé L tasse (80 ml) d’abricots en conserve 2 c. à soupe (30 ml) de vinaigre balsamique 1 c. à soupe (15 ml) de romarin frais haché 1 c. à thé (5 ml) de thym frais 1 gousse d’ail écrasée Sel et poivre au goût MARCHE À SUIVRE 1.
RECETTES Tzatziki Sauce 1. Verser le yogourt dans une passoire fine placée au-dessus d’un bol afin de récupérer le liquide. Laisser égoutter le yogourt de 3 à 8 heures. Jeter le liquide. 2. Couper le concombre en dés et saler. Laisser reposer 20 minutes. Bien égoutter. 3. Mélanger le yogourt, le concombre, le jus de citron, la menthe et l’échalote dans un petit bol. Saler et poivrer au goût. Rôtir le gigot d’agneau 1. Déposer le gigot sur une surface de travail et bien l’assécher.
RECETTES NOTE L’acide citrique, que l’on retrouve dans les oranges et le jus de citron et de lime, peut endommager le fini émaillé des plats de cuisson et des grilloirs. Pour cuire des aliments à forte teneur en acide citrique, nous recommandons fortement d’en tapisser la surface de papier sulfurisé ou aluminium, afin de prlonger la vie de ces accessoires. PÂTE À PIZZA Portions: 2 pizzas de 11 po INGRÉDIENTS ¾ tasse + 2 c. à soupe (210 ml) d’eau chaude 1 ¾ c. à thé (9 ml) de levure sèche 1 c.
RECETTES SUGGESTIONS DE PIZZA Toutes les combinaisons de pizza sont appréciables. Les meilleurs ingrédients sont encore les restes du frigo. Voici quelques suggestions qui vous mettront l’eau à la bouche. Margarita Préparer la pâte selon la recette à la page 142. Couper la pâte en deux et l’étirer pour couvrir une plaque à pizza de 11 po. Napper avec ½ tasse de sauce tomate, ajouter ¾ tasse de fromage bocconcini tranché, du basilic et de l’origan frais pour garnir. Asperger d’huile d’olive.
RECETTES PIZZAS POUR DESSERT Banane et chocolat Préparer la pâte selon la recette à la page 138. Couper la pâte en deux et l’étirer pour couvrir une plaque à pizza de 11 po. Badigeonner la pâte de beurre fondu et saupoudrer d’une c. à soupe (15 ml) de sucre et de ¼ c. à thé de cannelle. Placer la grille à la position centrale. Tourner le cadran de FONCTIONS à PIZZA et désactiver le réglage FROZEN. Cuire à la TEMPÉRATURE et au TEMPS requis par défaut.
RECETTES SCONES à l’ORANGE et aux CANNEBERGES Fonction: BAKE Température: 400˚F (205˚C) Cuisson: Environ 25 minutes Portions: 6 INGRÉDIENTS 1 ¼ tasse (300 ml) de farine tout usage ¼ tasse (60 ml) de farine de blé entier ¼ c. à thé (1 ml) de soda à pâte 1 c. à thé (5 ml) de poudre à pâte 3 c. à soupe (45 ml) de sucre ¼ c. à thé (1 ml) de sel ¼ tasse (60 ml) de beurre froid (coupé en dés) ¼ tasse (60 ml) de graisse végétale ¼ tasse (60 ml) de canneberges séchées 1 c.
RECETTES GALETTE aux POMMES style STRUDEL Fonction: BAKE Température: 400˚F (205˚C) pour 20 minutes; puis 350˚F (175˚C) pour 40 minutes (cuisson totale: 1 heure) Portions: 1 galette de 9 po Une galette est très simple à faire. Il suffit de rouler la pâte, d’y ajouter la garniture au centre et de replier les bords. Et voilà ! Ingrédients pour la pâte 1 ¼ tasse (300 ml) de farine tout usage 2 c.
RECETTES 5. Placer la grille à la position inférieure. Tourner le cadran de FONCTIONS à BAKE. Régler la TEMPÉRATURE à 400˚F (205˚C) et le TEMPS à 20 minutes. Activer en pressant le bouton START/CANCEL. 6. Cuire la galette aux pommes pour le temps prévu. Abaisser ensuite la température à 350˚F (175˚C) et cuire 40 minutes additionnelles ou jusqu’à ce que la croûte soit dorée. 7. Laisser refroidir avec de servir. Couper en triangles et servir avec de la crème glacée à la vanille.
RECETTES BISCUITS À LA BRISURE DE CHOCOLAT Fonction: COOKIE Température: 350˚F (175˚C) Cuisson: 11 minutes Portions: 36 biscuits INGRÉDIENTS L tasse (80 ml) de sucre ¾ tasse (180 ml) de sucre brun ¾ tasse (180 ml) de beurre non salé, ramolli 1 œuf 1 c. à thé (5 ml) de vanille 2 oz (60g) de chocolat mi-sucré, fondu 1 ¾ tasse (420 ml) de farine tout usage ¾ c. à thé (7 ml) de soda à pâte 2 c. à thé (10 ml) de fécule de maïs ¾ c.
RECETTES BARRES au CITRON avec CROÛTE à la NOISETTE Fonction: BAKE Température: 350˚F (175˚C) Portions: 6 1 tasse (250 ml) de farine 2 c. à soupe (30 ml) de sucre en poudre ½ tasse (175 ml) de beurre non salé froid ¼ c. à thé (1 ml) de sel ¼ tasse (60 ml) de noisettes 2 œufs ¾ tasse (180 ml) de sucre ¼ tasse (180 ml) de jus de citron frais ¼ c. à thé (1 ml) de poudre à pâte 2 c. à soupe (30 ml) de farine tout usage 6 c.
RECETTES GÂTEAU au FROMAGE à la VANILLE Fonction: BAKE Température: 350˚F (175˚C) pour la croûte; 325˚F (162˚C) pour le gâteau Cuisson: 7 minutes pour la croûte; 55 minutes pour le gâteau Portions: 1 gâteau rond de 9 po INGRÉDIENTS 1½ tasse (375 ml) de chapelure de biscuits graham 3 c. à soupe (45 ml) de beurre fondu 24 oz (750 g) de fromage à la crème, à la température de la pièce 1 tasse (250 ml) de crème sûre ¾ tasse (180 ml) de sucre 2 c. à thé (10 ml) de vanille 3 œufs, séparés MARCHE À SUIVRE 1.
NOTES 151
GARANTIE LIMITÉE D’UN AN Sous réserve des conditions décrites cidessous, HWI Breville garantit pendant une période d’un an de la date d’achat que cet appareil ne présente aucun défaut de matériel ou de fabrication.
NOTES 153
NOTES 154
NOTES 155