7085-K_Gour Elec_Eng-SP.qxd 11/1/07 2:28 PM Page 2 OWNER’S MANUAL / MANUAL DEL PROPIETARIO ASSEMBLY AND OPERATING INSTRUCTIONS INSTRUCCIONES DE ARMADO Y OPERACIÓN SAVE THIS MANUAL FOR FUTURE REFERENCE GUARDE ESTE MANUAL PARA REFERENCIA FUTURA WARNING/ADVERTENCIA HAZARDOUS EXPLOSION MAY RESULT IF THESE WARNINGS AND INSTRUCTIONS ARE IGNORED. READ AND FOLLOW ALL WARNINGS AND INSTRUCTIONS IN THIS MANUAL TO AVOID PERSONAL INJURY, INCLUDING DEATH OR PROPERTY DAMAGE.
7085-K_Gour Elec_Eng-SP.qxd 11/1/07 2:28 PM Page 3 IMPORTANT SAFEGUARDS WE WANT YOU TO ASSEMBLE AND USE YOUR SMOKER AS SAFELY AS POSSIBLE. THE PURPOSE OF THIS SAFETY ALERT SYMBOL IS TO ATTRACT YOUR ATTENTION TO POSSIBLE HAZARDS AS YOU ASSEMBLE AND USE YOUR SMOKER. WHEN YOU SEE THE SAFETY ALERT SYMBOL, PAY CLOSE ATTENTION TO THE INFORMATION WHICH FOLLOWS! READ ALL SAFETY WARNINGS AND INSTRUCTIONS CAREFULLY BEFORE ASSEMBLING AND OPERATING YOUR SMOKER. WARNING • This smoker is to be used outdoors only.
7085-K_Gour Elec_Eng-SP.qxd 11/1/07 2:28 PM Page 4 WARNING • Use caution when reaching into or under smoker. Always wear oven mitts/gloves to protect your hands from burns. Avoid touching hot surfaces. • Base pan should never be touched or moved while smoker is in operation or if still hot. • The side door is for viewing purposes and adding water to water pan ONLY. Never add wood or any other material through the side door.
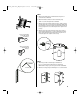
7085-K_Gour Elec_Eng-SP.qxd 11/1/07 2:28 PM Page 5 ASSEMBLY INSTRUCTIONS READ ALL SAFETY WARNINGS & ASSEMBLY INSTRUCTIONS CAREFULLY BEFORE ASSEMBLING OR OPERATING YOUR SMOKER. FOR MISSING PARTS, PLEASE CALL CUSTOMER SERVICE AT 800-527-0717. (Proof of purchase will be required.) 11 10 Inspect contents of the box to ensure all parts are included and undamaged.
7085-K_Gour Elec_Eng-SP.qxd 11/1/07 2:28 PM Page 6 STEP 1 a. Attach wooden handle halves to metal brackets using 8-32 x w" screws and nuts as illustrated. b. Attach two handle assemblies to side of smoker body using 10-24 x s" screws and square nuts as illustrated. c. Attach the three lower support brackets (V-clips) to inside of smoker body through the three 4" holes that are located about halfway down the smoker body (lower level).
7085-K_Gour Elec_Eng-SP.qxd 11/1/07 2:28 PM Page 7 STEP 3 a. Place lava rock pan inside base pan and align the hole in the side of each pan. b. Working from the inside of the lava rock pan, feed the cord of the electric element through the aligned holes until the back plate of the electric element is resting against the wall of the lava rock pan. Empty the entire bag of lava rocks into the pan and spread evenly. c. Lift the electric element up and position it on top of lava rocks.
085-K_Gour Elec_Eng-SP.qxd 11/1/07 2:28 PM Page 8 OPERATING INSTRUCTIONS PLACE THE SMOKER OUTDOORS ON A HARD, LEVEL, NON-COMBUSTIBLE SURFACE AWAY FROM ROOF OVERHANG OR ANY COMBUSTIBLE MATERIAL. NEVER USE ON WOODEN OR OTHER SURFACES THAT COULD BURN. PLACE THE SMOKER AWAY FROM OPEN WINDOWS OR DOORS TO PREVENT SMOKE FROM ENTERING YOUR HOUSE. IN WINDY WEATHER, PLACE THE SMOKER IN AN OUTDOOR AREA THAT IS PROTECTED FROM THE WIND.
7085-K_Gour Elec_Eng-SP.qxd CAUTION: 11/1/07 2:28 PM Page 9 Before each use, check handles and support brackets to make sure they are securely fastened. 4. Place the smoker body on base pan, making sure the water pan is still in place. 5. Carefully, fill water pan with warm water or marinade to 1" below the rim. A full pan holds 4 quarts of water and will last for approximately 2-3 hours. Do not overfill or allow water to overflow from water pan.
7085-K_Gour Elec_Eng-SP.qxd 11/1/07 2:28 PM Grilling Page 10 1. Remove dome lid and smoker body from base pan. 2. Place a cooking grill on the base pan. 3. Place food on the cooking grill in a single layer with space between each piece. 4. Place dome lid on base pan and plug the grill into electric outlet. For best results, the dome lid should be placed on base pan when grilling food. WARNING: Always use a 3-wire grounded outlet wired for 120 volts which is GFCI protected at 15 or 20 amps.
7085-K_Gour Elec_Eng-SP.qxd 11/1/07 2:28 PM Page 11 Additional flavoring wood should not have to be added during the cooking process, however, it may be necessary when cooking very large pieces of meat. Follow the instructions and cautions below to avoid injury while adding wood. Adding Wood During Cooking 1. Unplug smoker from electric outlet. Remove dome lid by tilting the dome lid toward you to allow heat and steam to escape away from your face.
7085-K_Gour Elec_Eng-SP.qxd 11/1/07 2:28 PM Page 12 If using both cooking grills, wear oven mitts to remove food and the top cooking grill. Move food aside on the lower cooking grill and pour water into water pan through the lower cooking grill. Pour slowly to avoid splashing or overfilling. 1" (2.5 cm) 4. Set the top cooking grill on the upper support brackets and place food back on the cooking grill. 5. Place the dome lid on smoker body.
7085-K_Gour Elec_Eng-SP.qxd 11/1/07 2:28 PM Page 13 AFTER-USE SAFETY WARNING 11 • There is no ON/OFF control switch. Always turn the smoker “OFF” by unplugging cord from electric outlet when adding water and wood, or when finished cooking. • Always allow the smoker and all components to cool completely before handling. • Before smoker can be left unattended, remaining embers and ashes must be removed. Use caution to protect yourself and your property.
7085-K_Gour Elec_Eng-SP.qxd 11/1/07 2:28 PM Page 14 MEDIDAS DE PRECAUCIÓN IMPORTANTES DESEAMOS QUE USTED ENSAMBLE Y USE SU AHUMADOR DE LA MANERA MÁS SEGURA POSIBLE. EL PROPÓSITO DE ESTE SÍMBOLO DE ALERTA DE SEGURIDAD ES LLAMAR SU ATENCIÓN A POSIBLES PELIGROS MIENTRAS ENSAMBLA Y USA SU AHUMADOR.
7085-K_Gour Elec_Eng-SP.qxd 11/1/07 2:28 PM Page 15 ADVERTENCIA • Tenga precaución cuando alcance cosas dentro o debajo del ahumador. Use siempre mitones o guantes resistentes al calor para proteger sus manos de quemaduras. Evite tocar superficies calientes. • La bandeja de base nunca debe ser tocada o movida mientras el ahumador está funcionando o si aún está caliente. • La puerta lateral es ÚNICAMENTE para observar el contenido y para agregar agua a la bandeja para agua.
7085-K_Gour Elec_Eng-SP.qxd 11/1/07 2:28 PM Page 16 INSTRUCCIONES DE ENSAMBLAJE LEA TODAS LAS ADVERTENCIAS DE SEGURIDAD E INSTRUCCIONES DE ENSAMBLAJE CUIDADOSAMENTE ANTES DE ENSAMBLAR U OPERAR SU AHUMADOR. PARA PIEZAS FALTANTES, POR FAVOR LLAME A SERVICIO AL CLIENTE AL 800-527-0717. (Se requerirá prueba de compra.) 11 10 Inspeccione el contenido de la caja para asegurarse que todas las partes estén incluidas y sin daños.
7085-K_Gour Elec_Eng-SP.qxd 11/1/07 2:28 PM Page 17 PASO 1 a. Fije las mitades de la manija de madera a los soportes de metal utilizando tornillos y tuercas de 8-32 x w" como se ilustra. b. Fije dos conjuntos de manijas a los lados de la unidad principal del ahumador usando tornillos y tuercas cuadradas de 10-24 x s" como se ilustra. c.
7085-K_Gour Elec_Eng-SP.qxd 11/1/07 2:28 PM Page 18 PASO 3 a. Coloque la bandeja para piedras volcánicas dentro de la bandeja de base y alinee el agujero en el lado de cada bandeja. b. Trabaje desde adentro de la bandeja para piedras volcánicas alimentando el cable del elemento eléctrico a través de los agujeros ya alineados hasta que la placa trasera del elemento eléctrico esté apoyada contra la bandeja para piedras volcánicas.
7085-K_Gour Elec_Eng-SP.qxd 11/1/07 2:28 PM Page 19 INSTRUCCIONES DE USO COLOQUE EL AHUMADOR EN EXTERIORES, EN UNA SUPERFICIE DURA, NIVELADA Y NO INFLAMABLE ALEJADA DE CUALQUIER ALERO DE TECHO O CUALQUIER OTRO MATERIAL INFLAMABLE. NUNCA USE EN SUPERFICIES DE MADERA U OTRAS QUE PUDIERAN QUEMARSE. COLOQUE EL AHUMADOR LEJOS DE VENTANAS ABIERTAS O PUERTAS PARA PREVENIR QUE EL HUMO ENTRE A SU CASA. EN CLIMA VENTOSO, COLOQUE EL AHUMADOR EN UN ÁREA DE EXTERIORES EN LA QUE ESTÉ PROTEGIDO DEL VIENTO.
7085-K_Gour Elec_Eng-SP.qxd 11/1/07 2:28 PM Page 20 PRECAUCIÓN: Antes de cada uso, revise las manijas y soportes de apoyo para asegurarse de que estén bien sujetos. 4. Coloque la unidad principal del ahumador sobre la bandeja de base, asegurándose de que la bandeja para agua siga en su lugar. 5. Cuidadosamente, llene la bandeja para agua con agua tibia o marinada hasta 1" (2.54 cm) por debajo del borde. Una bandeja llena contiene 1 galón de agua y durará aproximadamente 2-3 horas.
7085-K_Gour Elec_Eng-SP.qxd 11/1/07 2:28 PM Page 21 1. Quite la tapadera de domo y la unidad principal de la bandeja de base. Asar 2. Coloque una rejilla para cocinar sobre la bandeja de base. 3. Coloque la comida sobre la rejilla para cocinar en una sola capa dejando espacios entre cada pieza. 4. Coloque la tapa de domo sobre la bandeja de base y conecte la parilla al tomacorriente.
7085-K_Gour Elec_Eng-SP.qxd Para Agregar Leña Mientras Cocina 11/1/07 2:28 PM Page 22 No debiera tener que agregar madera saborizante adicional durante el proceso de cocción, sin embargo, podría ser necesario cuando esté cocinando pedazos de carne muy grandes. Siga las instrucciones y precauciones que aparecen abajo para evitar lesiones cuando agregue madera. 1. Desconecte el ahumador del tomacorriente.
7085-K_Gour Elec_Eng-SP.qxd 11/1/07 2:28 PM Page 23 4. Ponga la rejilla para cocinar en los soportes de apoyo superiores y coloque la comida de nuevo sobre la rejilla para cocinar. 5. Coloque la tapa de domo sobre la unidad principal del ahumador. Conecte de nuevo el ahumador al tomacorriente y permita que la comida continúe cocinándose. 1" (2.5 cm) OPCIÓN 2: Para agregar agua a través de la puerta lateral 1. Desconecte el ahumador del tomacorriente. 2. Aléjese y cuidadosamente abra la puerta lateral.
7085-K_Gour Elec_Eng-SP.qxd 11/1/07 2:28 PM Page 24 SEGURIDAD PARA DESPUÉS DEL USO ADVERTENCIA • No hay interruptor de ENCENDIDO/APAGADO. Siempre apague el ahumador desconectando el cable del tomacorriente cuando agregue agua y madera, o cuando termine de cocinar. • Siempre permita que el ahumador y sus partes se enfríen completamente antes de manipularlos. • Antes de desatender el ahumador, las brasas y cenizas restantes deben ser quitadas del ahumador.
7085-K_Gour Elec_Eng-SP.qxd 11/1/07 2:28 PM Page 1 ONE YEAR LIMITED WARRANTY For one year from date of purchase, The Brinkmann Corporation warrants the Gourmet Electric Smoker against defects due to workmanship or materials to the original purchaser.