User’s Manual Matrix 200 Switcher
Extron’s Warranty Extron Electronics warrants the product against defects in materials for a period of two years and defect in workmanship for a period of two years from the date of purchase.
SM EXTRON ELECTRONICS / RGB SYSTEMS, INC. 1230 South Lewis Street, Anaheim, CA 92805 (800) 633-9876 (714) 491-1500 FAX (714) 491-1517 U.S.A.
Contents Chapter 1 - Introduction to the Matrix 200 General .......................................................................................................................... 1-1 I/O Modules ...................................................................................................... 1-1 Configurations ................................................................................................... 1-1 Standard Features .....................................................................
Contents Chapter 4 - Using the Front Panel Controller Front Panel Controller (FPC) Operation ......................................................................... 4-1 Selecting Menus Using the SmartControl™ Keypad ...................................................... 4-2 Power On Message ........................................................................................................ 4-2 Tie Menu (default menu) .....................................................................................
Contents Appendix A - Part Numbers, Glossary and Troubleshooting Related Part Numbers ................................................................................................... A-1 Switcher Module Part Numbers ........................................................................ A-1 Option Kit Part Numbers ................................................................................... A-1 BNC-4 HR Cables (Mini High Resolution BNC Cables) .....................................
Contents CMD20 (44h) - Operate Program .................................................................... B-16 CMD22 (46h) - Set Clock ................................................................................ B-16 CMD23 (47h) - Request the Clock Information ................................................ B-17 CMD24 (48h) - Turn Executive Mode On/Off ................................................... B-17 CMD25 (49h) - Set RGB Delay .................................................................
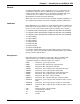
Matrix 200 User’s Manual 1 Chapter One Introduction to the Matrix 200 I/O Modules Configurations Standard Features Optional Features Matrix 200 Module Specifications
Chapter 1 • Introduction to the Matrix 200 General Each Extron Matrix 200 is custom designed to the user’s specifications. The configuration is built from various combinations of ten I/O modules. The I/O modules and possible configurations are listed below. The Matrix 200 can be controlled from a host computer, a Front Panel Controller (FPC), or a QuickSwitch™ Front Panel Controller (QS-FPC). Matrix units can also be interconnected to expand the switching capabilities for up to 48 inputs by 48 outputs.
Chapter 1 • Introduction to the Matrix 200 Standard Features • • • • • • • • Microprocessor control, with battery backup RS-232/RS-422 control Complete breakaway Composite and S-Video Genlock RGB video delay switching Separate video and audio mute Security Lockout 250 MHz bandwidth Microprocessor Control The Matrix 200 is programmable from a host system, or from the optional Front Panel Controller.
Chapter 1 • Introduction to the Matrix 200 Optional Features • • • • Front Panel Controller (FPC) SmartControl microprocessor QuickSwitch™ Front Panel Controller (QS-FPC) Redundant power supply Front Panel Controller (FPC) The Front Panel Controller (FPC) provides local control of all Matrix 200 Switcher functions. It is supplied as an optional accessory to the Matrix 200 and is intended for users who wish to supplement normal RS-232/RS-422 computer control with local or remote operator control.
Chapter 1 • Introduction to the Matrix 200 INPUTS 1 2 3 1 2 3 4 5 4 5 6 6 7 8 7 8 ENTER PRESET VIEW ESC RGBS VIDEO AUD 1 AUD 2 OUTPUTS QS - FPC MATRIX SWITCHER QuickSwitch™ Front Panel Controller (QS-FPC) The QuickSwitch Front Panel Controller (QS-FPC) provides local control of all Matrix 200 Switcher functions.
Chapter 1 • Introduction to the Matrix 200 Sample Configuration The picture here shows one example of the I/O modules that could be installed in six planes of a Matrix 200. See page 1-1 for I/O modules and possible configurations. For example, an 8 x 8 RGBS switcher requires: three 8 x 8 high-resolution analog modules (HRAM) and one 8 x 8 sync module (Syn). This would occupy the Red, Green, Blue and one Sync/Video planes.
Chapter 1 • Introduction to the Matrix 200 Matrix 200 I/O Module Specifications Power . Dimensions . . Shipping Weight . Operating Temperature . Storage Temperature . MTBF . Approved . Warranty . 100 - 240 VAC, 50/60 Hz, 60 Watts 17" W, 15" D, 6.8" H 43 cm W, 38 cm D, 17 cm H 22 lbs (10 kg) 0° C - 50° C -20°C - 70° C 35,000 Hours (demonstrated) CE, UL, CUL Listed 2 years, parts and labor HRAM Video (High Resolution Analog Module) Connectors . BNC Bandwidth . 250 MHz (-3 dB) Crosstalk: at 10 MHz .
Chapter 1 • Introduction to the Matrix 200 Audio Module, General Input Impedance . High Z (>10k ohms, typical) Input Voltage Level . To 6 V p-p into 600 ohms Output Impedance . Low, capable of driving 600 ohms, balanced Output Level . Near zero to unity gain Connectors . 6-conductor, Phoenix® Captive Screw Terminal Signal to noise . Better than 110 dB, 20Hz-20kHz Total Harmonic Distortion + Noise . Worst case 0.03% @ 20kHz, 30 V p-p . (Differential Output) Adjacent Channel Crosstalk .
Chapter 2 • Hardware Installation Matrix 200 User’s Manual 2 Chapter Two Hardware Installation IEC Power Panel Removing the Matrix 200 Cover Installing Front Panels (local & remote) RS-232/RS-422 Connections Installing Redundant Power Supply Installing Security Feature Installing I/O Modules Extron • Matrix 200 • User’s Manual
Chapter 2 • Hardware Installation This chapter covers only the installation of the Matrix 200 hardware. Connecting its inputs and outputs is covered in Chapter 3 and setup is covered in Chapter 4. IEC Power Panel The IEC Power Panel consists of an On/Off switch, a fuse cover and two male power connectors. The second connector is provided for a redundant power supply.
Chapter 2 • Hardware Installation Removing the Matrix 200 Cover As a preliminary step, follow this procedure when making any hardware changes which require access to the interior of the Matrix 200 unit. Caution: The ambient temperature of the rack should not exceed 50° C. To insure proper ventilation, we recommend that you allow a minimum of one rack unit spacing above and one below the Matrix 200 if forced air cooling is not used. 1. Turn off input power to the Matrix 200; disconnect power cord(s). 2.
Chapter 2 • Hardware Installation Installing a Front Panel Controller Remove the cover (see “Removing the Matrix 200 Cover” on page 2-2) and then do the following: 1. Remove the four No.10 screws and dress washers (items & ) from the Blank Front Panel. Caution: Take care to remove the four spacers from the rear of the panel. See picture below, left. 2. Disconnect the Power Indicator cable from J13 on the right side of the main controller board and remove the panel. See in the picture below right. 3.
Chapter 2 • Hardware Installation Replacing a Blank Panel with a QuickSwitch Front Panel Controller _______ Installing a front panel may be easier by placing the Matrix face-up, being careful to protect the BNC connectors from damage. After removing the Matrix 200 cover, remove the Blank Front Panel as follows: 1. Remove the four screws and dress washers (items & at left) from the existing front panel. Take care to remove the four spacers from the rear of the panel. 2.
Chapter 2 • Hardware Installation Installing a Blank Front Panel Remove the cover (see “Removing the Matrix 200 Cover” on page 2-2) and then do the following: 1. Disconnect the modular cable from the plug on the FPC to the RJ45 connector on the Matrix 200 main controller board. See in the picture below for the connector location. 2. Remove the four No.10 attaching screws and dress washers (items & in pictures below) from the front panel and remove the panel.
Chapter 2 • Hardware Installation Installing the FPC for Remote Operation The rear panel of the Matrix 200 has an 8-conductor RJ45 connector used to plug a cable from a remote FPC. The remote FPC can be used independently, or as a second FPC, in parallel with one mounted to the front of the Matrix 200. The use of one or more FPCs does not interfere with normal RS-232/RS-422 control of the Matrix 200 switcher. The diagram below shows the cable connection from the remote FPC to the Matrix 200.
Chapter 2 • Hardware Installation RS-232/RS-422 Communications The Matrix 200 can be controlled by a host system through an RS-232/RS-422 interface. The interface allows the user to write programs to configure and automate the operation of the Matrix 200. This includes making changes dynamically when commanded by the host controller and when informing the host of the Matrix status. Certain important changes in status are reported to the host automatically.
Chapter 2 • Hardware Installation Checksum Disable Jumper The Matrix 200 is shipped with JMP3 installed to disable the Checksum feature. To enable it, remove the top cover (page 2-2) and remove JMP3. See picture below. _______ Note: When Checksum is disabled, the Cks1 and Cks2 bytes must still be included. They must be data bytes (have a value between 80h and FFh). Enabling the Part Number Jumper The Matrix 200 reports its unit part number if the JMP4 jumper on the main board is installed.
Chapter 2 • Hardware Installation Installing a Redundant (second) Power Supply To install a redundant power supply in a Matrix 200, disconnect the power source, remove the Matrix from its rack mount, and place it on a clean workspace. Refer to page 2-2 to remove the cover. With the cabinet open, do the following: 1. Mount the new power supply on the four bolts projecting up from the bottom of the cabinet and secure it with four nuts. This position is parallel to that of the primary power supply.
Chapter 2 • Hardware Installation Adding an Audio Module Tools for Installation: 3/16" flat screwdriver #4 Phillips screwdriver #6 Phillips screwdriver Wire cutters Audio Option Kit: Qty Description 6 Internal Tooth Lock Washers 1 Audio Module with: 1 3" Ribbon Cable 6 1-5/8 Screws 16 Phoenix Connectors _______ Do not use this procedure unless your Matrix 200 is up to date. See previous page. 1. Remove the Matrix top cover (procedure on page 2-2). 2.
Chapter 2 • Hardware Installation 5. Unpack the Audio Matrix module and locate the following: · The bracketed attachment is the power supply. · Two rows of female Phoenix audio connectors, eight in each row. Six pins per connector. · Board address DIP switches. (See at right.) · 3-inch ribbon cable attached. (Not visible in the picture to the right.) _______ The address DIP switches are factory-set. See right end of picture above. They should be set to represent an address of five (0101 binary). 6.
Chapter 2 • Hardware Installation 11. Plug the remaining I/O Ribbon cables from each module to a connector on the Main Controller board (See below). Since the Main Board connectors are the same, connect the cables for neatness and convenience. For example, the illustration below shows the Red I/O module connected to J5, the Green to J6, etc. Warning: When working close to the other I/O modules, be careful that you do not change any other DIP switch settings. 12.
Chapter 2 • Hardware Installation Installing I/O Modules in the Rear Panel Tools for Installation: 3/16" flat screwdriver #4 Phillips screwdriver #6 Phillips screwdriver 9/16" Socket/nutdriver There are three types of modules that can be installed in the rear panel of the Matrix 200: HRAM module, for RGB; Sync module, for Horizontal and/or Vertical Sync; and Composite Video module for Composite Video or S-Video. Positions, or “planes” 1, 2, and 3 will accommodate only HRAM modules.
The picture to the right shows some physical differences between these two modules. The Sync module has some components placed on the insides of the boards, while the Composite Video module has none. 1 5 2 3 4 6 7 8 INPUTS The Sync termination DIP switches below will be set for 75 ohms (on) or 510 ohms (off). The switches (1 - 8) correspond to the inputs on the right (1 - 8).
Chapter 2 • Hardware Installation Installing FPC/QS-FPC Software Update 1. If the FPC/QS-FPC is mounted on the Matrix 200, refer to the procedure on page 2-2 to open the cabinet and then continue with step 2. ___________ Electro-Static Discharge (ESD) can damage IC chips, even when it is not enough to be humanly detected (felt, heard or seen). Do NOT touch IC chips without being electrically grounded. 2.
Matrix 200 User’s Manual 3 Chapter Three Rear Panel Connections Multiple Output Connections Genlock Connections RGB Input Connections Composite Video Input Connections S-Video Input Connections Audio Terminal Connections
Chapter 3 • Rear Panel Connections Multi-Output Connection When using the Matrix 200 to switch different types of video signals, the signal output from the switcher is in the same format as the corresponding input. That is, RGB and Sync (composite or separate H&V) signals will pass through the RGB and SYNC output; NTSC and PAL video signals will pass through the composite video output; and S-Video will pass through the S-Video output.
Chapter 3 • Rear Panel Connections Genlock Connections The Matrix 200 is designed to use an external Genlock signal to synchronize composite video or S-video switching. If connected, Genlock can be programmed either from the optional Front Panel Controller, or from a Host system (through the RS-232/ RS-422 port). O U T P U T S The illustration here shows the Genlock connections.
Chapter 3 • Rear Panel Connections RGB Input Connections with Right & Left Audio AV SOURCE UNIT AUDIO OUTPUT VIDEO OUTPUT L R R G B IN P U TS IN P U TS RED G RE EN ( SYNC) IN P U TS IN P U TS IN P U TS INP UTS INP UTS SYNC/ VIDEO SYNC/ VIDEO BL UE IN P U TS OU TPU TS OU TPU TS THIS SWITCHER IS CONFIGURED FOR 8 X 8 RGBS, 8 X 8 COMPOSITE VIDEO, AND 8 X 8 AUDIO. R G B VIDEO INPUT VIDEO DESTINATION UNIT AUDIO DESTINATION UNIT _______ Audio Connections may or may not be used.
Chapter 3 • Rear Panel Connections RGBS Input Connections with Right & Left Audio AV SOURCE UNIT AUDIO OUTPUT VIDEO OUTPUT L R SYNC OUTPUT R G B IN P U TS H&V IN P U TS RED G RE EN ( SYNC) IN P U TS IN P U TS IN P U TS INP UTS INP UTS SYNC/ VIDEO SYNC/ VIDEO BL UE IN P U TS OU TPU TS OU TPU TS THIS SWITCHER IS CONFIGURED FO 8 X 8 COMPOSITE VIDEO, AND 8 X 8 A R G B H&V VIDEO INPUT SYNC INPUT VIDEO DESTINATION UNIT AUDIO DESTINATION UNIT _______ Audio Connections may or may not be
Chapter 3 • Rear Panel Connections RGBHV Input Connections with Right & Left Audio AV SOURCE UNIT AUDIO OUTPUT VIDEO OUTPUT L R SYNC OUTPUT R G B IN P U TS H IN P U TS RED G RE EN ( SYNC) IN P U TS IN P U TS V IN P U TS IN PU TS IN P U TS SYNC/ VIDEO SYNC/ VIDEO BL UE IN P U TS OU TPU TS OU TPU TS SWITCHER IS CONFIGURED THISTHIS SWITCHER IS CONFIGURED FOR 8 FOR X 8 RGBS, 8 X 8 COMPOSITE VIDEO, AND 8 X 8 AUDIO.
Chapter 3 • Rear Panel Connections Composite Video Input Connections NTSC and PAL are television or VCR type signals on a single coax cable, which may or may not have stereo audio. For this application, the Matrix 200 uses one Composite Video module, shown below in the right-most position. Possible uses include: NTSC or PAL, with or without right & left audio follow. Connect the output of an NTSC/PAL video source to a Video module input. (See illustration below.
Chapter 3 • Rear Panel Connections S-Video Input Connections S-Video (S-VHS) is typically the output from the AV source on a 4-pin miniature din-type connector and must be converted to 2 BNC type connectors - one for Chroma (C) and the other for Luminance (Y). _______ For S-VHS to BNC interface, use Extron cable 26-353-01. To connect S-Video to the Matrix 200, the Matrix must be ordered with two composite video modules. Use one for Luminance (Y) and the other for Chroma (C).
Chapter 3 • Rear Panel Connections S-Video Input Connections with Right & Left Audio AUDIO OUTPUT AV SOURCE UNIT L R S-VIDEO OUTPUT Y C Extron p/n 26-353-01 LUMINANCE (Y) IN P U TS RED IN P U TS IN P U TS G REEN (SYNC) IN P U TS CHROMA (C) IN P U TS IN PU TS IN P U TS SYNC/ VIDEO SYNC/ VIDEO BLUE IN P U TS OU TPU TS OU TPU TS THIS SWITCHER IS CONFIGURED FOR 8 X 8 RGB, 8 X 8 S-VIDEO, AND 8 X 8 AUDIO.
Chapter 3 • Rear Panel Connections Audio Terminal Connections The rear of the Matrix 200 has two rows (16 sets) of audio connector pins below the BNC connectors. The top row is for 8 inputs and the bottom row for 8 outputs. Each group of six pins accommodates a left and a right audio channel. One sample is shown here. The 6-terminal screw (Phoenix®) connectors are supplied with the switcher. The connectors are wired to the audio cables using the captive screws inside the connectors.
Matrix 200 User’s Manual 4 Chapter Four Using the Front Panel Controller Power On Message Using the LCD Display Tie (default) Menus Selecting Menus with the Keypad Automating the Matrix 200 QuickSwitch Front Panel Controller
Chapter 4 • Using the Front Panel Controller Front Panel Controller (FPC) Operation Control/Indicator Function LCD display The Liquid Crystal Display (LCD) has two-rows and 16-columns of character positions. It displays the Matrix status, as well as menus used to configure the unit. Cursor keys Press Left/Right keys to step to the next accessible position. (Cursor skips over positions that cannot be accessed.) Press Up/Down keys to step through choices.
Chapter 4 • Using the Front Panel Controller Enter key/light Press to accept or store the current display changes. The light blinks when pressed. Escape key Press to cancel current operation or to return to default (TIE) menu. Selecting Menus Using the SmartControl™ Keypad First press Menu, and then press one of the following: [Escape] to select the default Tie (Connection) Menu [1] [2] [3] to select Copy menu. (copy a configuration) to select RGB Sync Delay menu. to select Mute menu.
Chapter 4 • Using the Front Panel Controller Tie Menu (default menu) The Tie Menu is the default menu for the Matrix 200. Used to make all input/ output connections, this menu has four submenus (Tie levels): Tie Gang, Tie All, Tie Group, and the Tie Individual Menus. See examples on the next page. How to select the Default Menu. This menu is displayed automatically (immediately after the Power On message) when the Matrix 200 is powered on.
Chapter 4 • Using the Front Panel Controller How I/O Modules Are Handled Each Matrix 200 is custom designed, therefore, there could be different combinations of I/O modules consisting of RGB, Sync, Video and/or Audio modules. Each I/O module occupies a separate plane and can be handled in any of four ways. The LCD displays below show four examples of submenu Tie Levels. These will be explained in detail later in this chapter. 1. The first Tie Level ties “All” modules together.
Chapter 4 • Using the Front Panel Controller Changing Tie Submenus Many of the menus have submenus. To change Tie level, use the Left/Right cursor keys to place the cursor at (0,3) under the >. Use the Up/Down cursor keys to display the desired level. The choices that appear will depend on how the Matrix is configured. For example, if a Matrix has RGBS, Composite Video and Audio, the Tie Menu choices will be: ALL, RGB, Red, Grn, Blu, Syn, Cv2 and Aud.
Chapter 4 • Using the Front Panel Controller Tie Group Level The Matrix 200 has three I/O Gangs: RGBS, Video and Audio. The Tie Group Level allows one or more Gangs to be configured as a Group. On the FPC, each of these three Gangs has a button. In the LCD display, the Gang names are abbreviated as: RGB, VID, and AUD. Use the steps below to set up a group. For this example, combine RGB with Audio and set them up as a Group. 1. Press Escape to display the default Tie Menu (if not already displayed).
Chapter 4 • Using the Front Panel Controller Tie Individual Level (Breakaway) With this menu, connections are made separately to each of the I/O ports. For this example, connect Red input #5 to outputs #1 and #3. The actual display information may vary, depending on the Matrix configuration. 1. If not already in the default Tie Menu, select it by pressing Escape. Observe that the cursor is at the 0,3 position (under the >). 2. Use the Up/Down cursor keys to step through the choices. (e.g.
Chapter 4 • Using the Front Panel Controller Another way to choose a menu is to use the Up/Down buttons to step through the list of menus, and then press Enter when the desired menu appears. The last menu# used is stored. For example, if menu 3 was used last, the next time the menu button is pressed, menu 3 appears in the display. To select it again, the steps are Menu, followed by Enter. e.g.
Chapter 4 • Using the Front Panel Controller 1. With the Delay RGB->Sync menu displayed, the cursor should be at 1,0. Use the Up/Down cursor keys to select All, Out1, Out2, etc., for a specific output. 2. Use the cursor keys to position the cursor at position 1,11. Use the Up/Down cursor keys to sequence through the available delay times in increments of 1 second (0 thru 9) until the desired delay time is displayed. (If required, step to position 1,13 and set a value for “tenths” of a second.) 3.
Chapter 4 • Using the Front Panel Controller Automating the Matrix 200 The three stages of automating the Matrix 200 switching are “presets”, “sequences” and “programs”. The three menus that follow are associated with automating: • Routing configurations may be stored as Presets. (See Menu 4.) • These stored Presets may be assigned as timed steps, to run in a Sequence. (See Menu 5.) A Sequence may be started at any time, and will loop through preset steps until stopped.
Chapter 4 • Using the Front Panel Controller Save the Current Routing as a Preset (menu 4) 1. With the Preset menu displayed and the cursor under the “P”, use the Up/ Down cursor keys to display the SAVE menu, as shown here. The Preset number should be blinking. 2. Use the cursor keys to move the cursor to the lower right corner of the display (last position 1,15). Use the keypad to enter the preset number (1 - 20). 3. Press Enter to store the current routing configuration to memory. 4.
Chapter 4 • Using the Front Panel Controller Create a Timing Sequence (menu 5) 1. To create a timing sequence, place the cursor at the upper left corner of the LCD display (position 0,0), then use the Up/Down keys to select the Edit (ED) Submenu, shown here. Observe that the first step of the sequence (01) is displayed at the far right end of the top row. 2. Move the cursor to position 1,5 and enter the preset number (1-20) to be used in this step of the sequence. (Only saved presets may be used.) 3.
Chapter 4 • Using the Front Panel Controller Copying a Sequence (menu 5) When creating a new sequence, it may be easier to make a copy of an existing sequence and then edit the copy. The new, edited copy will be assigned a new sequence number. To make a copy of an existing sequence, do the following: 1. With the cursor at the upper left corner of the LCD display (position 0,0), use the Up/Down keys to select the Copy Submenu.
Chapter 4 • Using the Front Panel Controller Resume the Sequence (menu 5) After a sequence has been stopped, SmartControl remembers which sequence was running. To resume the stopped sequence, select the Operation Submenu and place the cursor under the >. Use the Up/Down keys to display “Resume”. Press Enter to resume running the sequence that was stopped. There is no sequence number required; it can only resume the sequence that was last running. Delete a Sequence (menu 5) 1.
Chapter 4 • Using the Front Panel Controller Program Start Time/Date (menu 6) The Program menu to the left has 7 selection points. Use the Left/Right cursor keys to step from one to another. Three selection points are indicated by the character ">". These are used to define the type of Program menu. The other four selection points are for entering data. 1.
Chapter 4 • Using the Front Panel Controller Function Menu (7) This menu provides access to different operational functions of the Matrix 200. It has three submenus: LED/LCD Contrast Submenu. Tie Level Access Submenu. Vertical Interval Switching Submenu. To select this menu, press Menu, followed by “7”. Selecting Function Submenus With the Function Menu displayed, use the cursor keys to position the cursor at position 0,0.
Chapter 4 • Using the Front Panel Controller Security Menu (8) The Security Menu can place certain restrictions on the use of the Matrix 200. The Executive Mode feature, when set to “ON”, will only allow the front panel buttons to be used for viewing the Matrix 200 configuration, although ties can be changed. If it is set to “OFF”, the front panel buttons can be used to change the configuration of the Matrix 200.
Chapter 4 • Using the Front Panel Controller Miscellaneous Menu (9) This menu is used to set the baud rate of the serial communications with the host controller via the RS-232/RS-422 serial port. The menu can also display the software version for the Main Controller and for the FPC. Provision for displaying and setting the internal clock is also provided. The five Miscellaneous Submenus are: • • • • • Show Local FPC Software Version Show Main Controller Software Version.
Chapter 4 • Using the Front Panel Controller Host Baud Rate Submenu (menu 9) This submenu displays the baud rate of the host controller: 9600 baud. This is a fixed value and cannot be reset. Show Clock Time & Date (menu 9) With the cursor at position 0,0, use the Up/Down cursor keys to display “CLK:” on the top row of the display. This submenu is used to display the date and time of the internal clock. This is a view-only submenu; no user input is required. Read clock date and time, as shown here.
Chapter 4 • Using the Front Panel Controller Configure Audio Menu (0) The first time power is applied to the audio board, the following conditions exist: No inputs are connected to outputs. All inputs are set for professional levels. All outputs are set for consumer levels. Refer to the sample display screens on this page.
Chapter 4 • Using the Front Panel Controller QuickSwitch™ Front Panel Controller (QS-FPC) Operation The QuickSwitch Front Panel Controller (see below) has its controls arranged in two areas. The left side is Input and Output buttons, and the right side is Control buttons and I/O Module Select buttons. The basic operation of this panel is that it allows the user to tie any one input to one or more outputs. (An output can never be tied to more than one input.
Chapter 4 • Using the Front Panel Controller I/O Module Select Buttons The four buttons on the far right side of the panel are used to select the I/O modules to be viewed or configured. The buttons and LEDs will not operate if the corresponding modules are not installed in your Matrix 200. For example, if your unit does not have audio, the AUD buttons and LEDs will not operate. When an I/O button is pressed, the associated LED for that I/O module will light to show that it is active.
Chapter 4 • Using the Front Panel Controller View – Pressing the View button lights its LED for to indicate a “view-only” mode to allow the display of the current Matrix 200 configurations. In this mode, pressing any input or output button will also light all LEDs for the input and output(s) that are part of that configuration. Pressing a button for any unassigned output will light all of the unassigned outputs. _______ Using the View mode prevents changing configurations by accident.
Chapter 4 • Using the Front Panel Controller Ties, Configurations and Presets Only one configuration may be active at one time, and only one Tie (or set of Ties) may be viewed at one time. Therefore, the only way to view each of the stored Presets is to load (activate) each preset and then view each set of Ties in that configuration (as shown in Example #2). Example #3 This example shows a configuration with seven Ties, or sets of Ties. RGBS and Audio are shown as separate lines.
Chapter 4 • Using the Front Panel Controller Matrix 200 Configuration Worksheet Matrix 200 Configuration Worksheet 4-25 Extron • Matrix 200 • User’s Manual
Matrix 200 User’s Manual 5 Chapter Five Windows® Software Control Installing the Software Operating Examples Using Help
Chapter 5 • Windows® Software Control Extron Matrix Control Software Extron supplies controller software that runs in the Windows® operating system, version 3.1 or later. Install the software from the 3.5” floppy disk, just like any other Windows application. (Run Setup.exe from the floppy disk.) This software, called “Matrix 100/200 Control Program”, works with both the Matrix 100 and Matrix 200 switchers. Its operation will be restricted to the features and configuration of your Matrix.
Chapter 5 • Windows® Software Control Control Program Example Drag an Input box to an Output box to make a “Tie” or connection. Clicking on an Input or an Output box will open an appropriate dialog box with a choice of icons for either Input Devices or Output Devices. Click on the desired icon to assign it to the selected Input or Output. A Text Box at the bottom, marked “Caption”, allows the user to type in a name for that device. Click “Ok” to close the dialog box.
Chapter 5 • Windows® Software Control Matrix 100/200 Help Double-click on the Help Icon (or press F1 at any time) to open the Help Window. Below is an example of what this might look like. As with all Windows® Help files, clicking on the underlined words will provide more detailed help. Extron’s Matrix 100/200 Help Contents To learn how to use Help, press F1 or choose Using Help from the Help menu.
Matrix 200 User’s Manual A Appendix A Part Numbers, Glossary and Troubleshooting Related Part Numbers Switcher Module Part Numbers BNC Cables Matrix 200 Part Numbering System Glossary of Terms Frequently Asked Questions
Appendix A • Part Numbers, Glossary and Troubleshooting Related Part Numbers Switcher Module Part Numbers Extron Part Part # Blank Front Panel .................................. 60-147-01 Front Panel Controller (FPC) ................. 60-146-01 QuickSwitch Front Panel Controller ....... 60-188-01 Audio Connectors (Phoenix) .................. 10-163-01 SVHS-to-BNC Adapter ........................... 26-353-01 GLI 350 ..................................................
Appendix A • Part Numbers, Glossary and Troubleshooting BNC-4 HR Cables (Mini High Resolution BNC Cables) Extron BNC-4 HR cables are mini high resolution (HR) BNC cables, color coded with solid colors and wrapped in a single jacket. The total cable diameter is 0.327". Extron recommends that when using signals with a scanning frequency of 15-125 kHz and running distances of 100 feet or more, high resolution BNC cables should be used to achieve maximum performance.
Appendix A • Part Numbers, Glossary and Troubleshooting Matrix 200 Part Numbering System Because the Matrix 200 can be factory-configured with many combinations of switcher modules, the diagram below illustrates how the part numbers are derived. All Matrix 200 part numbers begin with 60-138, the remaining digits are determined by other options. Use this diagram when ordering a new Matrix 200. _______ 1. S-Video uses two Composite Video modules that are tied together.
Appendix A • Part Numbers, Glossary and Troubleshooting Glossary of terms AC – Alternating Current – Flow of electrons that changes direction alternately. ADA – Analog Distribution Amplifier – A device that takes in one signal and distributes it to several outputs without “tying” those outputs together (buffered). Adapter – A linking device which allows two dissimilar devices to connect physically, and/or communicate electronically. AMPS – (Amperes) A unit of measurement for current.
Appendix A • Part Numbers, Glossary and Troubleshooting Breakaway – The ability to separate audio and video signals for the purpose of switching them independently. For example: an audio and video signal from the same source may be “broken away” and switched to different destinations. This is the opposite of the term “audio follow”. Brightness – Usually refers to the amount, or intensity of video light produced on a screen. Sometimes called “black level”.
Appendix A • Part Numbers, Glossary and Troubleshooting DAT (Digital Audio Tape) – A method developed by Sony and Hewlett-Packard for recording large amounts of information in digital form on a small cassette tape. It uses a rotating helical read/write head, similar to the technique used on a VCR. dB (Decibel) – The standard unit used to express gain or loss of power. It indicates the logarithmic ratio of output power divided by input power.
Appendix A • Part Numbers, Glossary and Troubleshooting H or H/V – Horizontal (H) sync, or Horizontal and Vertical sync combined (H/V). On connector panels, H identifies the connector for Horizontal Sync and H/V means it is also used for combined, or “composite” Horizontal and Vertical Sync. Hertz (Hz) – A measure of frequency in cycles per second. High Impedance – (Hi Z or High Z) – In video, when the signal is not terminated locally and is going to another destination where it will be terminated.
Appendix A • Part Numbers, Glossary and Troubleshooting Matrix Switcher – In audio/video, a means of selecting an input source and connecting it to one or more outputs. Like a Switcher, but with multiple inputs and multiple outputs. M (Mega) – An abbreviation for one million. A megabyte is actually 1024K, or roughly a million bytes (1,048,076 to be exact [1024 x 1024]). MHz (as in 8 MHz) – An abbreviation for megahertz. This is a unit of measurement and refers to a million cycles per second.
Appendix A • Part Numbers, Glossary and Troubleshooting Power (Electrical) – The dissipation of heat by passing a current through a resistance. Measured in Watts (W), it is expressed by Ohm’s law from the two variables: Voltage (E) and Current (I). i.e. P = I 2xR, or, P = E2/R or P = ExI Progressive Scan – See non-interlaced. Resolution – The density of lines or dots that make up an image. Resolution determines the detail and quality in the image.
Appendix A • Part Numbers, Glossary and Troubleshooting Still – In video, the term “still” is used as opposed to “motion” because there can be a difference in the way these two types of video are processed for the best viewing results, especially when the video is line-doubled or line-quadrupled. Still video includes text and slide presentations, while motion would include movies and TV programs. See Motion. Strike – In the Audio/Video business, this is the tearing down of an installation or show.
Appendix A • Part Numbers, Glossary and Troubleshooting _______ A-11 Extron • Matrix 200 • User’s Manual
Appendix A • Part Numbers, Glossary and Troubleshooting Troubleshooting The following Q & A section, “Frequently Asked Questions”, is composed of questions and answers to typical problems and situations encountered by users of the Matrix 200. We hope that the information will be both helpful and informative during your implementation of the Matrix 200. Frequently Asked Questions Q: I have connected up the Matrix 200 and programmed it, but it is not passing all the signals.
Appendix A • Part Numbers, Glossary and Troubleshooting Q: Does the Matrix 200 provide genlock capability with RGB/video? A: The Matrix 200 does provide genlock capability with video. This feature is not applicable to RGB video since genlock is a composite video characteristic. Q: My Matrix 200 is not responding to RS-232 commands. What should I check? A: • Make sure you’re allowing enough time between commands.
Appendix A • Part Numbers, Glossary and Troubleshooting Q: Can I use the Matrix 100 front panel on the Matrix 200? A: Yes, but you will lose control of certain functions, such as plane breakaway, with the Matrix 100 front panel (QuickSwitch). However, you can still do basic input to output ties. When using a multiple matrix system, we recommend that a front panel be used with the Matrix 200. Should there be any problems, this will simplify the troubleshooting process considerably.
Appendix A • Part Numbers, Glossary and Troubleshooting _______ A-15 Extron • Matrix 200 • User’s Manual
Matrix 200 User’s Manual B Appendix B Programming Guide Control Ports Host/Matrix Data Format Command Structure Communications Protocol Using Commands
Appendix B • Programming Guide Control Ports The picture below shows the connectors for two Control Ports: Remote FPC and RS 232 Comm. S REDUNDANT POWER ! FUSE: 250V ~0.8A TT AC POWER INPUT 100-240V ~0.
Appendix B • Programming Guide 1. The Simple Instruction Set can be any ASCII character that is recognized by the Matrix 200 as a command. Simple commands could come from a terminal or any other controlling device. After the Matrix 200 receives the command, it will execute it and send an appropriate response to the controlling device. 2. The Advanced Instruction Set consists of more complex instruction strings. Advanced instructions are used when a complete command cannot be defined with one character.
Appendix B • Programming Guide Simple Instruction Set A simple command consists of a single character typed on a keyboard and preceded by ESC (1B hex). It is not necessary to press the “enter” key. A table of the simple commands is on the following page. Related Terms The following terms may be helpful in understanding information in the tables and examples that follow. Line Feed/Carriage Return: General – On most keyboards, pressing “enter” creates a line feed (lf) and a carriage return (cr).
Appendix B • Programming Guide Simple Instruction List The following table shows the simple command set with responses for the Matrix 200. The Response column shows what will be seen on the host’s screen. Appropriate response messages are also displayed on the Matrix 200’s LCD screen. The Hex column gives hexadecimal equivalents for cases where the codes will be generated by another source. All simple commands are preceded by ESC (1B hex). Version 1.
Appendix B • Programming Guide Advanced Instruction Set Command Structure All advanced commands follow the same pattern: 1. Command Specifier 2. Data (if any) 3. Checksum 4. End of Transmission Mark Command Specifier The command specifier consists of one byte for short commands or two bytes for long commands. The first byte is the Command Code (CMD) in the range 20 hex thru 7F hex. The second byte of long commands is called the Subcommand (SCMD) and is treated as data (ranging from 80 hex to FF hex).
Appendix B • Programming Guide Host-Initiated Communications Protocol Most of the information transfer activity is initiated by a Host system through a control port. For example, the Host can send Commands to the Matrix to request data from or send data to the Matrix 200. After receiving a command, the Matrix 200 executes it and sends back a Response to the Host. The Response includes an error code together with any requested data. The Response includes the original Command code.
Appendix B • Programming Guide Command List (Host-to-Matrix) 2 Not supported by Matrix 200, version 1.0 software. SCMD = Subcommand, a second byte that further defines the Command. See page B-5.
Appendix B • Programming Guide Using Commands The remainder of this appendix explains the operation of each command including data byte breakdown, responses and possible error codes. CMD0 (30h) — Send Status The Host asks the Matrix for its status settings. Format: CMD0, SCMD, Cks1, Cks2, EOT Where: SCMD = 080h 81h-8Fh send status bytes reserved Response: SCMD = 080h — send status bytes Format: 30h, 80h, Erc, StsB1, StsB2, StsB3, Cks1, Cks2, EOT Status Bytes (StsB1-3) are described below.
Appendix B • Programming Guide CMD1 (31h) — Report ID The Host asks for the configuration of the Matrix. This includes information such as: what type of switching modules are installed in which planes, etc. Format: CMD1, SCMD, Cks1, Cks2, EOT Where: SCMD = 80h 81h 82h 83h Reserved Reserved Report technology (See example) Reserved Example: SCMD = 82h Report Technology (See example at bottom of page.) Response: CMD1, 82h, Erc, *{(BdAd, #Inp, #Out, Tech, CR), ...
Appendix B • Programming Guide CMD3 (33h) — Turn Power Off The Host tells the Matrix to turn power off. The action is independent of other active control ports, e.g., Front Panel Controller. Format: CMD3, Cks1, Cks2, EOT Example: 33h, 80h, B3h, 04h Response: CMD3, Erc, Cks1, Cks2, EOT CMD4 (34h) — Send Software Version The Host asks the Matrix to send the current software version. The format is “x.y”.
Appendix B • Programming Guide Set (Tie) Connection Commands The Set Connection Commands that follow are the programming equivalent of the Tie Menus used from the FPC. Tie menus are described in Chapter 4. Planes and Plane Maps 3 4 BLUE SYNC/ VIDEO SYNC/ VIDEO c O U T P U T S O U T P U T S LISTED 1T23 ITE O U T P U T S 1 REDUNDANT POWER 1 2 4 1 2 4 ! 2 FUSE: 250V ~0.8A TT 3 AC POWER INPUT 100-240V ~0.
Appendix B • Programming Guide CMD5 (35h) — Set (Tie) Connection The Host tells the Matrix to connect the specified output (Out#) to the specified input (Inp#) in those planes specified by PlnMap0. (Plane maps are explained earlier in this section.) Format: CMD5, PlnMap1, PlnMap0, Out#, Inp#, Cks1, Cks2, EOT Example: 35h, 80h, 87h, 83h, 85h, Cks1, Cks2, 04h This example will connect output #3 to input #5 in RGB planes. PlnMap1 is not used at this time, therefore it will be 80h.
Appendix B • Programming Guide CMD8 (38h) — Download Status and Presets The Host asks the Matrix 200 to send the contents of the specified preset. Same variables are used as in CMD7. (Stored presets are numbered 1 thru 20, however, the current Matrix setup can be accessed as preset “0”.) Format: CMD8, Preset, Cks1, Cks2, EOT Response: CMD8, Erc, {(BdAd, Inp1, Inp2, ...Inpn, CR), ...
Appendix B • Programming Guide CMD12 (3Ch) — Mute Selected Outputs The Host tells the Matrix to mute specific planes within selected outputs. Format: CMD12, Mute1, Mute2, ... Muten, Cks1, Cks2, EOT Where: MuteX specifies planes to be muted for the output corresponding to the mute byte number. This uses the same format as PlnMap shown below. PlnMap0 to access the RGBS Switcher (planes 1, 2, 3 & 4) Plane # Plane Use HRAM = High Resolution Analog Module.
Appendix B • Programming Guide See decimal/binary/hex conversion table on page B-2. 2. Maximum number of steps in any sequence is 31. 3. Total number of steps for all sequences is 128. 4. It is recommended that all sequences be listed and named, for future reference. (e. g. Sequence #4 is XYZ Presentation; Sequence #1 is Product Demo; etc.
Appendix B • Programming Guide CMD18 (42h) — Set Program The Host tells the Matrix to start a specific event (preset or sequence) at a specific time, on a specific date. Matrix power will be turned On at that time. This is called a program. Only one program can exist in a Matrix 200 at one time. Format: CMD18, PrgEvnt, Num, Yr, Mo, Dy, Hr, Min, Sec, Cks1, Cks2, EOT Where: PrgEvnt the program event which will be started (triggered).
Appendix B • Programming Guide CMD23 (47h) — Request the Clock Information The Host asks the Matrix for its clock settings. See decimal/binary/hex conversion table on page B-2. Format: CMD23, Cks1, Cks2, EOT Example: 47h, 80h, C7h, 04h Response: CMD23, Erc, Yr, Mo, Day, Hr, Min, Sec, Cks1, Cks2, EOT Possible Ercs: C4 = Clock not set CMD24 (48h) — Turn Executive Mode On/Off The Host requests the Matrix to turn Executive Mode on/off.
Appendix B • Programming Guide CMD27 (4Bh) — Set Baud Rate Sets the baud rate for the host controller. Front panel baud rate cannot be set using this command. When the port is changing its own baud rate, this becomes active only after the response has been sent back.
Appendix B • Programming Guide CMD31 (4Fh) — Set Slave Coordinates Reserved for future use. Format: CMD31, CDOut, CDIn, Cks1, Cks2, EOT Example: CDOut, CDIn = 89h, 91h. Where: CDOut and CDIn specify where the slave matrix is mapped into the compound matrix space, (see also CMD1). If the Matrix 200 is in a slave mode, its output #1 functions as output #9 of the compound matrix while input #1 becomes input #17 (decimal).
Appendix B • Programming Guide CMD35 (53h) — Operate Security The Host sends information to modify the status of the security system. The command has the following subcommands: Where: SCMD = 80h Request system access (format 1) 81h Terminate session and lock system (format 2) 82-FFh reserved Format 1: CMD35, 80h, UPas1, UPas2, Cks1, Cks2, EOT Where: UPas1 and UPas2 are user-entered security codes that must match internally stored MPas1 and MPas2 to gain access to the system.
Appendix B • Programming Guide Configure Audio Inputs Case 1 — SCMD = 85h, configure input section of plane #5 (standard audio board address) . dB range: hex dB FFh +31 FEh +30 etc. E0h 0dB DFh -1 DEh -2 etc. C1h -31 C0h -32 etc. 81h -95 See conversion table on page B-2. Format: 54h, 85h, {(InLeftGain, InRightGain, InMisc, CR), ...}Cks1, Cks2, EOT Where: InLeftGain, bits 6 - 0 are the seven most significant bits of the left channel gain of the input circuit.
Appendix B • Programming Guide CMD37 (55h) — Request Audio Parameters The Host asks the Matrix 200 to send the configuration for the audio board. Format: CMD37, SCMD, Cks1, Cks2, EOT Where: SCMD contains the board address. Same as CMD36. Example 1: 55h, 85h, Cks1, Cks2, 04h Requests input audio information for audio plane (board #5). Example 2: 55h, 95h, Cks1, Cks2, 04h Requests output audio information for audio plane (board #5). Response: CMD37, 85, Erc, {(InLeft Gain, InRightGain, InMisc, CR)...
Appendix B • Programming Guide Reports (Matrix-to-Host) Report0 (70h) — Status This report is broadcast when a change in internal status is detected.