
User`s manual

Extron • Matrix 200 • User’s Manual
Chapter 2 • Hardware Installation
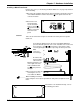
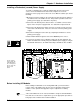
Red
Black
Lock Washers
Tools for Installation:
3/16" flat screwdriver
#4 Phillips screwdriver
#6 Phillips screwdriver
Wire cutters
Audio Option Kit:
Qty Description
6 Internal Tooth Lock
Washers
1 Audio Module with:
1 3" Ribbon Cable
6 1-5/8 Screws
16 Phoenix Connectors
Adding an Audio Module
_______ Do not use this procedure unless your Matrix 200 is up to date. See previous
page.
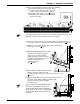
1. Remove the Matrix top cover (procedure on page 2-2).
2. Locate the gray ribbon cables that connect the Main Controller board to the
existing I/O modules (Red, Green, Blue and Sync/Composite Video). Note the
orientation of the red stripe on each ribbon cable and unplug both ends. If
necessary, cut the ties that bind them together. It is not necessary to mark the
cable connections; this will be covered later. Place the ribbon cables
aside.
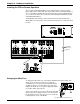
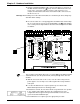
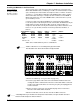
3. On the rear panel, remove the two screws (See below)
that hold the right end of the blank cover. (Tabs hold the
left end.) Remove the cover and put the screws back in
the same holes. This reveals two long, parallel
access slots. These will
accommodate the upper
and lower sections of the
Audio Module.
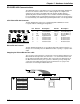
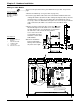
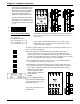
4.Check the installation
parts list and identify
them by their location in
the picture to the right.
2-10