INSTALLATION TIPS & USER GUIDE CENTRAL VACUUM POWER UNIT ! FOR RESIDENTIAL USE ONLY ! AB0001 MODELS VX3000C, VX6000C AND VX12000C VISIT WWW.BROAN.CA FOR THE CENTRAL VACUUM SYSTEM INSTALLATION INSTRUCTIONS BROAN-NUTONE CANADA INC.; MISSISSAUGA, ONTARIO REGISTER YOUR WWW.BROAN.CA 1-888-882-7626 PRODUCT ONLINE AT: WWW.BROAN.CA 30042323 rev.
page 2 IMPORTANT SAFETY INSTRUCTIONS SAVE THESE INSTRUCTIONS READ ALL INSTRUCTIONS BEFORE USING THIS APPLIANCE WHEN USING AN ELECTRICAL APPLIANCE, BASIC PRECAUTIONS SHOULD ALWAYS BE FOLLOWED, INCLUDING THE FOLLOWING: WARNING TO ! REDUCE THE RISK OF FIRE, ELECTRIC SHOCK OR INJURY: 1. Do not use on wet surfaces or outdoors. 10. Do not unplug the unit by pulling on cord. To unplug, grasp the plug, not the cord. 11. Store your cleaner indoors in a clean, dry area. 12.
page 3 TABLE OF CONTENTS GENERAL INFORMATION . . . . . . . . . . . . . . . . . . . . . . . . . . . . . . . . . . . . . . . . . . . . . . . . . . . . . . . . . . . . . . . . . . . . . . . . . . . . . . 4 Tool Listing . . . . . . . . . . . . . . . . . . . . . . . . . . . . . . . . . . . . . . . . . . . . . . . . . . . . . . . . . . . . . . . . . . . . . . . . . . . . . . . . . . . . . . . 4 Working with Plastic Tubing . . . . . . . . . . . . . . . . . . . . . . . . . . . . . . . . . . . . . . . . . . . . . .
page 4 GENERAL INFORMATION WALL INLET INSTALLATION TOOL LISTING MAKING THE WALL INLET CUTOUT Depending on the installation, the use of the following tools may be required. The power tools are recommended to make the installation proceed quickly. A mask should be worn when cutting ducting and gloves when using glue. The wall inlet should be located 18” on-center from the floor and directly in line with the attic or basement inlet tubing hole previously drilled in the wall plate or header.
page 5 POWER UNIT INSTALLATION 1. Locate power unit within six feet (1.82 m) of a grounded electrical outlet. Broan VX3000C and VX6000C power units require a 120 V, dedicated 15-amp branch-circuit with a NEMA 5-15R receptacle or a dedicated 20-amp branch circuit with a NEMA 5-20R receptacle. Broan VX12000C power unit requires a 240 VAC, dedicated 20-amp branch circuit with a NEMA 6-20R receptacle. ! WARNING Do not install outdoors.
page 6 POWER UNIT INSTALLATION (CONT’D) INTERNAL WIRING DIAGRAMS FITTING MAIN LINE TO POWER UNIT • VX3000C • VX6000C Your power unit is capable of being connected to the intake vacuum trunk line from either side. Select the intake connection to be used. Some installations may require the connection into both intakes. The power unit has 4 intake connections, which 2 of them are factory sealed.
page 7 GROUNDING INSTRUCTIONS WIRING ! WARNING Improper connection of the equipment-grounding conductor can result in a risk of electric shock. Check with a qualified electrician or service person if you are in doubt as to whether the outlet is properly grounded. Do not modify the plug provided with the appliance – if it will not fit the outlet, have a proper outlet installed by a qualified electrician. Grounding Instructions – This appliance must be grounded.
page 8 FOR MODELS: VXKIT300A, VXKIT600E AND VXKIT1200E INSTALLING HOSE HANGER CONNECTING HOSE (CONT’D) If not already done, install the hose hanger by following these 3 steps. DUAL VOLTAGE HOSE In addition to connecting into wall inlet (A), dual voltage hose must also be connected to a standard electrical outlet (B). If your new hose connection is not compatible with the telescopic handle of your unit, please call 1-888-882-7626. IMPORTANT: Do not return the hose to the store.
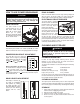
page 9 FOR MODELS: VXKIT600E AND VXKIT1200E HOW TO ASSEMBLE POWER BRUSH/WAND/HANDLE 1. 2. 3. 4. Read important safety instructions before installing power brush. Ensure hose is disconnected from power supply before installing power brush. Push wand into power brush neck so that the lock button snaps in place. Connect hose handle into wand quick connector and ensure that the prongs are aligned with the receptacle holes. Push until lock button snaps in place.
page 10 HOW TO USE POWER BRUSH/WAND CAUTION Always pick up hard or sharp objects by hand before using your power brush. Items such as pins, hairpins, tacks, crayons, etc., may damage the brush roll or may break the belt. WAND RELEASE The power brush is not recommended for use on bare floors. Wand release pedal (A) on power brush allows you to quickly disconnect wand and switch to combination floor/rug tool for use on bare floors.
page 11 MAINTAINING THE POWER BRUSH HOW TO CHANGE BRUSH ROLL ! WARNING Disconnect electrical supply before servicing or cleaning the unit. Failure to do so can result in electrical shock or personal injury from cleaner suddenly starting. Replace brush roll when brush roll brissles are worn to the base support bars level. HOW TO CHANGE BELT ! WARNING Motor shaft can become hot during normal use. To prevent burns, avoid touching the motor shaft when replacing the drive belt. FIG. 7 1. 1.
page 12 FOR ALL MODELS VACUUM POWER CONTROL EMPTYING THE DEBRIS PAIL The wand end of the deluxe hoses is equipped with a control ring to regulate suction. The control ring covers a “bleeder” hole. Open the hole to reduce the suction for cleaning draperies, small rugs, and other light fabrics. Some very thick, plush carpets with high density yarns also require reduced suction to make the nozzle easier to push.
page 13 EMPTYING THE DEBRIS PAIL (CONT’D) CLEANING THE INTERNAL FILTER When emptying the debris pail, it is a good idea to also clear any dust and dirt that may have accumulated on the internal filter media. To do this, simply open the direct door, reach in and tap the top of the internal filter (Fig. 13). This will release any loose debris into the pail. You may empty the pail again at this point but it is not necessary as any amounts of dirt and dust will be minimal. Close the door. FIG.
page 14 TROUBLESHOOTING GUIDE Read before calling Service Center. PROBLEMS POSSIBLE CAUSES POSSIBLE REMEDY 1.Loss or decrease of • Debris pail is completely full. • Empty debris pail as described on page 12. vacuum occurs. • Obstruction in the hose. A blockage in the hose • Insert handle end of hose into utility valve at can be determined by inserting the hose into any power unit. Turn unit on.
page 15 SERVICE PARTS 9 8 4 2 5 REPLACEMENT PARTS 6 7 3 AL0001 1 KEY PART NO. NO. 10941189 1 10941191 2 10941192 3 10941199 10941232 4 10941233 10941195 10941235 5 10941236 10941231 30100528 6 30100527 30010272 7 30010270 10941217 8 10941218 10941211 9 10941213 AND REPAIRS In order to ensure your unit remains in good working condition, you must use Broan-NuTone genuine replacement parts only.
page 16 WARRANTY BROAN MODELS VX3000C, VX6000C AND VX12000C BROAN-NUTONE CANADA INC. CENTRAL VACUUM POWER UNIT LIMITED LIFETIME WARRANTY Broan-NuTone Canada warrants to the original consumer purchaser that its central vacuum power unit will be free from defects in materials and workmanship for as long as you own your home in which it was originally installed with the exception of the motor and electronic components which will be warranted for five (5) years.