
Technical data


140 Web Tools Administrator’s Guide
53-1002934-02
Zone configuration and zoning database management
9
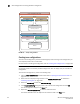
2. You can view the current zone configuration name (if one is enabled) in the lower portion of the
Switch Events and Switch Information window.
If no zone configuration is enabled, the field displays “No configuration in effect”.
Viewing detailed information about the enabled
zone configuration
To view detailed information about the enabled zone configuration, perform the following steps.
1. Open the Zone Administration window, as described on “Opening the Zone Admin window” on
page 124.
The zone configuration in effect at the time you launched the Zone Administration window is
identified in the lower-right corner. It is also updated if you manually refresh the Zone
Administration window contents by clicking the refresh icon at the lower-right corner of the
Zone Administration window, or when you enable a configuration through the Zone
Administration window.
CAUTION
Clicking the refresh icon overwrites all local unsaved zoning changes. If anyone has made any
changes to the zones outside of your Zone Admin session, those changes are applied.
2. To identify the most recently effective zone configuration without saving or applying any
changes you made in the Zone Administration window, select Print > Print Effective Zone
Configuration in the Zone Administration window.
NOTE
If no zone is enabled, a message displays, indicating that there is no active zoning
configuration on the switch.
3. Optional: Click Print located in the Print Effective Zone Configuration dialog box to print the
enabled zone configuration details.
NOTE
You must use Brocade Network Advisor to print the zone database summary configurations,
display zone configuration summaries and create configuration analysis reports.
Adding a WWN to multiple aliases and zones
This procedure enables you to configure a WWN as a member in a zone configuration prior to
adding that device to the fabric. Specifically, it is useful if you want to add a WWN to all or most
zoning entities. The added WWN does not need to currently exist in the fabric.
To add a WWN, perform the following steps.
1. Open the Zone Administration window as described in “Opening the Zone Admin window” on
page 124.
2. Select Edit > Add WWN.
The Add WWN dialog box displays.