
Technical data


166 Web Tools Administrator’s Guide
53-1002934-02
Port configuration
12
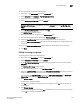
9. Click Failback Enable.
A confirmation dialog box displays.
10. Click Yes to enable failback to all the ports in the port group or click No if you do not want to
enable failback.
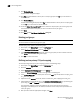
11. Click Failback Disable.
A confirmation dialog box displays. Click Yes to disable failback to all the ports in the port group
or click No if you do not want to disable failback.
12. Under the Select Members(N-Port)* section, select the required ports you want to group and
clear the check boxes for the ports you want to remove from the port group.
13. Click Save.
14. Click Close on the Port Group Configuration dialog box.
Deleting port groups
NOTE
You cannot delete the default port group 0 (pg0).
To delete port groups, perform the following steps.
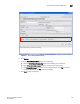
1. Click a port in the Switch View to open the Port Admin tab.
2. Select Configure N-Port Groups from the Actions list.
3. In the Port Group Configuration dialog box, select the group that you want to delete and then
click Delete. A confirmation dialog box displays.
4. Click Yes to confirm the action.
Defining custom primary F-N port mapping
To manually change primary F-N port mappings, perform the following steps.
1. Click a port in the Switch View to open the Port Admin tab.
2. Click the FC Ports tab.
3. Select Configure F-N Port Mappings from the Actions list.
4. Select the Primary Mappings subtab on the right side of the dialog box.
5. In the Primary Mappings area, select ports and use the Add (right arrow) button to map F_Ports
or U_Ports to N_Ports.
6. Optional: Use the Remove (left arrow) button to delete an F_Port mapping from an N_Port.
7. Optional: Define a secondary N_Port in the Secondary Failover Mappings area, by selecting the
ports using the Add and Remove buttons to set up the secondary mappings.
The secondary mappings must be to a different port in the same group as the primary
mapping. If a secondary port is not defined, the failover moves to any online ports within the
same port group.
8. After you have made the appropriate changes, click Save.