
Technical data


246 Web Tools Administrator’s Guide
53-1002934-02
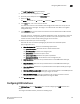
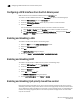
Configuring FCoE login groups
18
4. Specify a VLAN ID.
The format is VLAN<bridge number><ID>. In this Fabric OS release, no bridge instances are
supported, so the bridge number is always 0, and the value under Bridge is statically defined
as VLAN0. The <ID> is an integer from 1 to 3583, that must be entered in the ID field.
5. Select the Native check box to add all the converged interfaces added in the present operation
as native to a VLAN.
NOTE
If you want to modify any converged interface as either native or non-native, you must first
remove that particular member from that VLAN and then re-add it to the same VLAN.
6. Under the Selection List, click the plus sign (+) next to the Interface and LAG folders, and select
individual interfaces and LAGs you want to associate with the VLAN ID.
7. Cl ick Add to move the interfaces or LAGs to the Selected List.
Note the reminder that interfaces must be configured as L2, and that the interfaces or LAGs
must be in Trunk mode to be associated with multiple VLANs, Access mode interfaces can be
associated with only one VLAN, and the Converged mode interface can be Native in one VLAN
and it could be non-native type in more than one VLAN.
8. Click OK.
9. Repeat the procedure for additional VLANs.
10. To edit the VLAN, select the detail from the table in the VLAN tab and click Edit.
NOTE
The FCoE check box is selected by default for FCoE VLAN. The FCoE check box is read-only, you
must use the CLI to make any changes to the FCoE VLAN.
11. Click OK to enable FCoE. Clear the check box to disable FCoE.
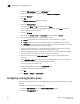
Configuring FCoE login groups
FCoE login groups control which FCoE devices are allowed to log in to a switch or fabric.
The FCoE Ports window is used for configuring the FCoE ports on a switch.
To configure an FCoE login group, perform the following steps.
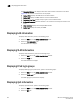
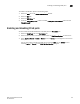
1. Select the DCB tab on the Switch Administration window.
2. Select the FCoE Login Group tab.
3. Click New.
The New Login Group dialog box displays.
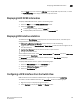
4. Enter a name for the login group in the Login Group Name field.
5. Select the switch WWN.
The choices are: